Event Reports
4x4 Riverland Challenge 2009
4x4 Mud Dust & Music 09
4x4 Riverland Challenge 08
Victoria 4WD Trip June 09
New Articles
AWD and Odd Sized Tyres
Outback Low Range Conversion
Windscreen, Spray then Wipe
Storage and Sleeping System
Project83
Intro - the idea and plan
4WD Conversion
Fender cutting
Radius Rod Mod
CD Player install EA81
Concept Subaru's
Bobbed Subaru Brumby
2005 Subaru Brumby/Brat
2door STi Convertible
Forester Pickup Truck
EA82 hatchback
Other Photochops
Subaru related Links
Forums
Ultimate Subaru
Message Board
Info Sites
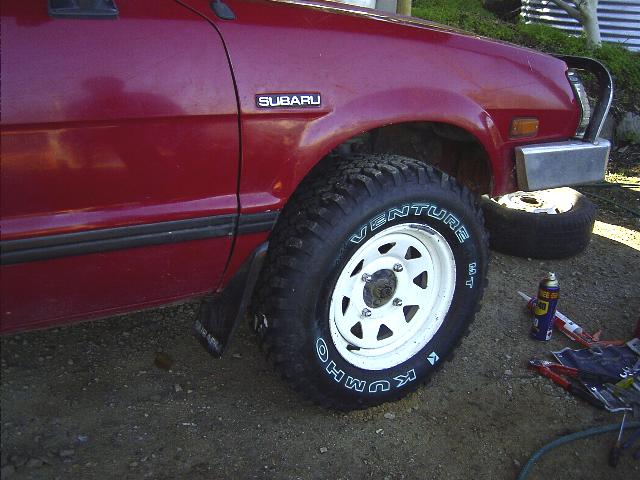
I used to have 22.5" (185/60R14's) But these were hopeless with offroading. And didn't give the car anymore ground clearance then a stock, non-lifted, rig. I looked for a while and almost gave up on the idea of A/T's or M/T's for my 14" Sunraysia wheels. But then I found I could get Kuhmo 27x8.5/14's pretty cheap. Be for I got them I thought I wouldn't have to do much to fit them, it looked almost like a straight fit. Once I put one on the Brumby I found I would have to do a fair bit more then I first thought. So here's what I had to do to fit 27" wheels on a 2" lifted Brat, or Brumby with replacement suspension if that makes a difference (?)
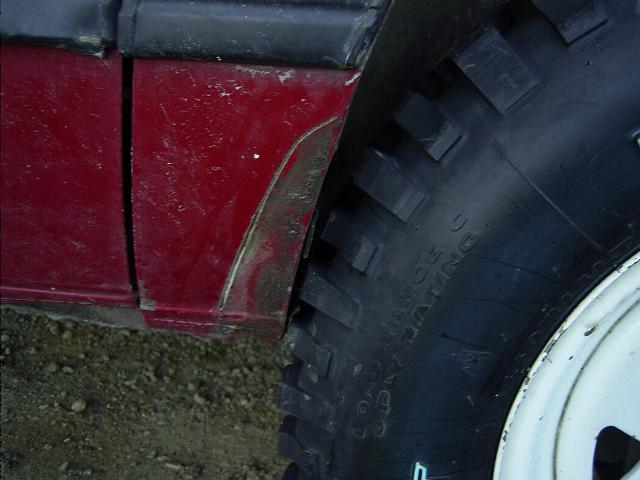 |
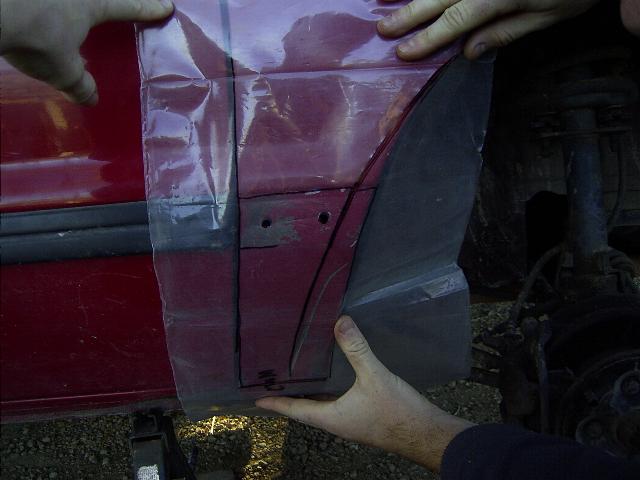
First the fenders needed trimming. I've seen plenty of peoples rigs that look hacked up to me. I wanted to keep a clean, nice look. This is on the front, I'll talk about the rear later. I wanted to keep the mud flaps too. So I started with a idea of angle grinding the fender back, then folding then putting the mud flaps back on. As I normally do, I asked my brother and my dad what they reckon about my idea. My dad just came out with this brilliant idea. Cut the fender with a angle grinder, leaving it attached at the top of the cut (only leaving the lip attached) and then fold it back behind the rest of the fender with some silicone. I started the job with a clear sheet of plastic, and a pen. I drew the shape I wanted the fender to be. Then cut the plastic, and traced it onto the fender with the pen.
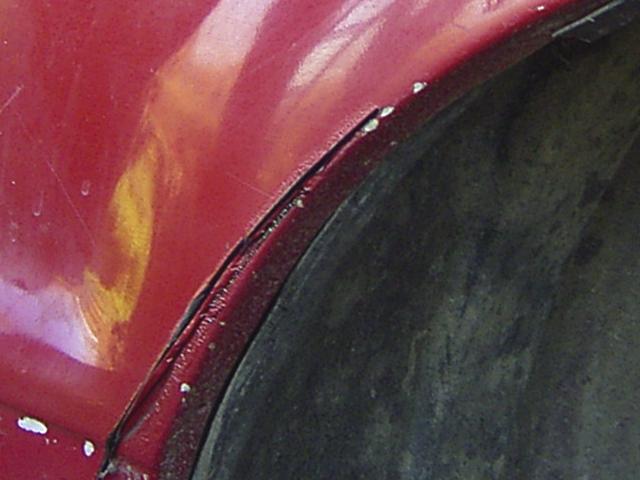
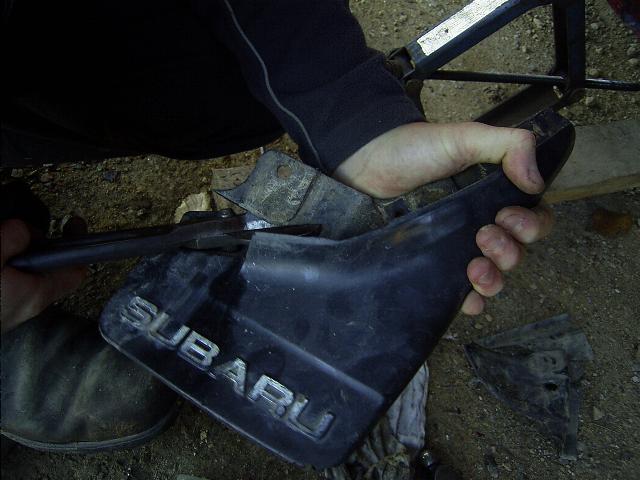
Done the cut. Folded it back. pop riveted it onto the other part of the fender. Cut the black plastic trim down to size, then put it back on. Then redrilled the mud flap hole in the fender as they were to high after that. I also had to cut the flaps up a bit as they didn't quite fit. Once the process on one side was done, it was the other sides turn. I used the plastic sheet, flipped it over and drew the same line on the other side. Cut, drill, bang, cut, and done!
The front of the fenders were already trimming when I got the Brumby ute. So although they don't look quite right, because of the angle, they don't rub at all.
I started the cut on the fenders higher then I needed to, but I thought that the way the original fender was made wasn't a smooth circular shape and would look better if it was.
On full lock I found the tires would rub the fire wall, if that's what you call it. The bit behind the fender. I got out the 5lbs hammer and whacked it in about half an inch. It only rubs on full lock while offroading sometimes now. And I didn't notice a difference inside the car.
So I started from when it takes a slightly sharp bend. As you can see, it worked quite fine and even Subaru owners don't see that I have cut the fenders.
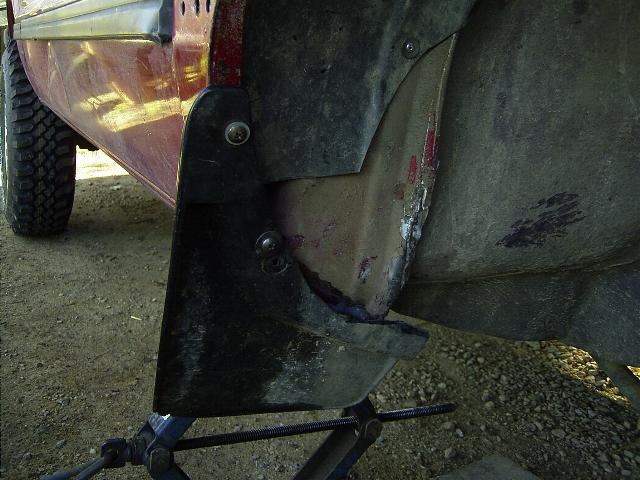 |
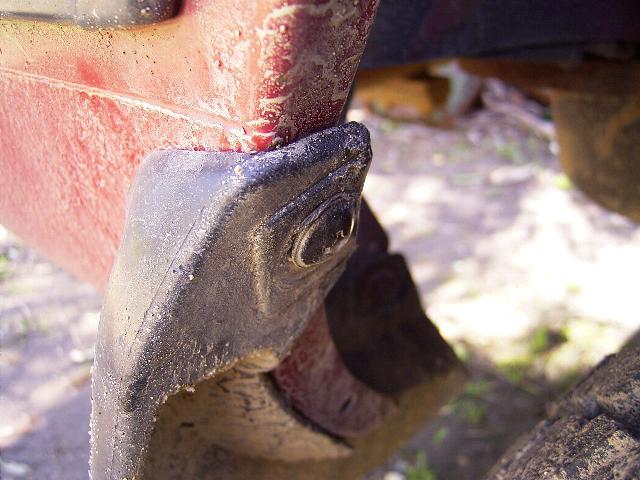
On the rear I didn't have to cut the fenders. But I did have to trim the mud flaps, and replace the bolts with rounded head screws. Although it rubs when offroading sometimes, and with 200KG load in the tray, or 400KG load in the try with the air suspension at 100PSI, it's not bad and doesn't appear to be doing any damage to the tyres.
So. All this took longer then your hacksaw would. But it turns out to be a clean image for the car. And I think it was worth it.
Text and pictures on this site Copyright © 2005 Thomas Paine. All rights reserved. All copyrights are retained by original authors. If you wish to use a picture or quote the text off this site to your own site or to a online forum please ask for permission first. If you use anything off this site that may lead to damage of my reputation I will have to take the matter further. So do not piss me off!
DISCLAIMER: Thomas Paine, www.OffroadingSubarus.com, does not warrant or make any representation regarding the use, or results of use of the information contained on and within this website as to its correctness, accuracy, currency or otherwise. Thomas Paine, www.OffroadingSubarus.com, expressly disclaim all liability or responsibility to any person using the information or advice contained on and within this website.

