Event Reports
4x4 Riverland Challenge 2009
4x4 Mud Dust & Music 09
4x4 Riverland Challenge 08
Victoria 4WD Trip June 09
New Articles
AWD and Odd Sized Tyres
Outback Low Range Conversion
Windscreen, Spray then Wipe
Storage and Sleeping System
Project83
Intro - the idea and plan
4WD Conversion
Fender cutting
Radius Rod Mod
CD Player install EA81
Concept Subaru's
Bobbed Subaru Brumby
2005 Subaru Brumby/Brat
2door STi Convertible
Forester Pickup Truck
EA82 hatchback
Other Photochops
Subaru related Links
Forums
Ultimate Subaru
Message Board
Info Sites
Old Subaru's have always had a problem with what wheels you can fit to them. Because most cars use 4x100 Stud pattern and most 4x4's use 6x139.7 Stud pattern it makes fitting any good wheels to the subie's 4x140 Stud pattern difficult. Unless you have plenty of money to burn on some custom mags.
But... There's a solution to the problem. It's so simple it's just crazy that only a few old gen Subaru owners have done it. Basically you can call it "Drilling the Hubs".
See, Because Subaru's use the 140mm pattern, which is how far apart the two opposite studs are. And most Jap made 4x4's use the 139.7mm (5.5") it means that two of the studs line up almost perfectly with the subie ones.
Here is a basic step by step guide to Drilling your hubs and making them the better 6x139.7mm pattern. Enjoy.
Drilling the hubs
First off you need the following parts.
8 more Subaru studs. With the 1.25x12M thread.
At least 1 Six Stud wheel for marking new holes.
14mm drill bit. Or even better, a 13.8, if there is such a size.
Also a smaller 5mm drill bit to start the hole is good.
Preferably a Drill press, but a normal power drill can work.
Plenty of oil to lubricate the drill bit.
Angle grinder with grinding disk.
A big hammer.
And preferably a chunk of hard wood.
And a roofing punch.
And of cause, all the parts to remove the hubs from the car.
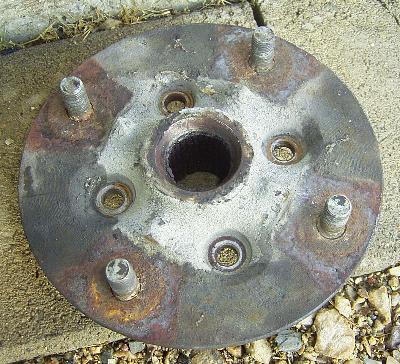
Click on the images to see ENLARGED view.
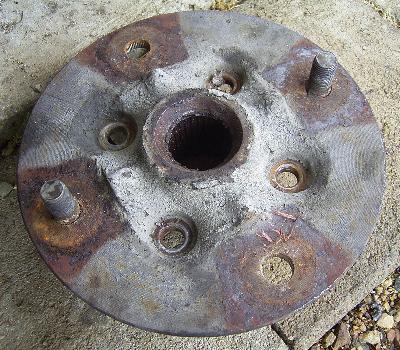
You will start with something like this. It is a front hub from a 82' EA81 Wagon. Still in it's 4x140 glory.
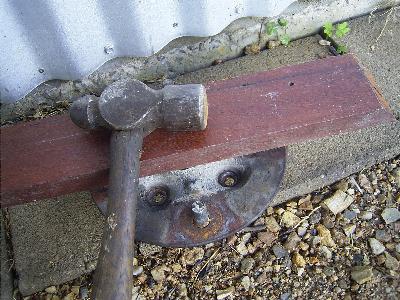
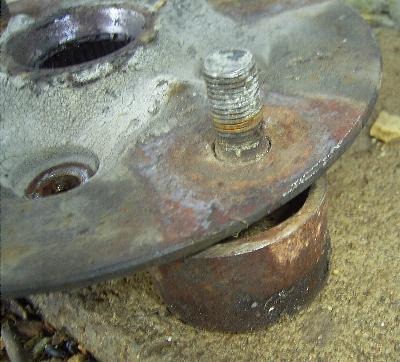
Grab yourself a hammer and the chunk of wood. Place something under the hub next to the stud you want to remove, but not under the stud.
Use the chunk of wood between the stud and the hammer to stop the hammer burring over the thread.
Hit it with just about all the force you can, and the hammer will bounce off with no effect. Continue to hit it till it puts out. If it ever does.
Now you need the six stud wheel. With the two remaining studs in your Subaru's hub bolt it to the 6 stud wheel like you would if it was on a car.
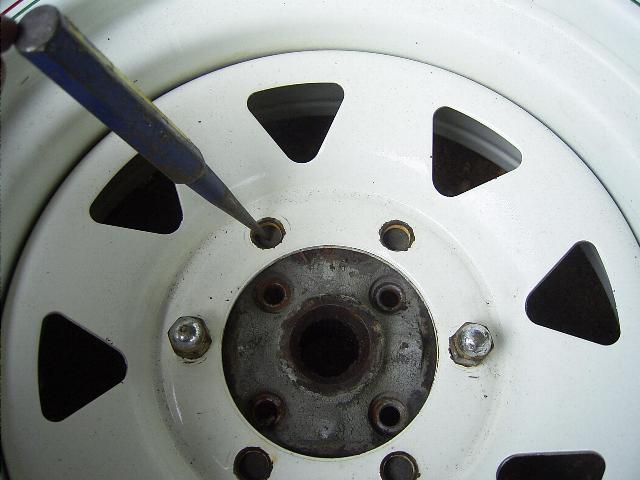
Now you should be able to see exactly where you need the new holes. Should look something like this
Line the punch up as close as you can get it to the center of the hole in the wheel, Tip: try looking at it from other angles to see if it really is centered.
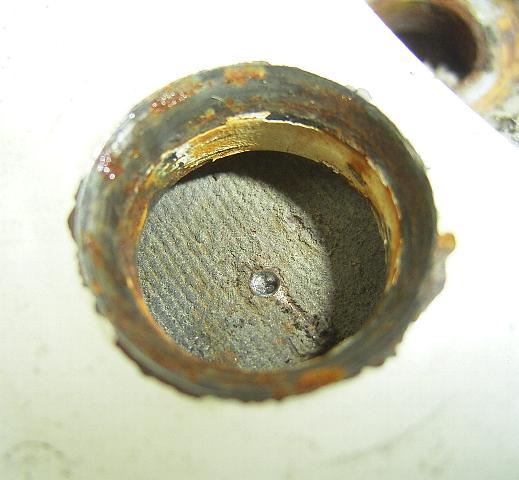
Hit the punch with a hammer, it may bounce and put a smaller mark not in the center, but you should get a nice mark right in the center of the hole for the 5mm drill bit to follow. This eliminates drifting the drill bit may do while trying to drill the holes.
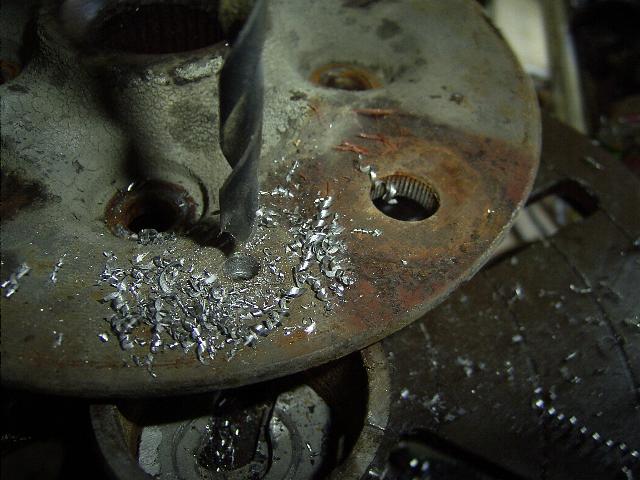
When drilling the holes, if your using a power drill, make sure the drill is completely vertical, otherwise your studs will stick out all over the place and you'll never get the wheel on. If your using a drill press, you should have no problems at all.
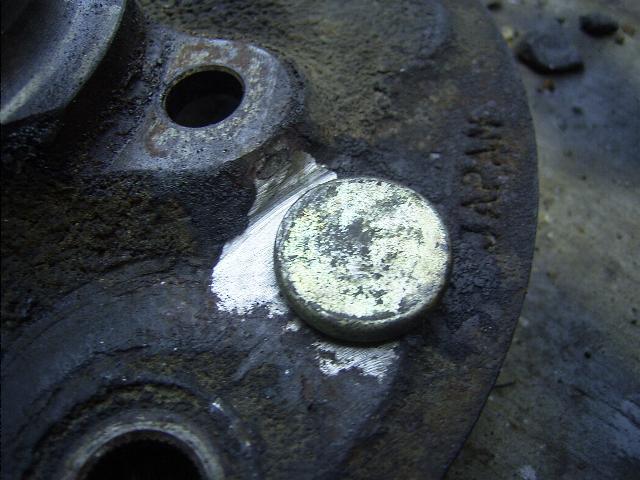
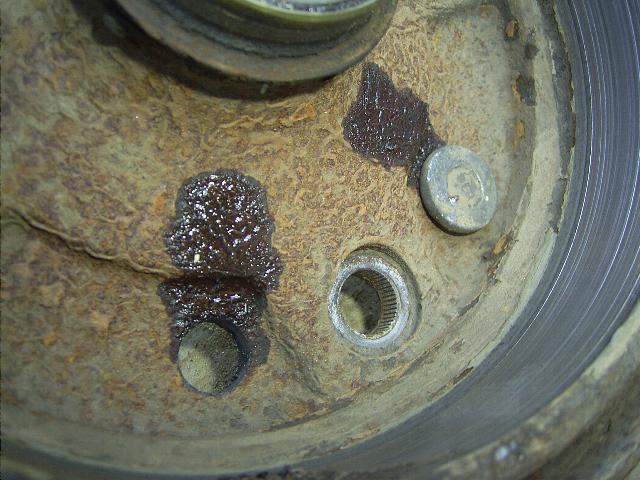
Now that you have the 4 new holes drilled to 14mm grab your Angle grinder and flatten the back of the hub where the new stud will go. This is to make the stud sit in place without rocking around (which causes wear and may lead to the stud splines failing.)
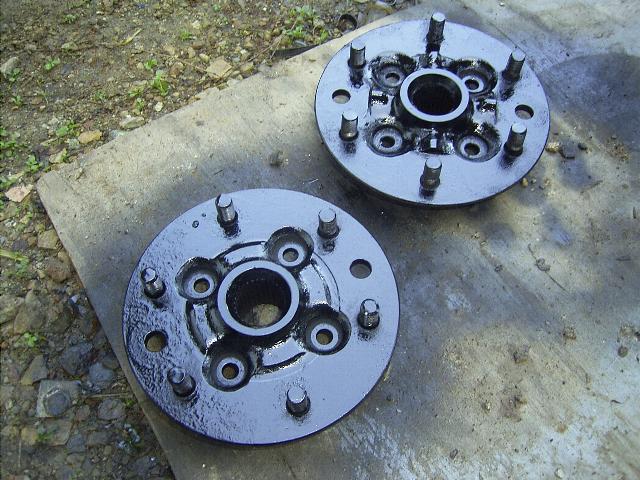
Place the hub on something hard. Put the new stud in place. And hit the new stud in. It should look like the picture above now.
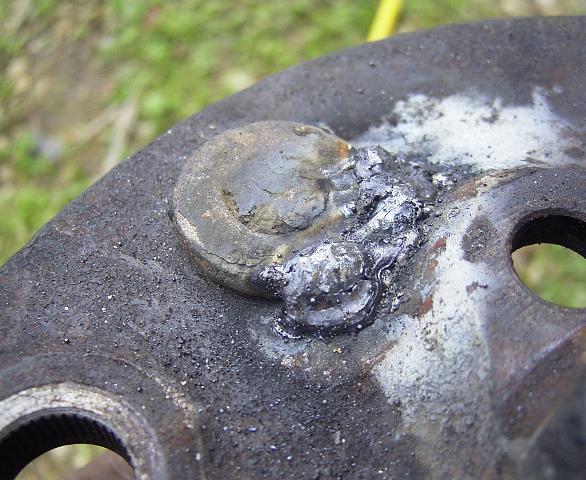
Some of the studs I done were a bit loose when I put them in. So I got out the arc welder and welded the head of the stud to the hub. This is just for reinforcing. It isn't entirely necessary.
Extra tips and tricks:
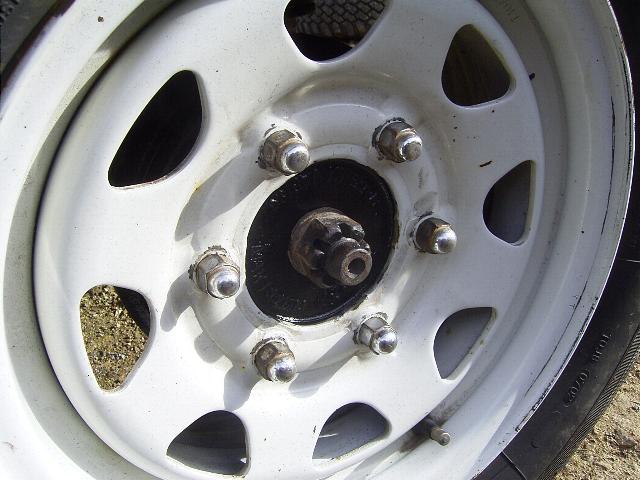
You really should put the lug nuts on the original studs and tighten them up, then put the other 4 on. This way it is all aligned perfect, even if your other studs aren't quite in the right place.
You can also use a punch that is smaller then the threaded end of your stud to get your studs out if you plan to use them again. This avoids burring the end of the thread.
When drilling the hubs, weather you use a drill press or power drill, keep the drill bit point well lubricated. RP7, WD40, Machine oil, or just engine oil does a good job. When the hub or drill bit gets hot back away and cool it down, water is on for this. If the drill bit gets to hot it will blunten faster then usual. When this happens you will need to sharpen the bit or get a new one. You can use a drill bit sharpener or you can sharpen it yourself on a bench grinder. Although it takes practice and persistence when sharpening this way.
Some people say you need to weld up the old stud holes to make the hub strong. This is a stupid thing to do, and I would highly NOT recommend this. When you weld you heat up the metal, this changes the structural strength of the metal and weakens it. When I welded the studs in I didn't try to completely weld the top of the studs to the hub, I just put a bit of weld on the surface to hold the stud from coming lose while I was trying to get the lug nut off.
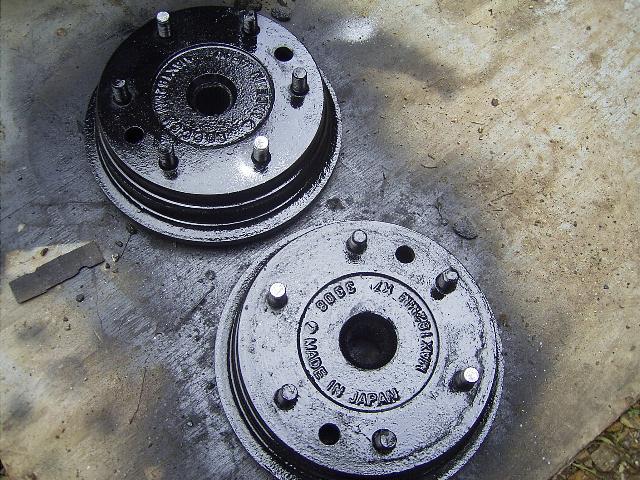
Here are some extra pictures to give you a better idea on what was done. And how it ended up.
So, that's it. I hope you can follow this. If not, send me an email, and I'll see if I can help.
You have full writes to follow this guide and copy everything I have done here. But, the content on this site is Copyright. Please do not waist your, or my, time. If you want to use a image or a passage of text from my site please email me for permission. It takes time for me to write these guides. If you wish to link to my site, please link only to my pages, and not my images. Thank you.
Text and pictures on this site Copyright © 2005 Thomas Paine. All rights reserved. All copyrights are retained by original authors. If you wish to use a picture or quote the text off this site to your own site or to a online forum please ask for permission first. If you use anything off this site that may lead to damage of my reputation I will have to take the matter further. So do not piss me off!
DISCLAIMER: Thomas Paine, www.OffroadingSubarus.com, does not warrant or make any representation regarding the use, or results of use of the information contained on and within this website as to its correctness, accuracy, currency or otherwise. Thomas Paine, www.OffroadingSubarus.com, expressly disclaim all liability or responsibility to any person using the information or advice contained on and within this website.

