
Event Reports
4x4 Riverland Challenge 2009
4x4 Mud Dust & Music 09
4x4 Riverland Challenge 08
Victoria 4WD Trip June 09
New Articles
AWD and Odd Sized Tyres
Outback Low Range Conversion
Windscreen, Spray then Wipe
Storage and Sleeping System
Project83
Intro - the idea and plan
4WD Conversion
Fender cutting
Radius Rod Mod
CD Player install EA81
Concept Subaru's
Bobbed Subaru Brumby
2005 Subaru Brumby/Brat
2door STi Convertible
Forester Pickup Truck
EA82 hatchback
Other Photochops
![]()
Subaru related Links
Forums
Ultimate Subaru
Message Board
Info Sites
Installing Rear Disk Brakes
All Non-Turbo Subaru's come equipped with rear drum brakes... while all Turbo EA82 Subaru's come with rear disk brakes. Wouldn't it be nice to swap those ancient drum brakes with some nifty rear disk's?? Well, you can Even your EA81 Subaru can use the rear disk brakes off of any EA82T Subaru. I recently did the conversion, and here's how its done.
First off, lets tell you where to find rear disk brakes. Pretty much any turbo Subaru built after 1985 will have rear disk brakes. You can use these rear disk brakes on any EA81 and EA82 Subaru. If your Subaru is 4WD, you will need the rear disk brakes off of another Turbo 4WD Subaru. If your Subaru is 2WD, you will have to find rear disks off of a 2WD Turbo Subaru. I found my rear disks in a junk yard on a 1986 Subaru XT Turbo Coupe. Any Subaru RX, XT Turbo, GL-10 Turbo (both wagon and sedan) will have rear disk brakes.
Next, lets go through the tools you'll need to remove and install your rear disks.
1) 14mm socket
2) 14mm wrench
3) 36mm socket
4) Socket Wrench
5) Hammer
6) 10mm wrench
7) Plyers (needlenose preferably)
8) Flat Head Screwdriver.
9) Breaker Bar (long piece of pipe for more leverage)
10) Jack & 1 Jack Stand
The parts you need from the donor car are the Disk Rotor, Disk Caliper with the flexible break line attached and the backing plate that the caliper mounts to.
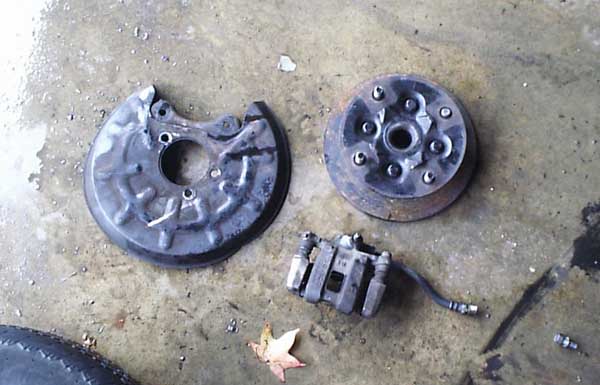 <-- Parts
Let's Get Started!
First, if the car is on the ground, use the screwdriver and your pliers to straighten out the cotter pin. Then remove the cotter pin from the spindle.
*tip* I use my pliers, and grab the rear of the cotter pin, right between the loop. Then I take my hammer and gently tap the pliers and the cotter pin should tap right out.
After you have the cotter pin out, use your 36mm socket with the breaker bar and break the nut loose on the spindle. Do not remove the nut just yet.
Then go ahead and break your lug nuts loose. Use your jack to raise the car and support it with your jack stand.
NEVER work on a car that is supported by just your jack (or cinder blocks, 2x4's or wooden planks!). Always use a jackstand!
After you raise your car, go ahead and remove the tire and then remove the 36mm nut. Make sure you keep the nut, washer and cone-washer as well. Sometimes the cone washer wont want to come loose, use your hammer and gently tap the spindle and the sides of the rotor until the cone-washer pops out of place.
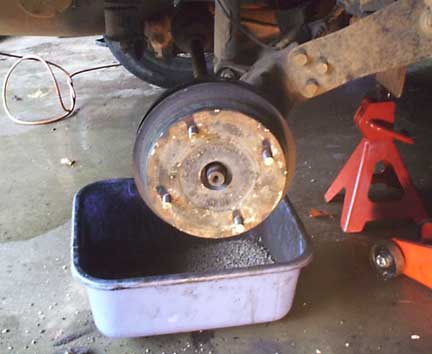
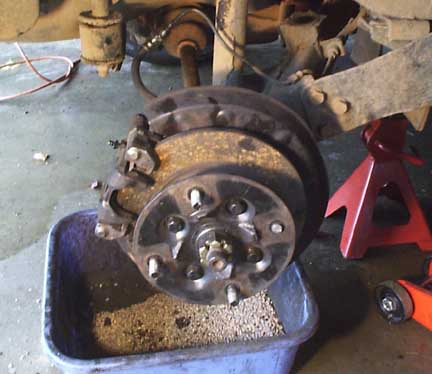
Now you should be able to remove the drum and expose the mounting bolts.
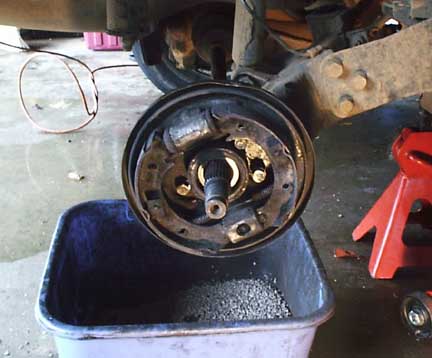
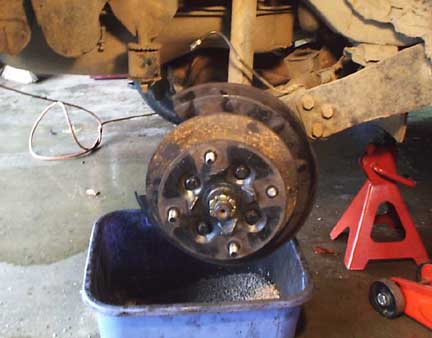
Remove the 3 bolts on the inside of the drum, holding the drum to the trailing arm. You will need to use a 10mm wrench to loosen the metal brake line. Take care not to strip the 10mm nut on the line, or break the line itself, you will be re-using it. Clean as much of the brake dust off of the hub assembly. Remove the drums from trailing arm by rotating it and tapping the backside with a hammer or mallet. Once its removed it should look like this.

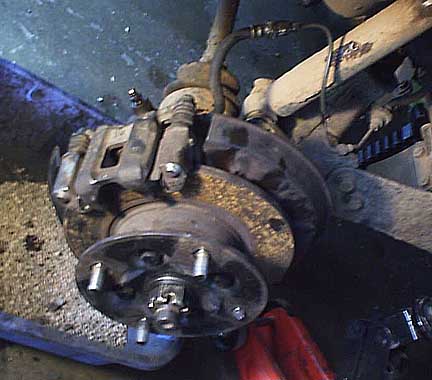
Once you have everything cleaned up, you should be ready to install your disk's. All the hardware is the same, bolt the backing plate onto the hub.

Once that is done, you will need to install the rotor. You must do this before you install your caliper. Its not necessary to torque the castle nut just yet, just fit the rotor in place.
After the rotor is on, you can install the caliper. Bolt the caliper bracket into place, and slide the caliper into its bracket. After you've installed the brake pads tighten the caliper and everything and attach your metal brake line to the rubber line leading from the caliper.
You might need to bend the metal line out of the way. Make sure its safe from being pinched or crushed.
Repeat the process for the other side.When you install your rotor, make sure to use the cone washer, then the flat washer, and torque your 36mm nut to 145lbs. Install the cotter pin, i find nails work just as well. You may want to bleed your brakes afterward, then take the car out for a brief test drive.
Good Luck & Have Fun,
-Brian
Text and pictures on this site Copyright © 2005 Thomas Paine. All rights reserved. All copyrights are retained by original authors. If you wish to use a picture or quote the text off this site to your own site or to a online forum please ask for permission first. If you use anything off this site that may lead to damage of my reputation I will have to take the matter further. So do not piss me off!
DISCLAIMER: Thomas Paine, www.OffroadingSubarus.com, does not warrant or make any representation regarding the use, or results of use of the information contained on and within this website as to its correctness, accuracy, currency or otherwise. Thomas Paine, www.OffroadingSubarus.com, expressly disclaim all liability or responsibility to any person using the information or advice contained on and within this website.