Headlight Relay Modification
 Because of how Subaru wired their headlights in the 80’s you get between a volt and 1.5v loss at the filament. This is because the power for the headlights must go through the steering column dip switch. Even though the headlights have relays on the positive side they are still powered through that switch on the negative side. I can’t really quite understand why they wired like this, and it gets worse…
The principle behind doing this is to reduce this loss of voltage to something more respectable, about 0.1v. To do this we must shorten the wires which power the headlights and eliminate that switch which has most of the voltage loss across it. But because you still need to be able to switch the lights on and off plus switch between high and low beam we need to use relays. Relays are basically a remote control switch. They use very little power to switch a large contact which can supply plenty of power without much losses. They use a coil to create an electro magnet which pulls a switch contact on. So you put a relay under the hood next to the battery for low beam and one for high beam. Using the original power for the headlights on the relays coil you then get power from the battery on the relays contacts, then the original wiring from the headlights are connected to those relays and the original common wire on the headlights is grounded to battery negative.
While doing this modification to my own Subaru I ran into some problems. Because how Subaru decided to wire their high beam indicator light when you wire up standard relays the way I described above the relays will not switch off. This is because the high beam indicator acts as a circuit for power to hold the relays on. To fix this, you can either cut into the wiring loom of the car and re-route the power for the indicator light or put 100 Ohm resistors parallel with the relays coil. The latter was my choice.
Something that you must know which may confuse you is that the headlights on Subaru’s and many other cars are wired with common positive. So the high and low beams in each light shares the same positive while the negative is switched in the car on the steering columns dip switch. I prefer common negative since the rest of the whole car is like that. So I wire it up so its the invert of that.
All relays share the same pin numbers. These are, 85 and 86 which are each side of the coil. Also 30 and 87, each side of the contacts.
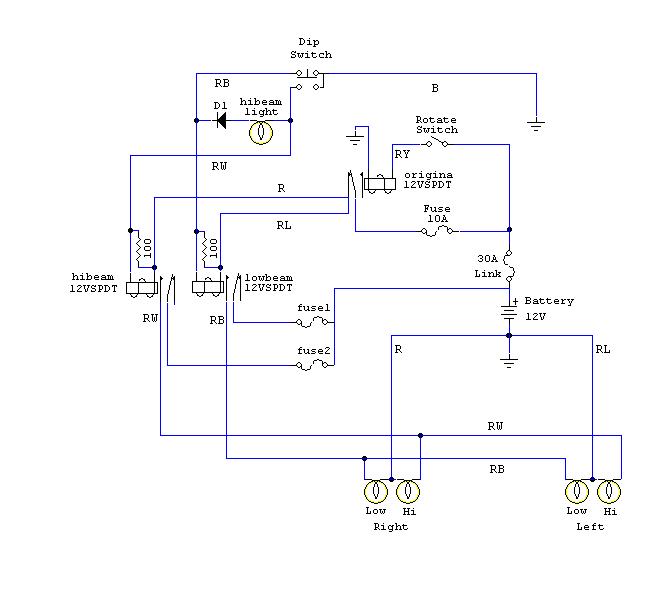
Here is a diagram of what the standard headlight wiring looks like seperate from the rest of the cars wiring. On the left is pre 84 and on the right is 84 onwards, quad headlight models.


Ok, enough with the explanation of how and why… Lets get to it.
Note: you will see an extra relay in some of the pictures shown. This is for my spot lights I wired up at the same time. I will show you how to do that in the end of the article. If you do plan on wiring up spot lights at the same time as doing the relay mod make sure you read all the way through this article before starting.
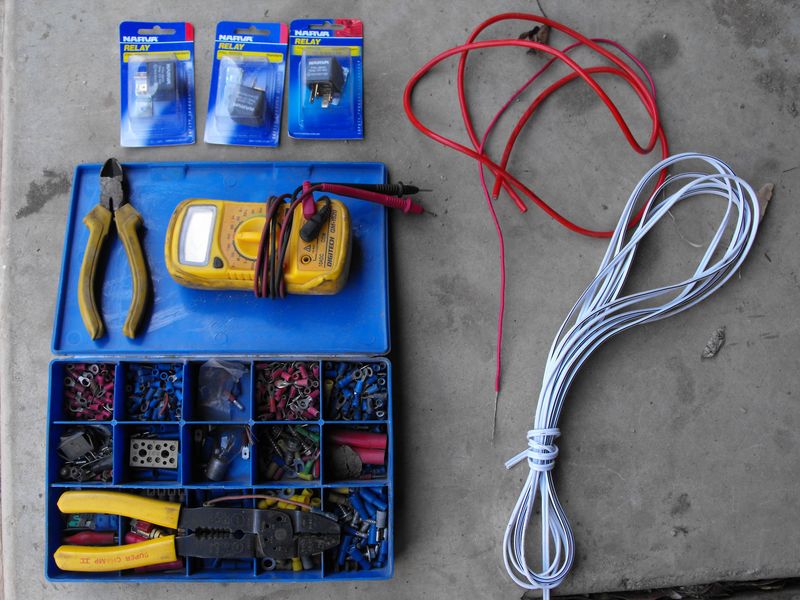
First up you will need two 30A or larger automotive relays, crimping tool and spade crimp connectors. You will only need female connectors. You will also want some bolt onable crimp connectors, wire strippers, fuse block, extra wire (that’s at least good for 10A). Two 100 Ohm resistors. A soldering iron. Black electrical tape. A multimeter is also a great tool to have for any electrical job.
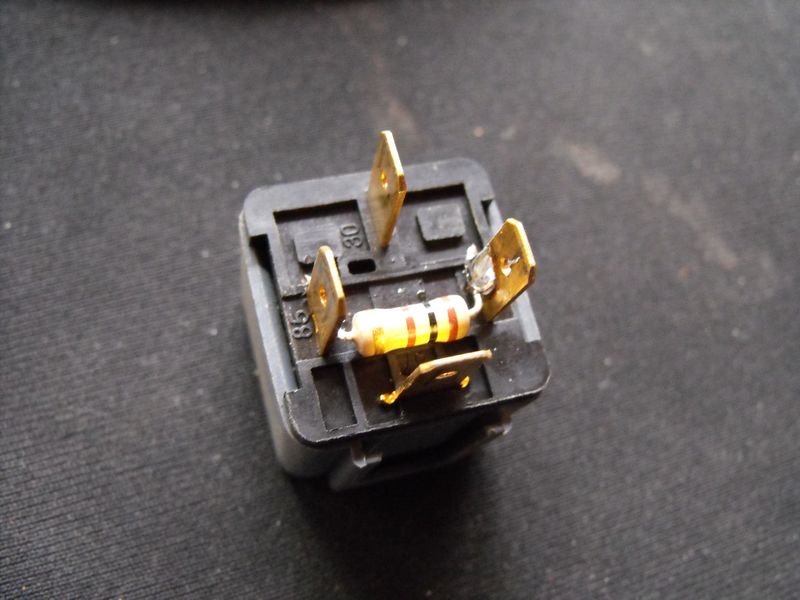
Lets setup the resistors on the relays first. Tin the 85 and 86 pins on the relay carefully (you don’t want them to get too hot or you’d destroy your relay). Then tin the pins right up close to the resistor. Solder the resistor between the 85 and 86 pin on the relay. By the way, 100 Ohm’s is shown as Brown Black Brown in resistor code. The gold or silver stripe is the rating. You may as well get the gold stripe as the cost is nothing of these little guys. Also you will want to get heavy duty ones (larger) they need to be good for 60mA, almost 1W of power.
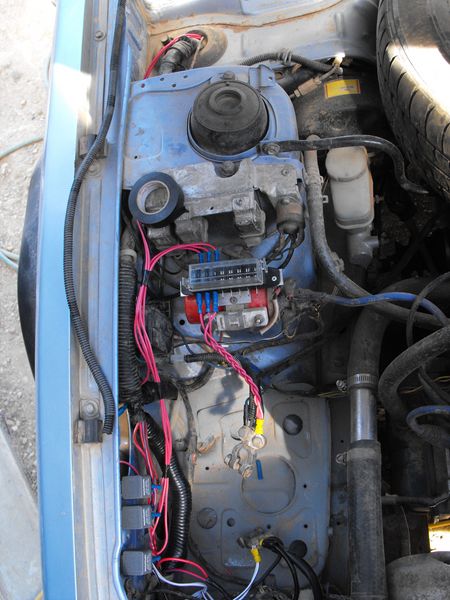
Now remove the battery. Pull the tape and plastic shield off the wiring and find the highlight wires in there.

The headlight wiring is like this (in brackets is the code for the colour as used on wiring diagrams, I will also use this short hand from now on):
Red (R) = positive from original cars relay
Red w/Blue stripe (RL) = same as above except in later models comes from a secondary positive relay
Red w/Black stripe (RB) = Low beam negative from dip switch
Red w/White stripe (RW) = High beam negative from dip switch
Note on later models there may be two of each RB and RW wires, these come and go to the same place doing the same job so treat as one wire.

Fit the hangers your relays should come with to the body behind the battery. Cut the RB and R wires. Connect the dash side of them on each side of one relays coil (85 and 86). Do the same with the RW and RL wires for the high beams relay. Remember to cut them at different point along the loom so they can reach the relays placed apart from each other. Now connect the headlight side of the wires RW and RB to those relays “87” pins. It should look something like this now.

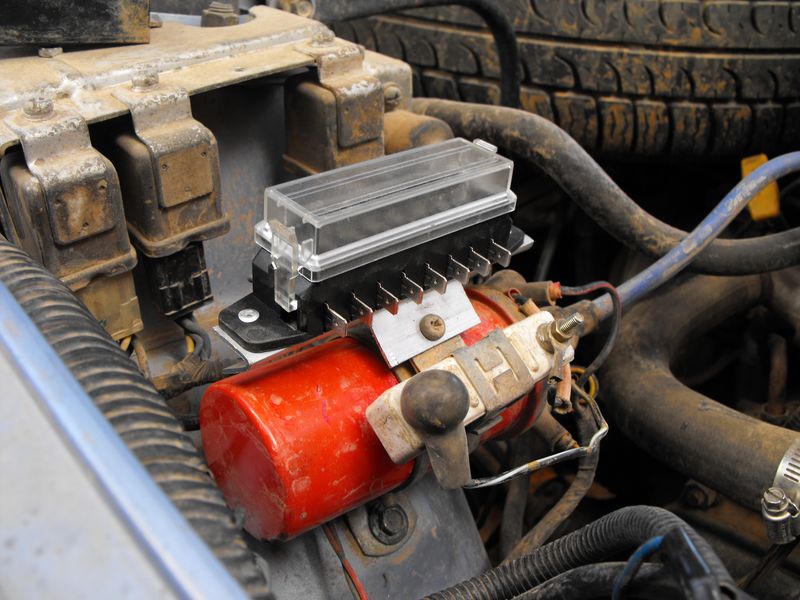
Mount your fuse block, I found the best spot in my sedan to be on the ignition coils mount. I just used a piece of 20x20x1.5mm ally for the bracket. Its best to have this fuse block as close to the battery as possible, because if the wires between the battery and fuses ground out you can start a fire in the engine bay.
Now run wires from the battery positive to the fuse block. Also run wires from the other side of the fuses to the two relays “30” pins. As you can see here I’ve also put the plastic shielding over the loom again except for the headlight wires.

Join a heavy duty wire to the headlight side of R and RL and wire it to the battery negative.

Now you just need to wrap it all up in tape to cover and protect the wires. Getting some of that plastic shielding in the smaller size is also a great idea, stick that over the wires where you can and tape it on.
The circuit should now look like this in a diagram format.
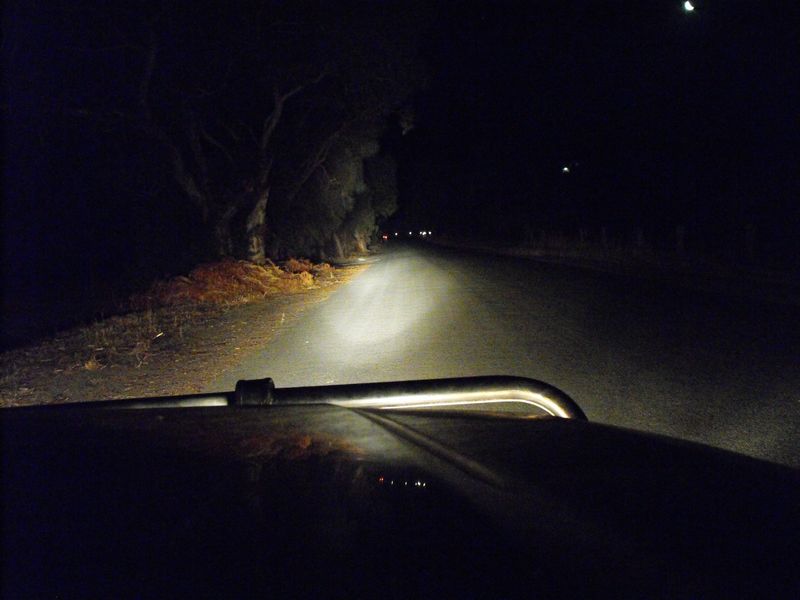
You should now have much better headlights. Almost no need for spot lights!
But if you still long for more light, like promised above I will explain how to add extra properly wired spot lights.
See legally in Australia any extra driving lights must be wired to only come on with your high beams and they also must be on a separate switch. I used a switch with a little light in it for this, so it will light up blue when the spot lights are on, just like the high beam lights!
Take a wire from pin 87 on your high beam relay run that into the car, through the switch on the “power” pin and then run a wire back out off the “Acc” pin to the spot lights relay pin 85. Then run a wire from spot lights relay pin 86 down to earth. And to get the switches light working you need to run a ground from the dash to the switches “ground” pin. Using the fuse block run another wire to the spot lights relay pin 30. Then wire your spot lights off pin 87. Other side of the light down to ground.


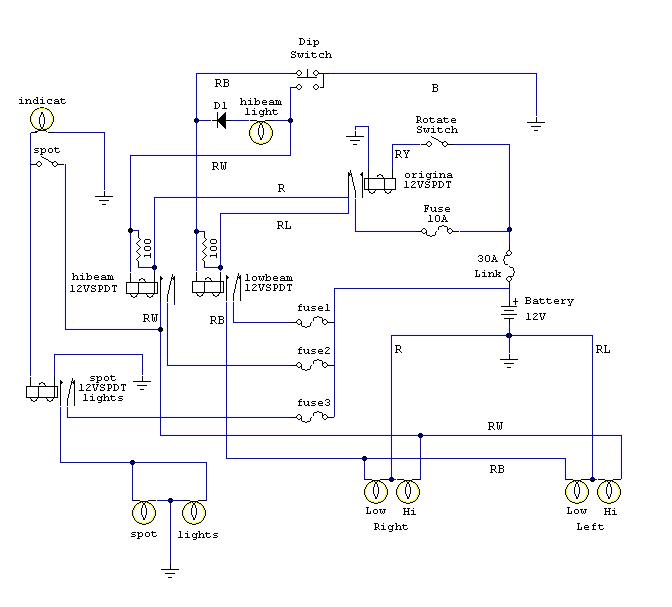
And this is what the circuit will look like with the spot light wiring.
Thank you for reading and have a safer drive with properly working headlights!
![]()
I bought my first Subaru back in 2005, it was a 89 Brumby, flair red. I lifted it, fitted Kumho 27″ MT’s. After a while I swapped the dual carb EA81 it had with an EJ22 bolted on a custom gearbox which used EJ D/R casing, EA82 5sp low range and an RX centre locking diff. Once I sold the Brumby I got a 83 Leone. Converted it to 4WD, put the Kumho’s on it, added a 5sp and drove it like I stole it. I then upgraded to a 99 Outback. It was hail damaged so I repaired it myself. I fitted it out with some storage and a mattress. I now have a 87 Brumby that I’ve resprayed with two pack urethane in Waratah Red. I am planning to fit an EJ with PT gearbox and a little bit of lift. It’s another project in progress.
Phizinza – who has written 50 posts on Offroading Subarus.