Outback Low Range Conversion – 1.59:1 EA82 low range in a Gen3 Part 2

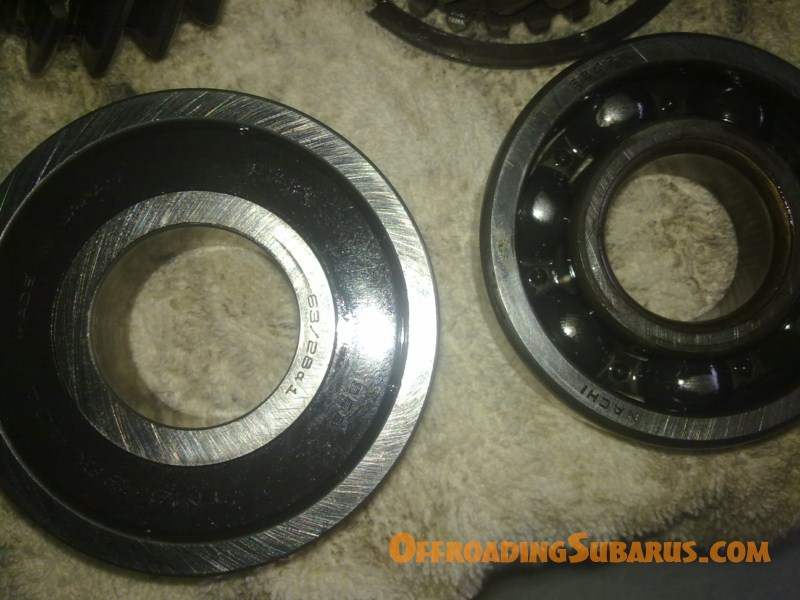 You may have noticed by now the EA82’s bearing is smaller than the Outback’s. To be precise the the EA82’s bearing is 62 OD, 25 ID and 17mm wide; while the Outback bearing is 68 OD, 28 ID and 18mm wide. The inside diameter is the problem here, as you need to use the Outbacks input shaft casing but also the EA82’s input shaft, You could either make a sleeve for the outside of the bearing or like I did the inside. You need to machine from brass or bronze an interference fitting sleeve with 24.95mm ID, 28.05mm OD and 18mm long. The 0.05mm is the interference fit, preferably somewhere around 0.02mm but not so close that the sleeve is loose. I used a cheap Chinese lathe which with 0.4mm of backlash was interesting machining to these small tolerances. Another problem I found, after pressing on the sleeve to the shaft that the shaft was not machined straight to start with, I ran it between centres on the lathe and using a dial gauge found although both ends of the shaft were running true the middle where the bearing pressed onto was 0.1mm out of centre. After finding this out I machined the sleeve while it was on the shaft to bring it into centre. I then pressed the Outback bearing onto the EA82 input shaft.
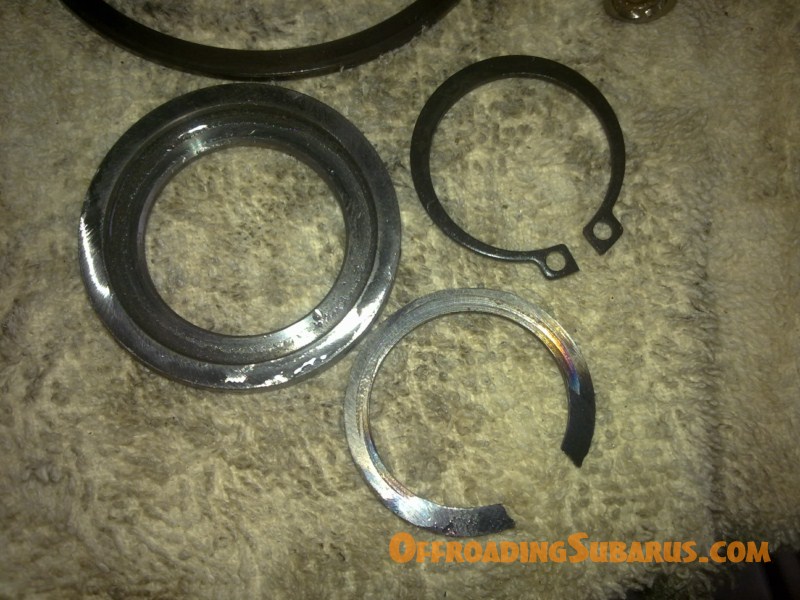
 Now to ensure the bearing stays in place. Because we are using the 18mm wide bearing on the shaft that used to have a 17mm wide bearing you need to grind off half of the circlip that retains the bearing (picture second to left: bottom clip). To put the EA82 bearing circlip retaining washer (picture second to left: top left washer) in place you need to grind just about 0.5mm off the end. You should now be able to put the washer on the shaft over the clip and install the final circlip (picture second to left: top right clip).
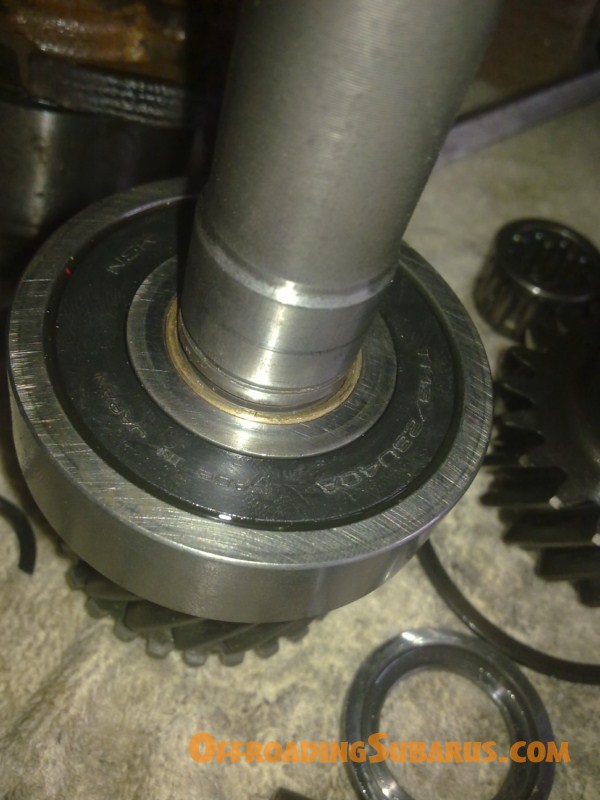
On the gearbox main shaft you need to remove the plastic retainer holding the roller bearing on the shaft. This won’t go back on. To put the inner part of the EA82 low range synchro on the Outback main shaft you need to machine out some of the spline. This is done on the side of the of the synchro that protrudes.
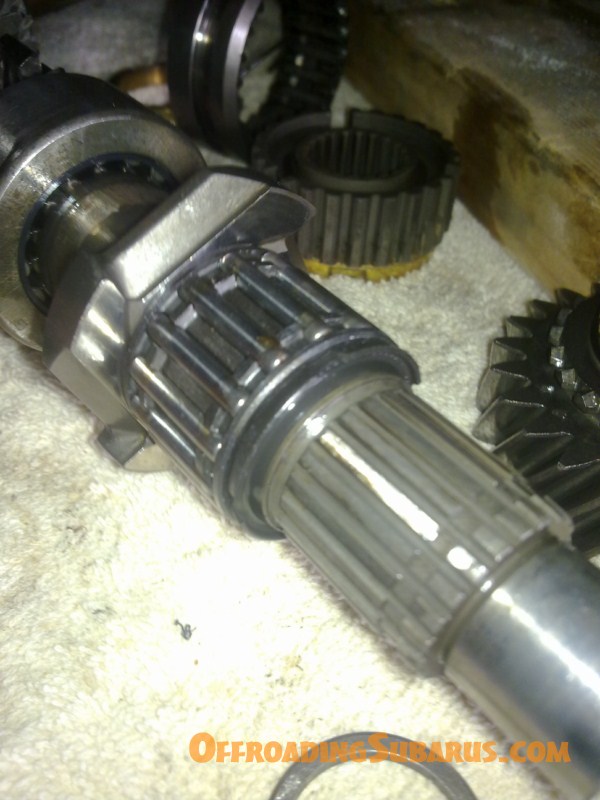


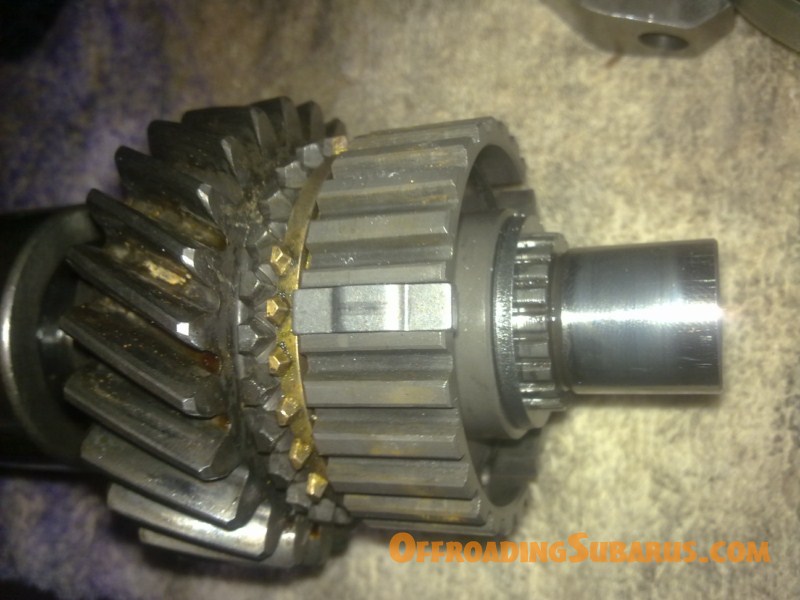

 Start assembling the synchro by making sure the springs are in place, as you can see by the two wire looking bits on the inside of the inner synchro on both sides. Also note the golden part of the synchro has three notches that line up with the inner synchro part. These take three small pieces that assist in holding the synchro in place. The last picture on the end shows the outer synchro ring in place. This is how it should look. Pay attention to the placement how the springs are holding out all the pieces. Excuse the picture, my camera must have corrupted the photo after taking it.
At this point I drilled an extra hole in the input shaft casing to feed where the EA82 “oil pump” is for the low range synchro.
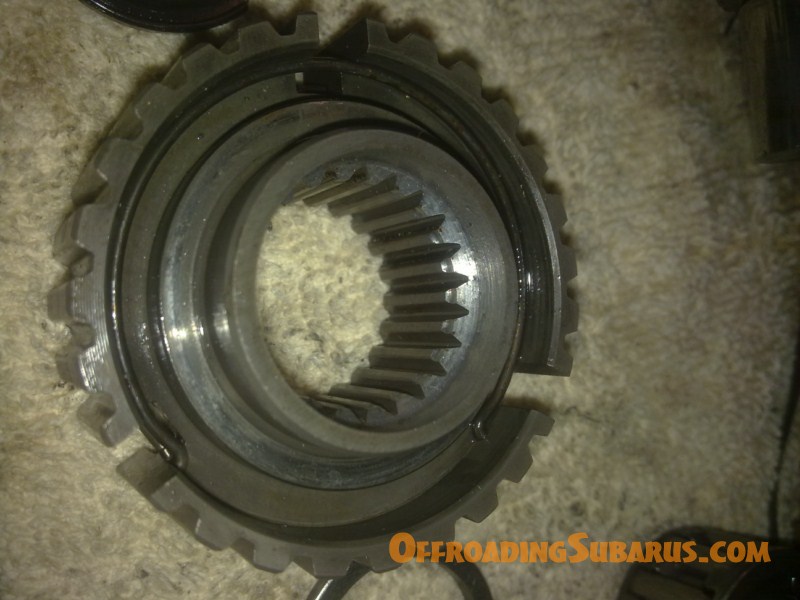
 The outer synchro ring of the EA82 low range comes in contact with the ring gear on the differential. Taking off 3mm from the diameter fixes this. This part is hardened steel, you will need a tungsten tool and even then it may be rough going. The other photo is of the clearance once the 3mm is taken off.

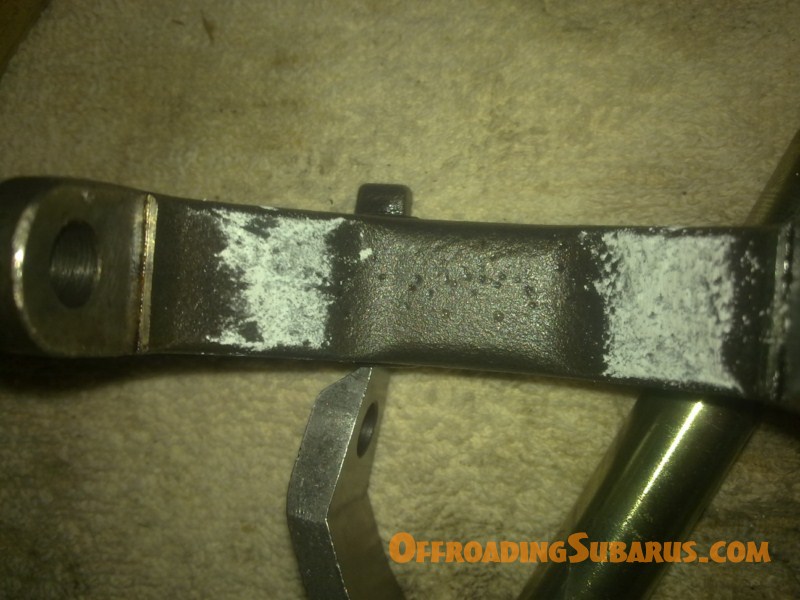
 This next stage I found a quicker way of doing. Usually you would use the EA82 fork and weld and grind the detent tab onto it as well as the low range light tab. However now that the synchro ring has been machined the Outback’s fork will fit. You just need to grind the slider feet to shape so they fit. I also found the fork rubbed the synchro so I ground a tiny bit off. Using chalk I checked and double checked that it was clearing.
Please continue reading PART 3
![]()
I bought my first Subaru back in 2005, it was a 89 Brumby, flair red. I lifted it, fitted Kumho 27″ MT’s. After a while I swapped the dual carb EA81 it had with an EJ22 bolted on a custom gearbox which used EJ D/R casing, EA82 5sp low range and an RX centre locking diff. Once I sold the Brumby I got a 83 Leone. Converted it to 4WD, put the Kumho’s on it, added a 5sp and drove it like I stole it. I then upgraded to a 99 Outback. It was hail damaged so I repaired it myself. I fitted it out with some storage and a mattress. I now have a 87 Brumby that I’ve resprayed with two pack urethane in Waratah Red. I am planning to fit an EJ with PT gearbox and a little bit of lift. It’s another project in progress.
Phizinza – who has written 50 posts on Offroading Subarus.