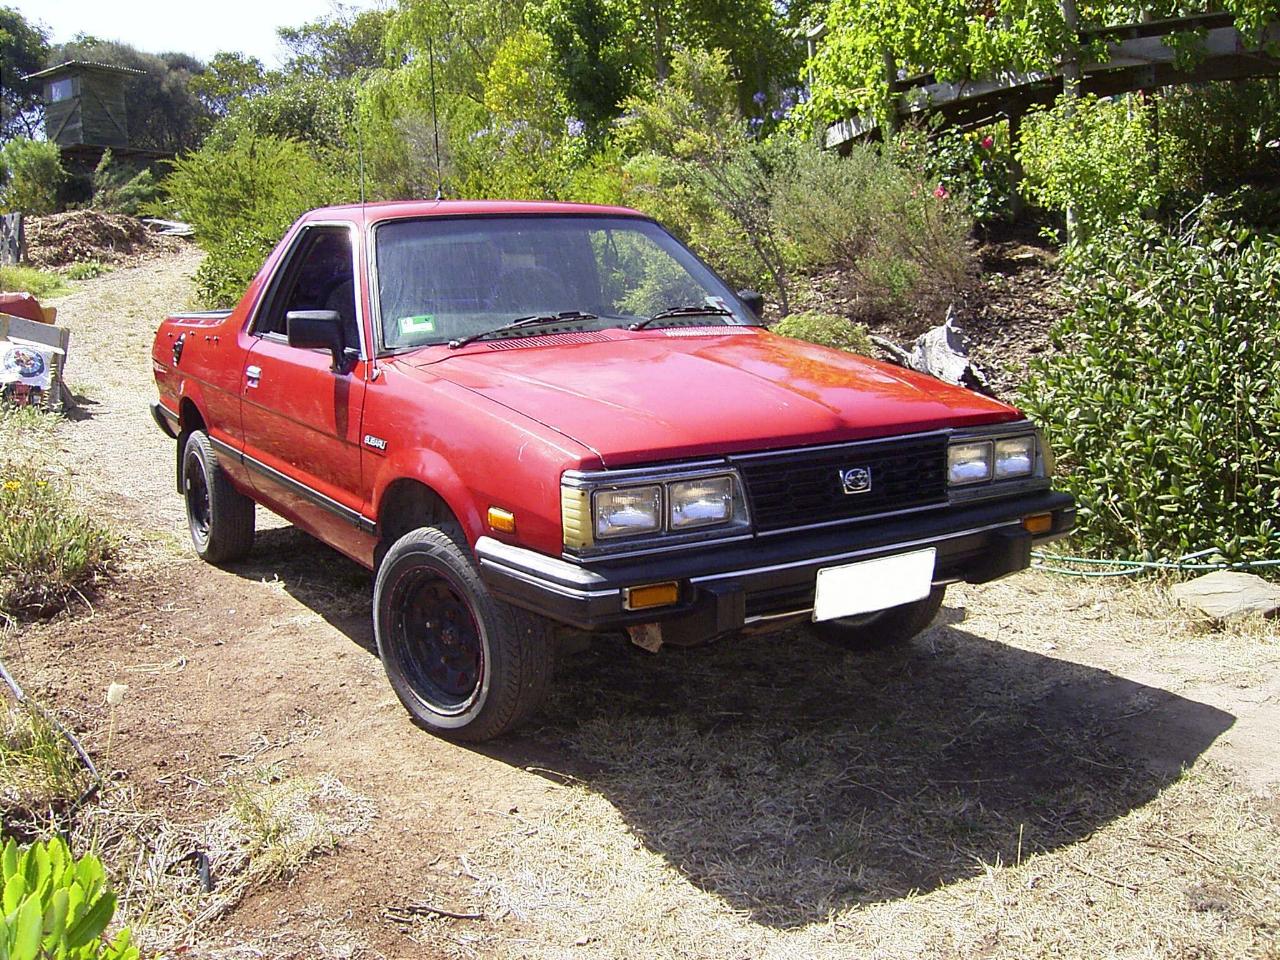
Phizinza’s First Brumby – 10 years ago
10 Years ago I started my EJ conversion on my first car, a red Subaru Brumby. I documented my conversion on UltimateSubaru. I figure it’s about time this website gets the famed Brumby that started the gearbox mix/match revolution.
What is below is basically a transcript of the post on the Ultimate Subaru site.
Thank you for visiting and reading!
http://www.ultimatesubaru.org/forum/topic/68441-brumby-conversion
Posted 06 February 2007 – 08:27 PM
So, this all started about 5months ago. I had a Subaru Liberty wreck sitting in my driveway with a good running motor and gearbox noise for a few months and my mates “are you doing to do the swap yet” questions were getting on my nerve. See, I had decided that I was happy with my car… But well, I’m doing the conversion now.
I started looking at the FT4WD gearboxes because I like on-road driving and plenty of people say EJ22 in FWD is kinda interesting. So I decided if I’m running a EJ22 it’s either with a t-case (totally illegal here) or it’s with AWD.
Now the LSD centers on the dual range EJ gearboxes aren’t any good for anything but road and sand. So It had to be 4WD.
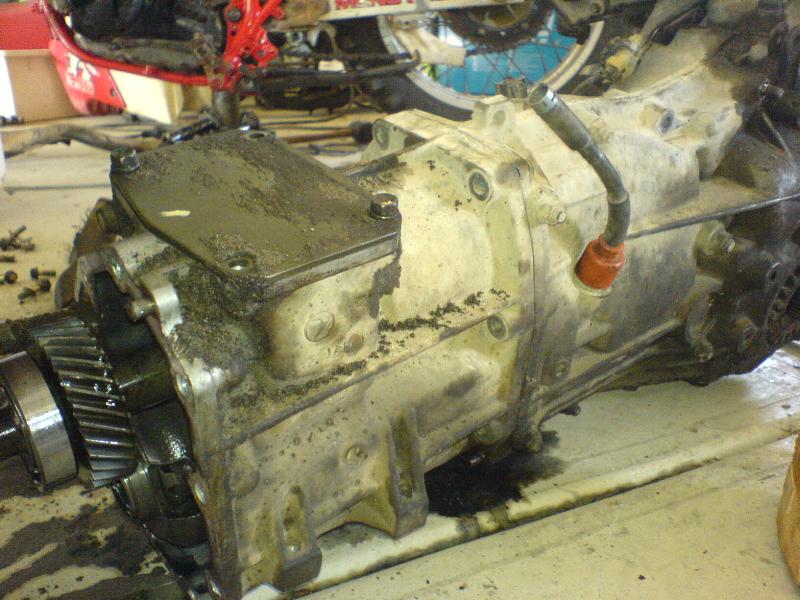
After seeing lots of pictures of the FT4WD gearbox (thanks to this forum) and after removing the EJ22 and gearbox from the Liberty I relised the gearboxes look the same!!
So then after about 2months research I figured it had a 99% chance of working and I got one of those jap import FT4WD gearboxes. On a side note here, the gearbox I got was not a normal turbo diff locker box. It had already had the center diff locker rear end bolted to a normal EA82 gearbox. I think they done this because the diff locker was from a single range gearbox. So this is why I stuck with the EA82 23 spline front diff.
I pulled both the Liberty and the modified turbo box apart and found it was going to work. I also found the problem noise in the Liberty box which I thought was a bearing it turned out it was the nut on 5th gear input side, it was lose.
So after making the EA82 low range lever work with the detent, welding and some drilling with some grinding, I had the gearbox going back together.
To torque the diff properly and pinion shaft I done it home workshop style. I used the pinion shims from the Liberty casing in the Liberty casing with the EA82 gears and pinion. I then set the left side diff cap so the back lash was just feelable. Then I tightend the right side one. I done this over and over till the diff felt the same as the other 5sp gearbox I had and had a tiny bit of backlash as recommended by manuals. This was after 5 or so hours of research finding out how to do this properly (which is done with 3 Subaru special tools.) Some might tell me this won’t work, but I can’t see why not. We removed a mates 5sp and the left side diff caps was loose! And because this had the tooth washer holder we figured the gearbox would of have to of been like that for more then 12,000km and this mate of mine is VERY rough with his gearboxes. Also that gearbox had no noises, only removed it because the synchros were going.
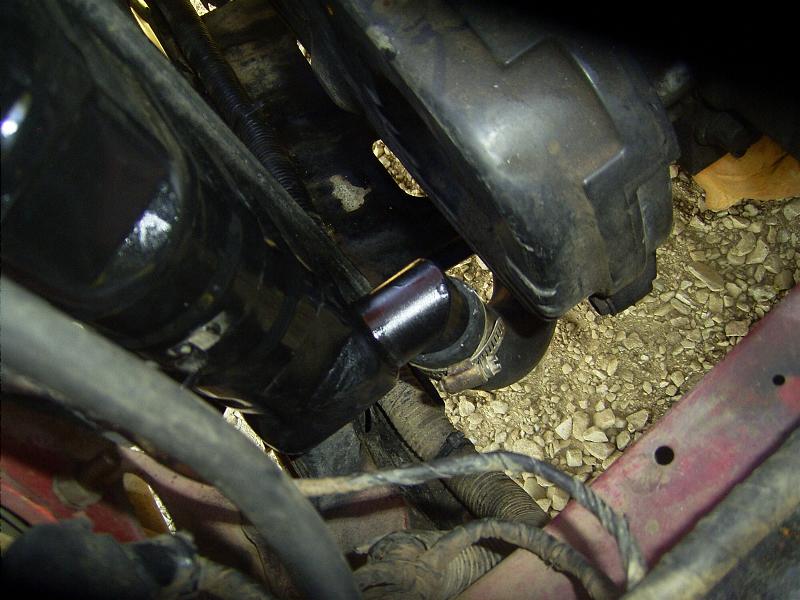
Here comes the fun bit, making the diff locker work. This took us ages to figure out why once we had the gearbox together that it too 50 – 60Nm to engage the diff locker. The vacuum solenoid could only push and pull about 20Nm. After pulling the back off the gearbox 5 or so times and making three different lever and mount designs (box didn’t come with original mount for the actuator cable) we figured out it was 2 missing alignment pins between the front two piece section of the gearboxs and the rear section which holds the diff and engager lever. Once those pins were installed it worked with only hand pressure on the lever. And the vacuum solenoid works great!
Now we are upto yesterday. 6th of February 2007
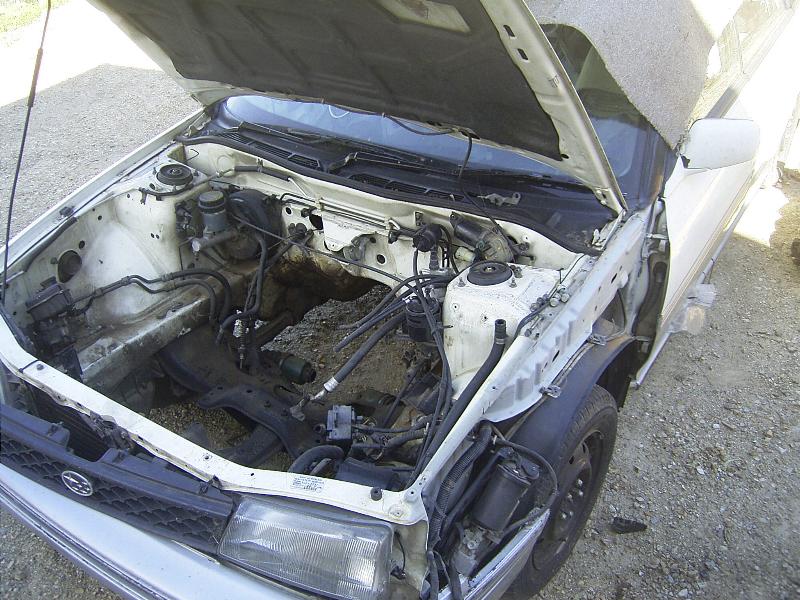
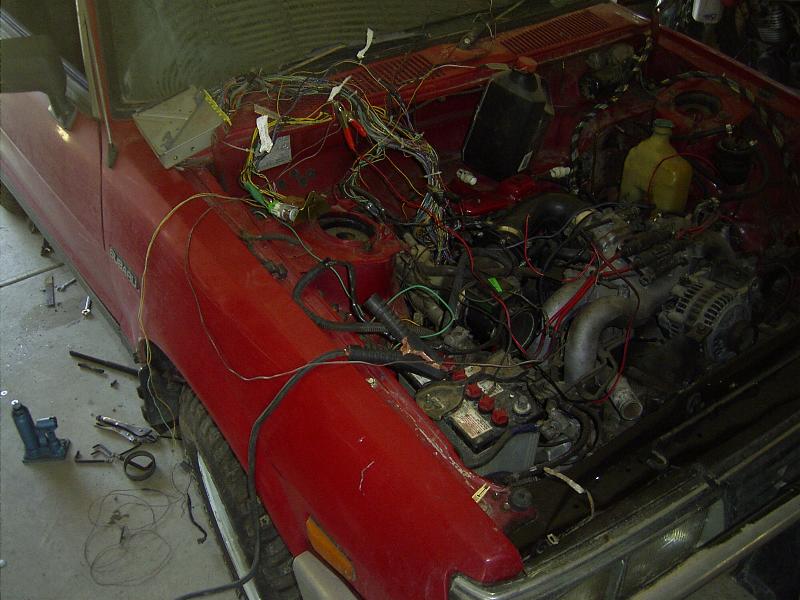
Then engine is out with gearbox as well. So is the welded rear diff and all the gear linkages. I have the EJ22 engine sitting there with the EJ flywheel ready to go on the EJ dualrange with EJ clutch and center diff locker with EA82 mounts.
So my first problem here was… The EA82 mounts are different to the EA81. I never remember hearing about that! So now it’s time to go do some research to find out how people do that. I will post some pictures in a minute.
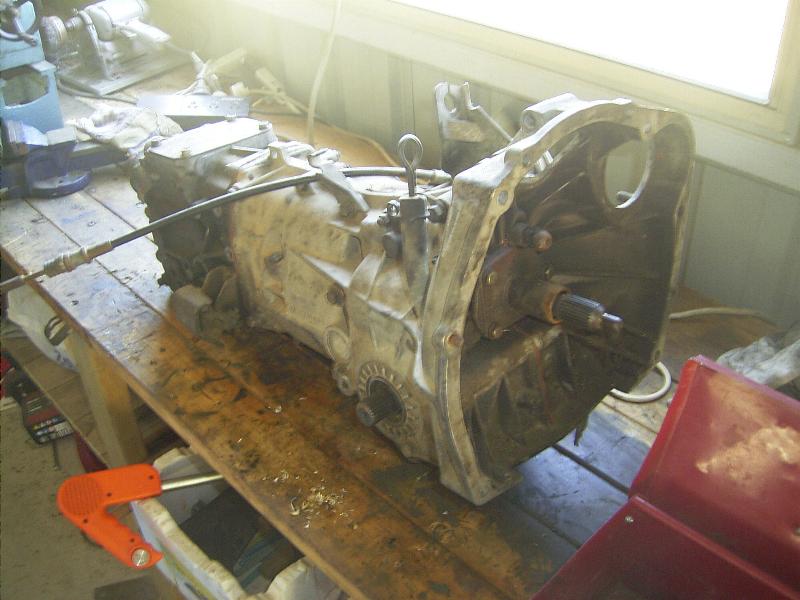
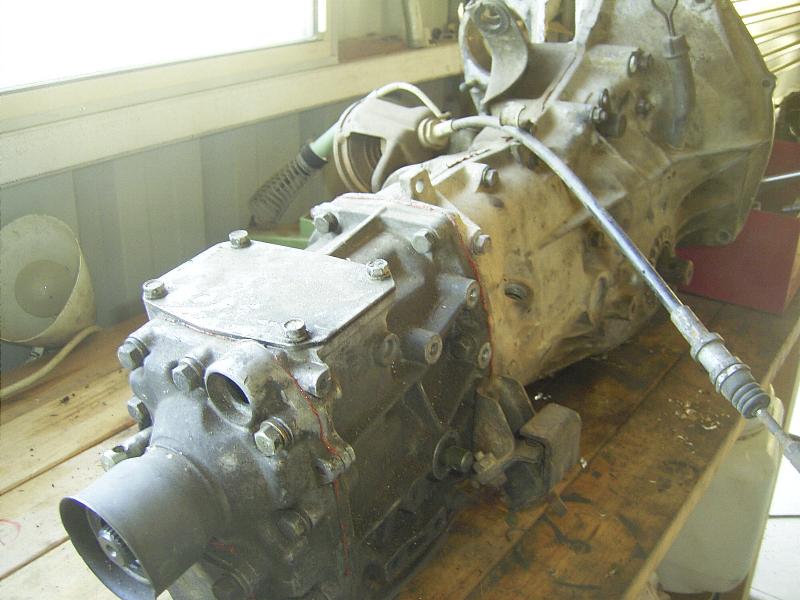
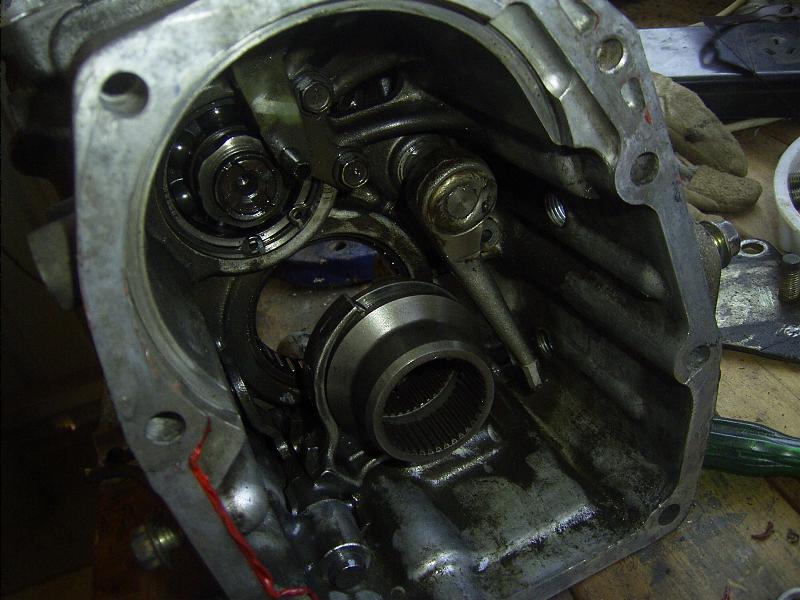
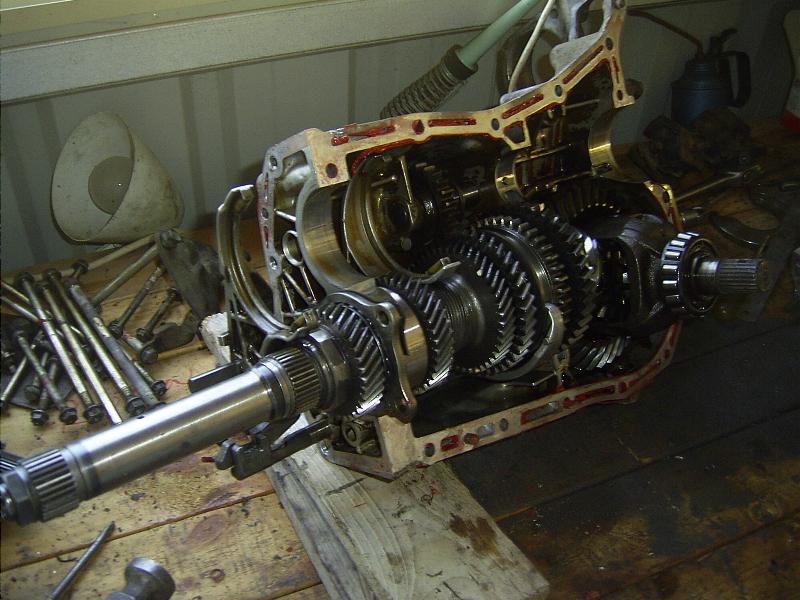
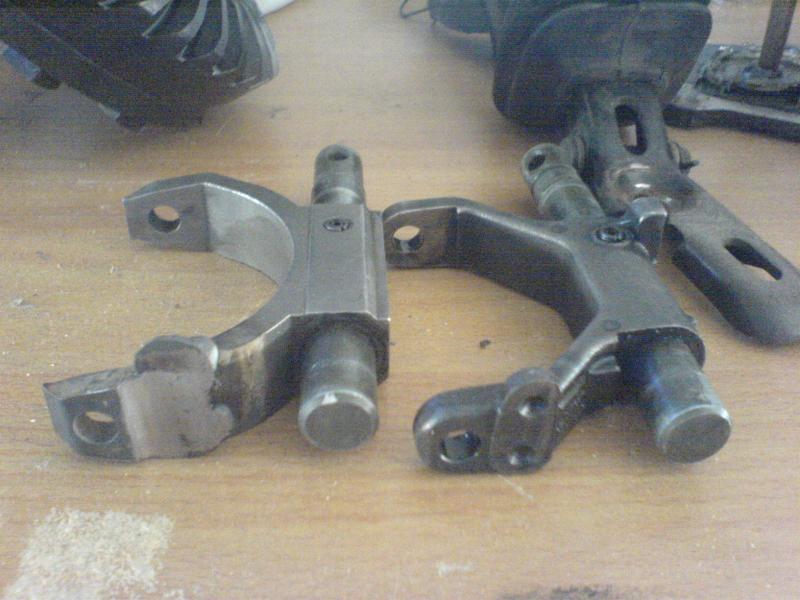
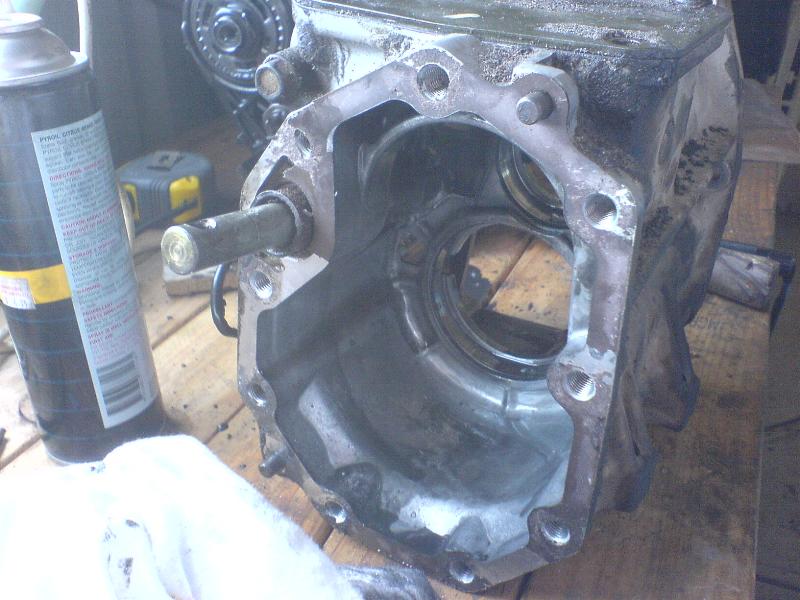
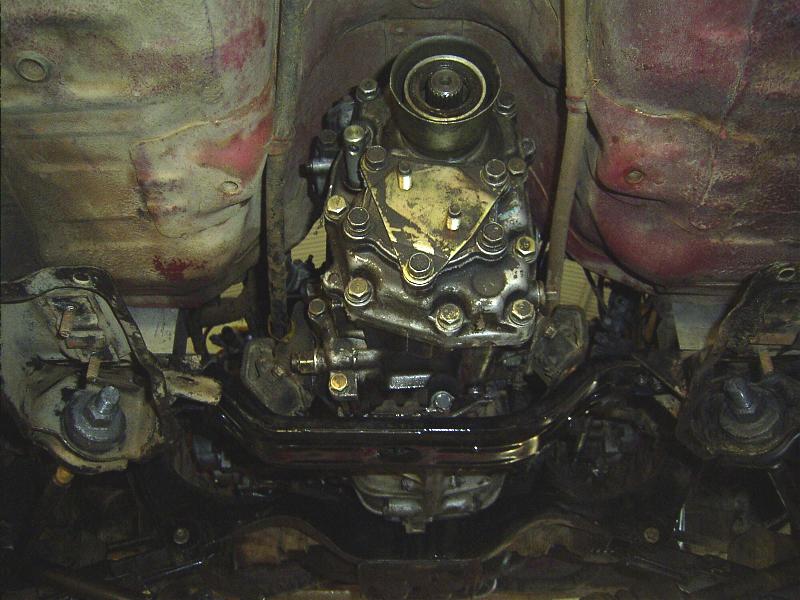
here are serveal pictures of the EA82 turbo crossbred gearbox (basiclly just all about the center diff locker)
http://offroadingsub…ock_onbench.jpg
http://offroadingsub…ck_onbench2.jpg
http://offroadingsub…center_diff.jpg
http://offroadingsub…iff_engager.jpg
http://offroadingsub…r_frontview.jpg
http://offroadingsub…r_selectors.jpg
http://offroadingsub…it_leftside.jpg
http://offroadingsub…t_rightside.jpg
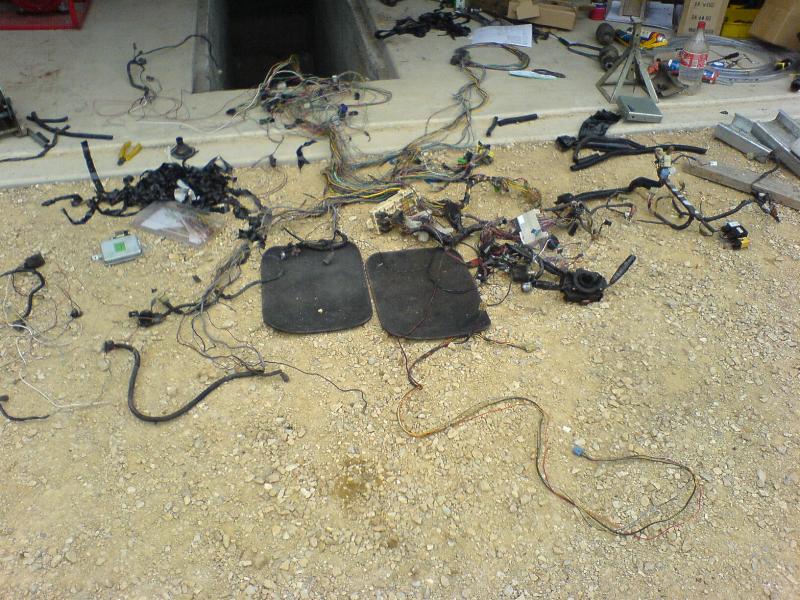
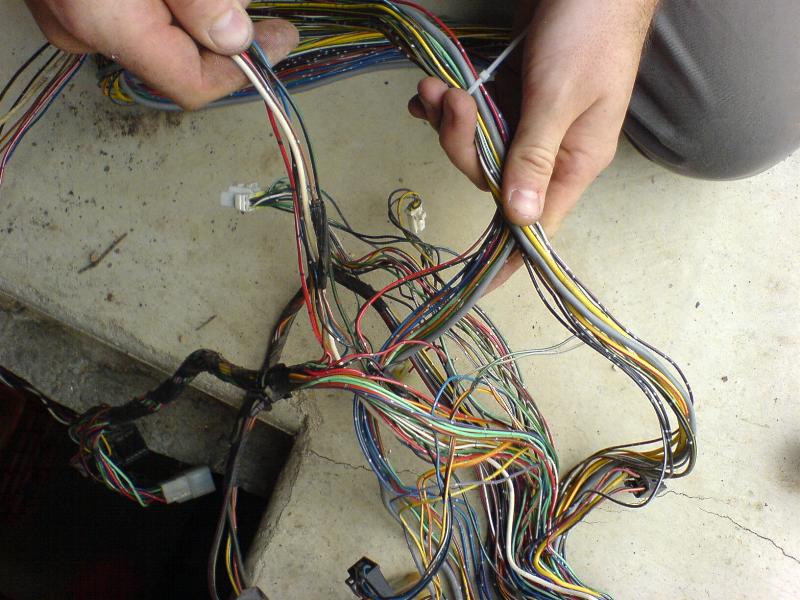
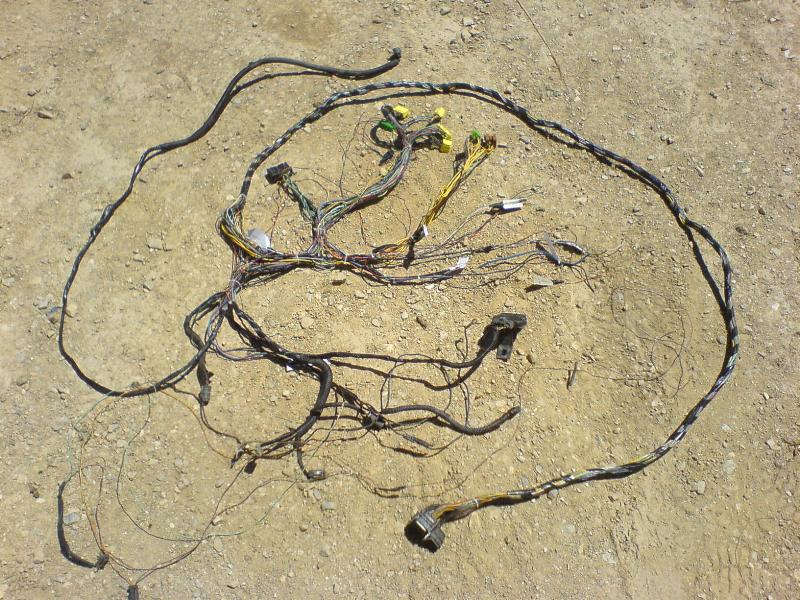
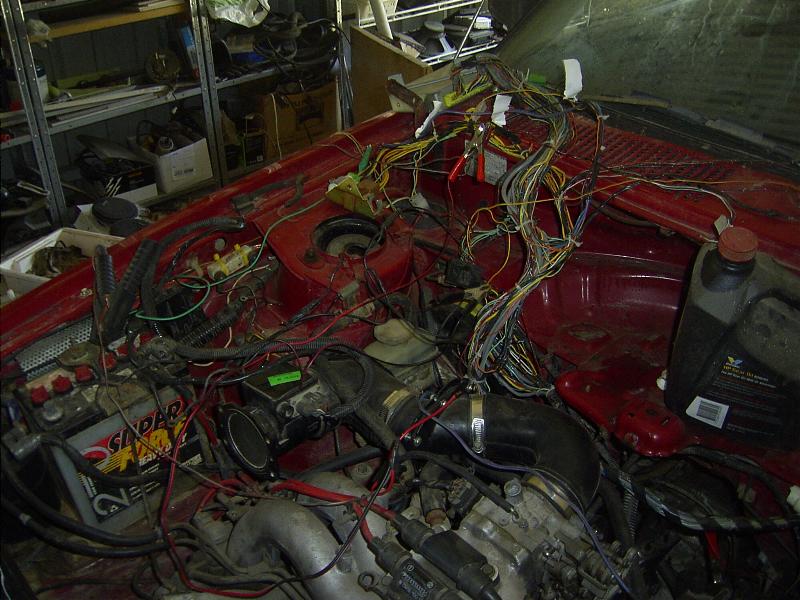
here are some pictures from a few months back when I pulled the EJ22 and striped the wiring loom (which I hope works, not tested yet)
http://offroadingsub…ngine_crane.jpg
http://offroadingsub…wiringloom2.jpg
http://offroadingsub…wiringloom4.jpg
http://offroadingsub…wiringloom1.jpg
http://offroadingsub…wiringloom3.jpg
http://offroadingsub…om_finished.jpg
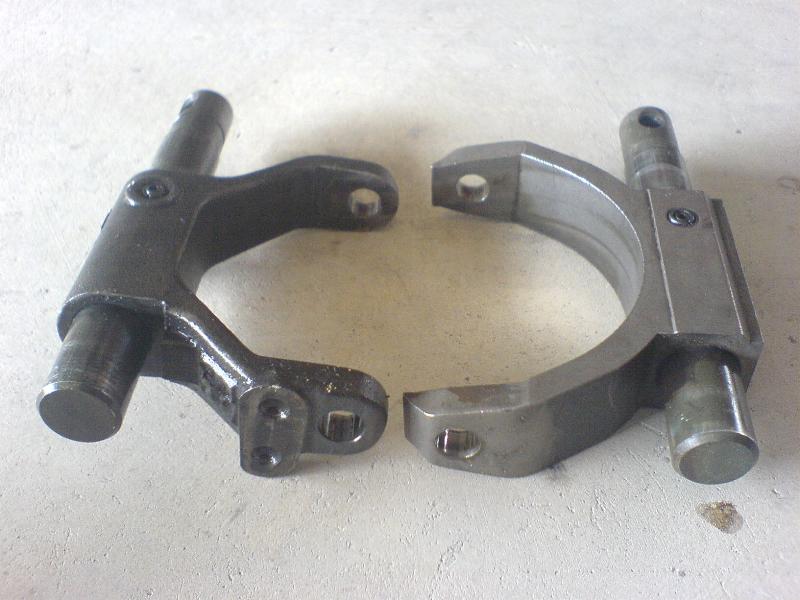
and some photo’s of the detent mod to the low range shift lever, so when you shift into low or high range it holds in and doesn’t pop out when on really bumpy terrain
http://offroadingsub…eshiftforks.jpg
http://offroadingsub…orks_detent.jpg
http://offroadingsub…rks_detent2.jpg
http://offroadingsub…rks_detent3.jpg
http://offroadingsub…rks_detent4.jpg
I will be editing then write up here to go on my site when I get the time.
Posted 08 February 2007 – 01:42 AM
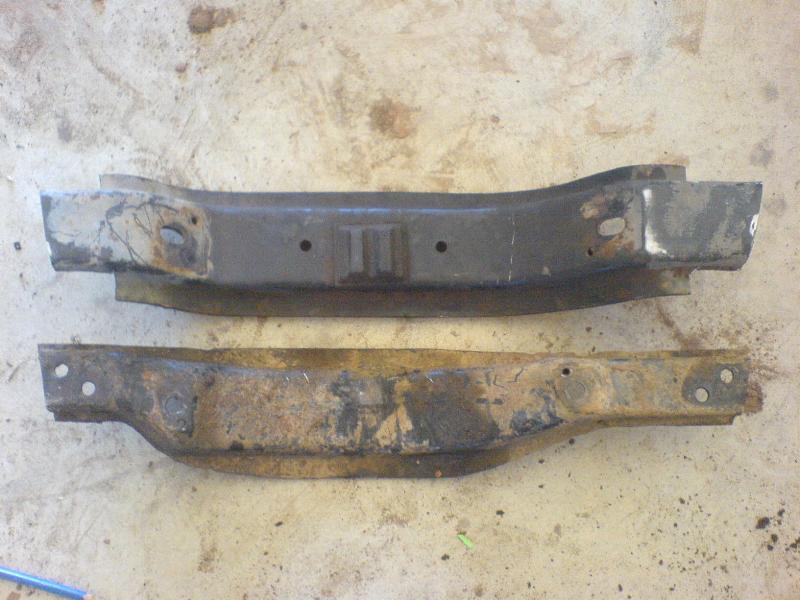
I’m working on cutting up a EA82 gearbox crossmember to fit the EA81. This is because I don’t have any good EA81 mounts and never in my life have seen any good ones. Where most of the EA82 mounts look good. I have pictures, but can’t upload them right now.. I’ll update on that later, gotta make sure it works first.
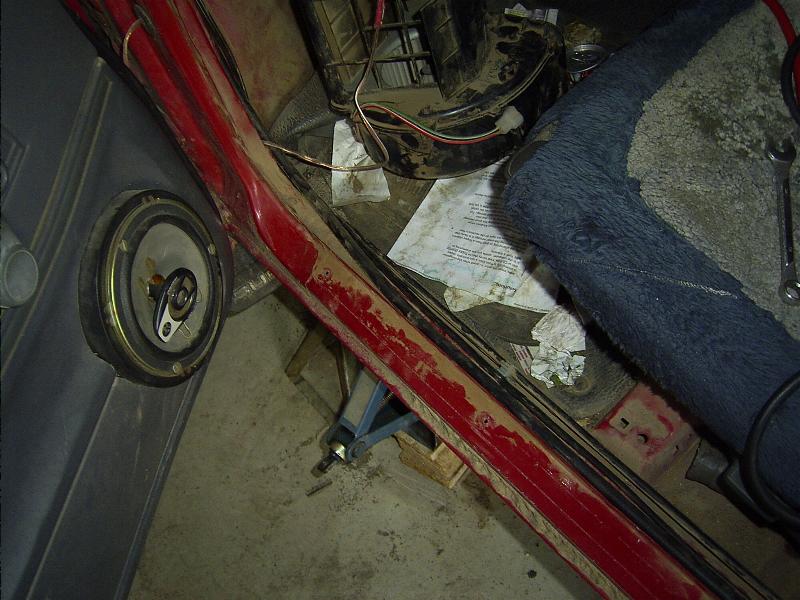
I’ve also pulled the left drive shaft again (second time this year) to fix the stupid boot clip things and clean the dirt out of the rubber to metal joint.
http://offroadingsub…_libertygx1.jpg
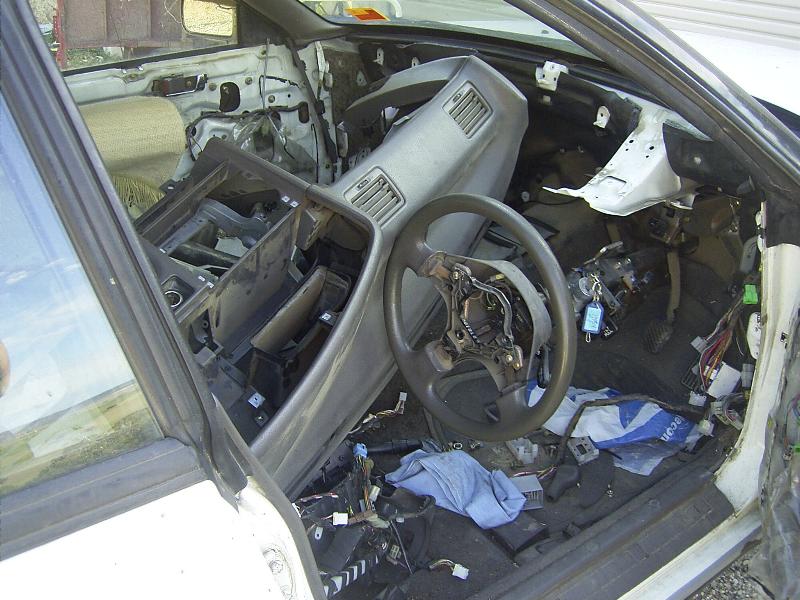
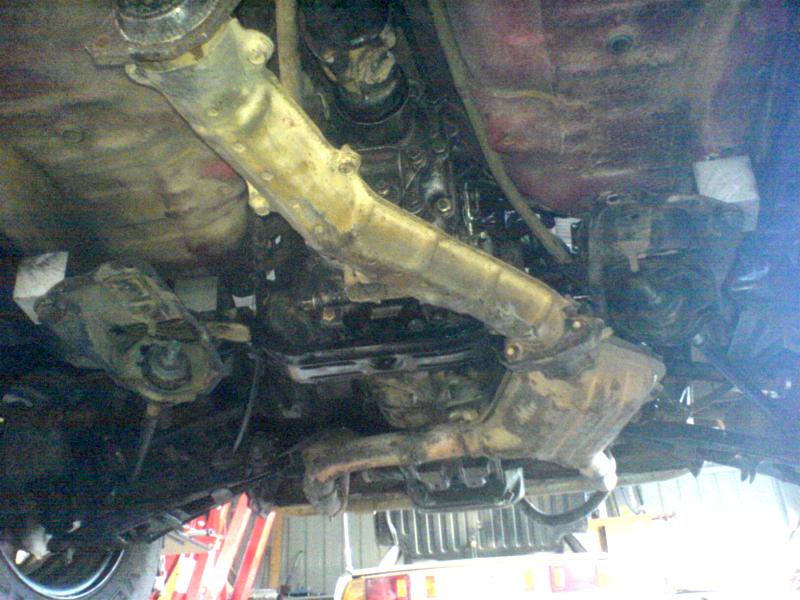
http://offroadingsub…_libertygx2.jpgHere is the striped out Subaru Brumby that’s getting the Ej22 and funky swap box that I built.
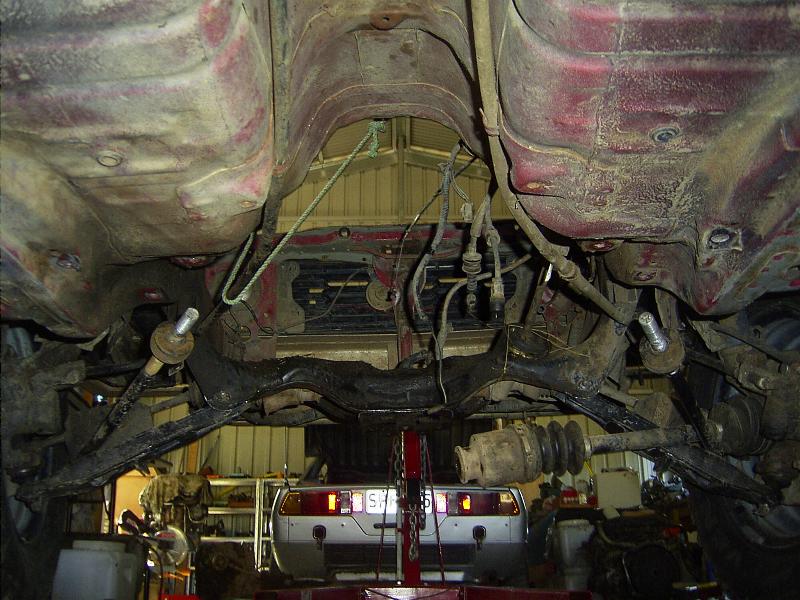
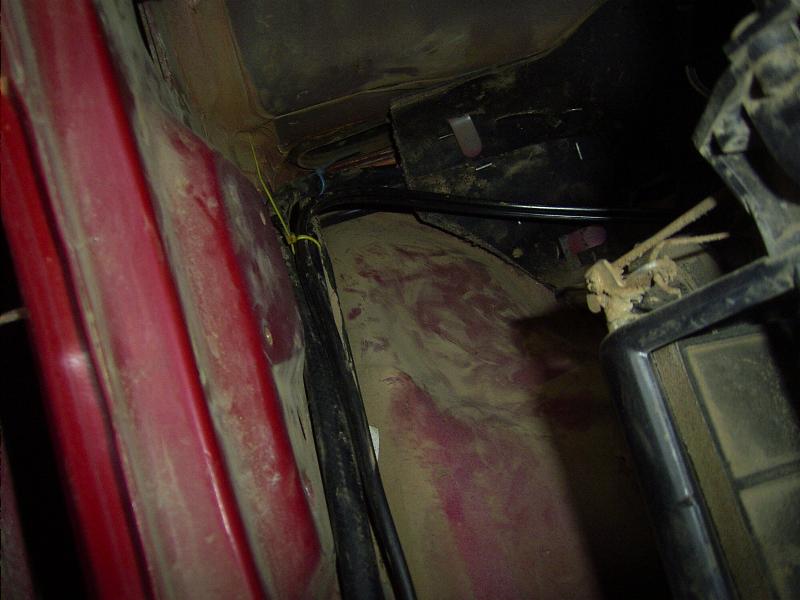
http://offroadingsub…_underneath.jpg
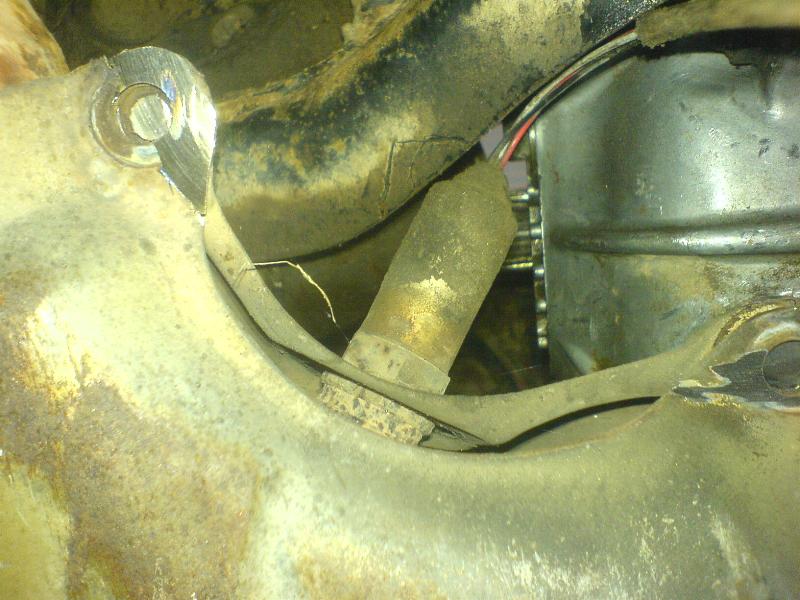
And here is an unexpected problem..
I was jacking the car up to remove the plate that bolts the gearbox crossmember to the body (or in my case, the lift blocks.) Mayeb this is what was making that noise I thought was a bull joint that I replaced not so long ago…
http://offroadingsub…ount_broken.jpg
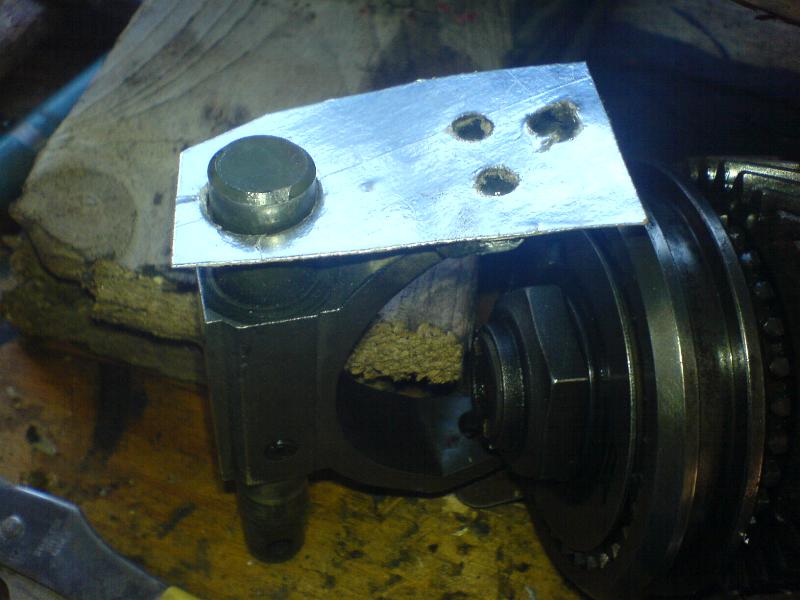
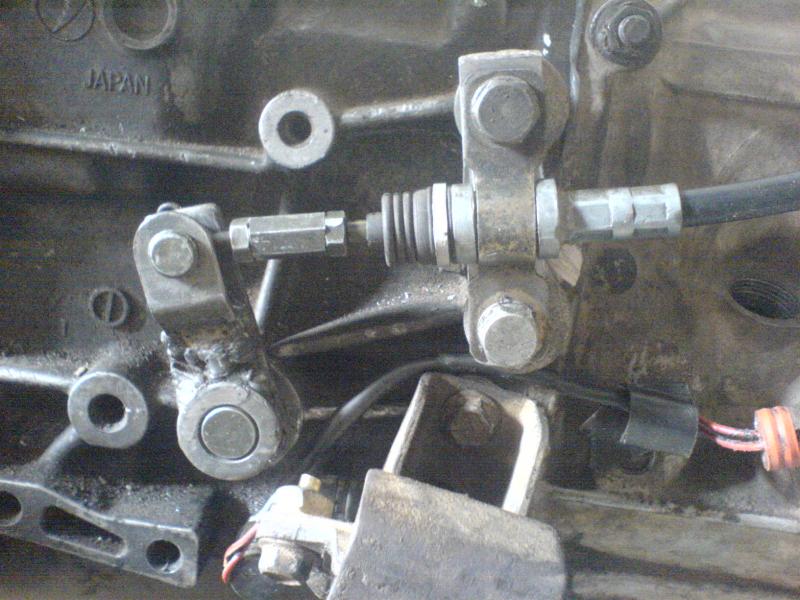
I gotta get some pictures of my custom bracket for the diff locker lever next. I warn you though, it is very cheap looking…
Posted 09 February 2007 – 04:15 AM
I cleaned the engine bay today. And drilled out the engine mount holes. I would post pictures, but the engine bay is still dirty looking (not as bad as it way, but) and the holes look terrible.. ahhaa, not trying to hard. But they will do the job and you won’t be able to see them so that’s alright..
My major goal is to make it look like that engine and gearbox was made for the car, eheh.
Posted 09 February 2007 – 11:43 PM
86BRATMAN said
excellent, form what you can tell much difference is there between the ej trans mounts and the ea82’s got any pics
Heres the best I can do for now.
EJ gearbox mounts
http://offroadingsub…vlsd_casing.jpg
EA82 gearbox mounts
http://offroadingsub…ck_onbench2.jpg
But what I am doing is converting a EA82 gearbox crossmember to fit where the EA81 one does. I am doing this because EA81 mounts suck, and I think modding the EA82 one in is better then modding the smaller looking EA81 one to fit the EA82 mounts.
I will have pictures of that soon I hope.
Alright.. An update of pictures! Because I found some more! ehhe
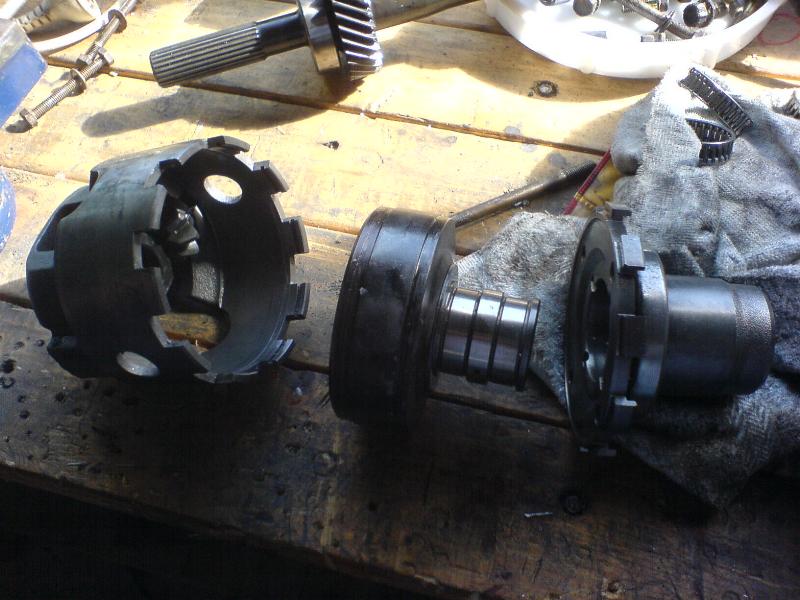
Starting with the EJ’s center differential
http://offroadingsub…vlsd_casing.jpg
http://offroadingsub…lsd_casing2.jpg
http://offroadingsub…_vlsd_apart.jpg
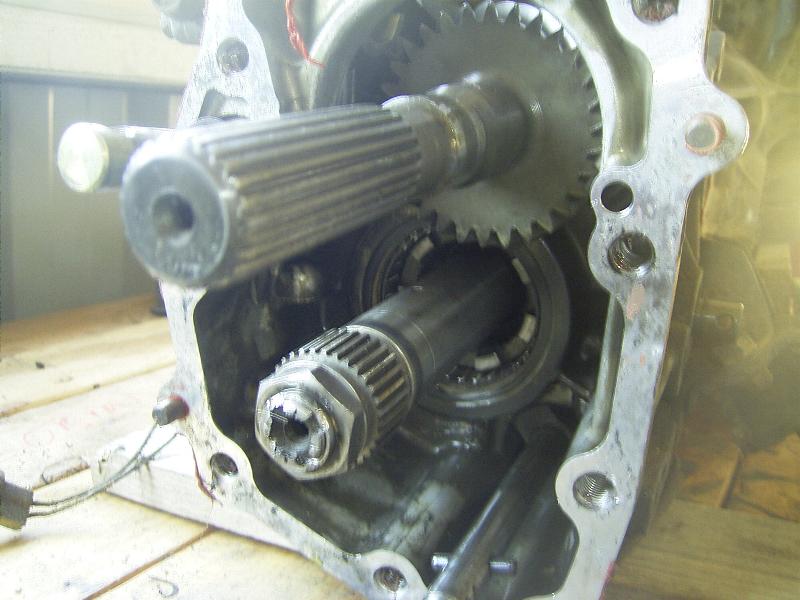
Moving on to the rear end of the EJ D/R gearbox with the rear casing removed
http://offroadingsub…pinionshaft.jpg
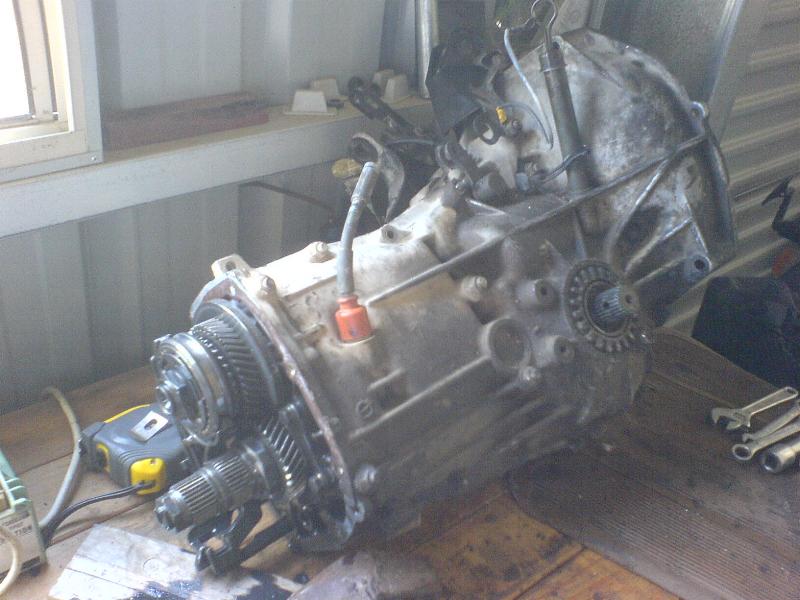
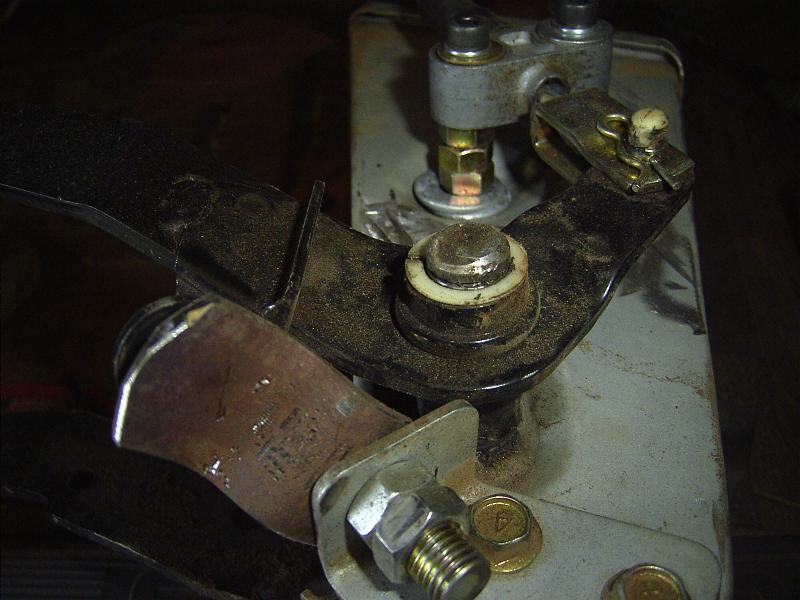
Now going to my final gearbox setup, EJ FT4WD, lever and vacuum solenoid mount.
http://offroadingsub…ocker_lever.jpg
http://offroadingsub…cker_mount1.jpg
http://offroadingsub…cker_mount2.jpg
I know it’s rough, but it works a wonder now 
Still no more work done to the car  I am planning to make some new alloy lift blocks for the gearbox crossmember so I can put it all back together and finish the work the the EA82 boxes crossmember.. Pics of that when it’s in and fitted.
Another update for todays happenings…
A fair bit happened today, as it was my brothers day off, or one out of three a week anyhow. So anyway, I got him to work obviously pretty much all day (well about 5 hours of the day anyhow.) Do you think I have said “day” enough times so far? :-\ Enough of that, time to show you some pics, as I know all of you like pics!
I’ll start in order that things happened. As I needed to pull the gearbox crossmember and the plates it attaches to (because one of the studs that holds the crossmember on snapped off,) I decided to replace the steel lift with the alloy one I had planned to do for a while now. Also because the bolts I bought ages ago were a little to long I got the thread cutters out and cut another 15mm of thread on each bolt (12Mx1.25) then got my bro to cut 20mm off of each bolt.
Results….
http://offroadingsub…ocks_brumby.jpg
http://offroadingsub…umby_fitted.jpg
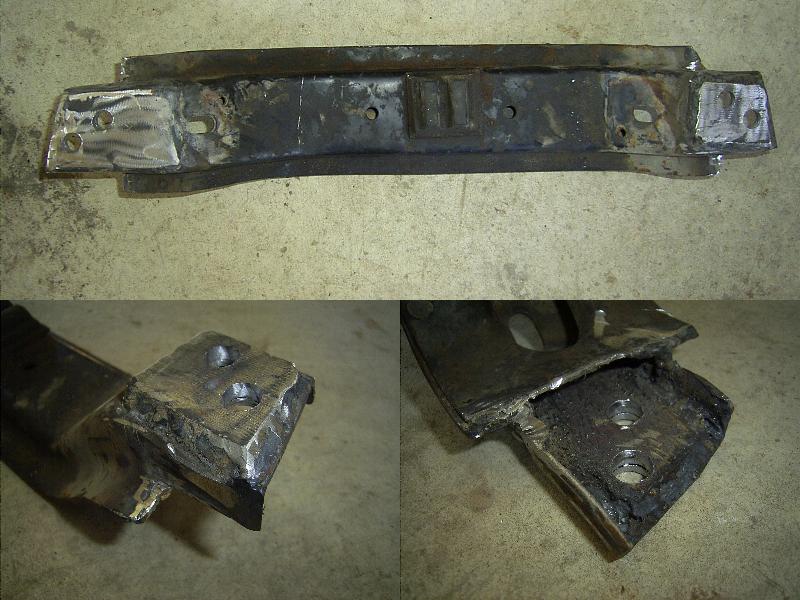
Then it was time to move onto the gearbox crossmember. I had already cut the EA82 version down to match the EA81 version a couple of days ago, but it needed reinforcing and some holes drilled. So, out came the angle grinder and 40x2mm bar steel. Then got my bro to weld it up.
Results..
http://offroadingsub…conversion1.jpg
http://offroadingsub…conversion2.jpg
http://offroadingsub…conversion3.jpg
http://offroadingsub…conversion4.jpg
http://offroadingsub…conversion5.jpg
Sorry, no pictures of it in as yet as the paint is still drying. So I’ll do that tomorrow.
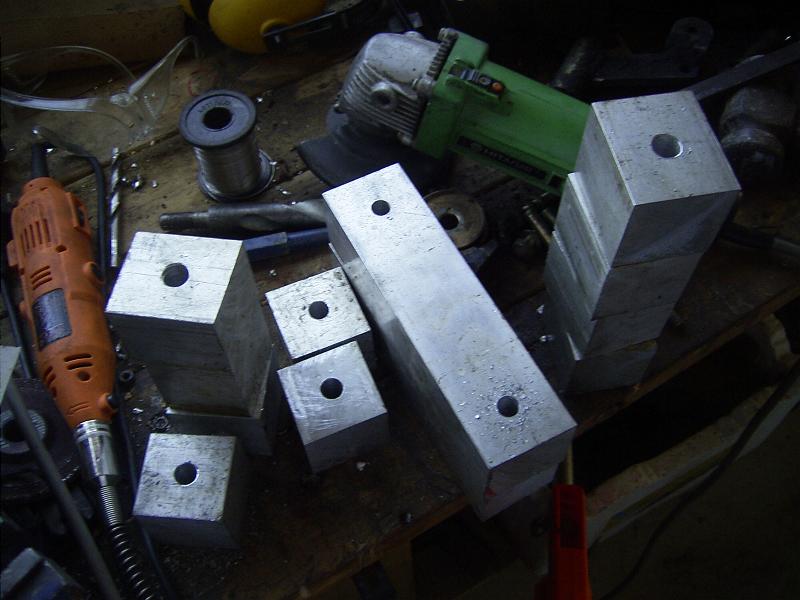
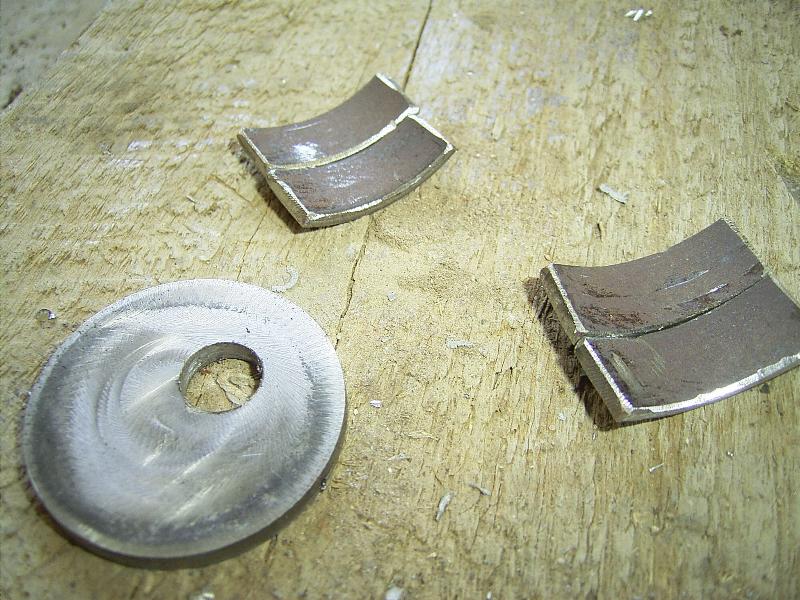
Then the last and hardest part of the day. The camber kit… Today we drilled the holes for the lower control arm camber cams. The engine crossmember is VERY tough stuff. With our brand new 22.22mm drill bit ( 7/8ths ) it was still very hard and I reckon the bit needs sharpening now.. Anyway, I wouldn’t suggest doing it… It wasn’t fun… The first picture is from the other day when I flattened out the crossmember to fit the camber cam which are 40mm by 4mm discs I made with the lathe, angle grinder and a towball. Four cams (discs) are needed in total. Also the cam’s need to be drilled with an off center hole, I’ll do that later tomorrow.
http://offroadingsub…crossmember.jpg
http://offroadingsub…ter_kit_cam.jpg
http://offroadingsub…crossmember.jpg
http://offroadingsub…crossmember.jpg
Posted 13 February 2007 – 06:31 PM
More updates!!!
Yesterday we worked more on the camber adjusters. I still need to put washers with cut outs in them in between the rubber and the ‘cam’ (in the 22mm hole I drilled basicly) so the rubber on the control arms don’t die. Heres some pictures.
http://offroadingsub…cuttingcams.jpg
http://offroadingsub…ter_kit_cam.jpg
http://offroadingsub…lding_final.jpg
Top one is cutting the discs using a lathe on thread cutting speed and an angle grinder. I would of used a cut off bit in the lathe but the tow ball I used was such hard steel the bit could not take the heat so it was doing more cutting to the bit instead of the ball. The angle grinder worked a treat though!
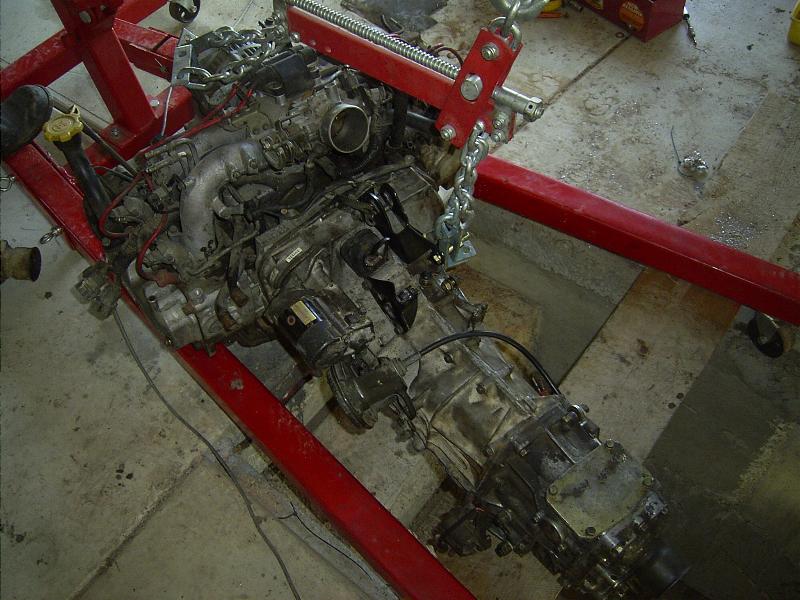
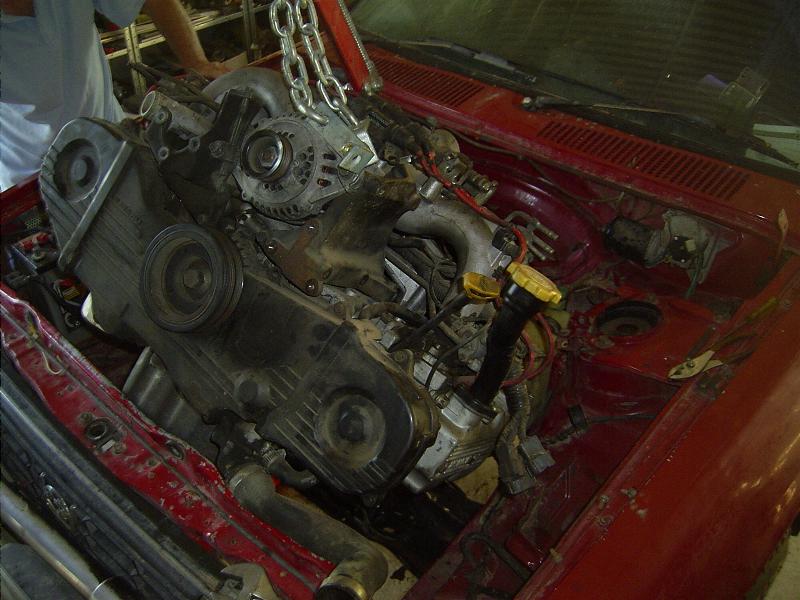
Then it was time to put the motor in. When I got it on the crane I relised I may have forgotten to make sure the holes in the new gearbox crossmember lined up properly. I figured the easiest way to measure was to just continue to put the engine and gearbox in…. It worked! All lined out perfectly!!! Wooo hoo!
http://offroadingsub…crane_ready.jpg
http://offroadingsub…ne_goingin1.jpg
http://offroadingsub…ne_goingin2.jpg
http://offroadingsub…ne_goingin3.jpg
http://offroadingsub…arboxmounts.jpg
You may of noticed it was a little tight getting it in.. I think this is because the mounts we held the engine to the crane with were different to the EA81 and so we could not get as much angle on the setup as before with the engine leveler. My brother had to straighten the radiator mounts out and bent that piece of metal back after putting the engine in.. But other wise it fits beautifully!
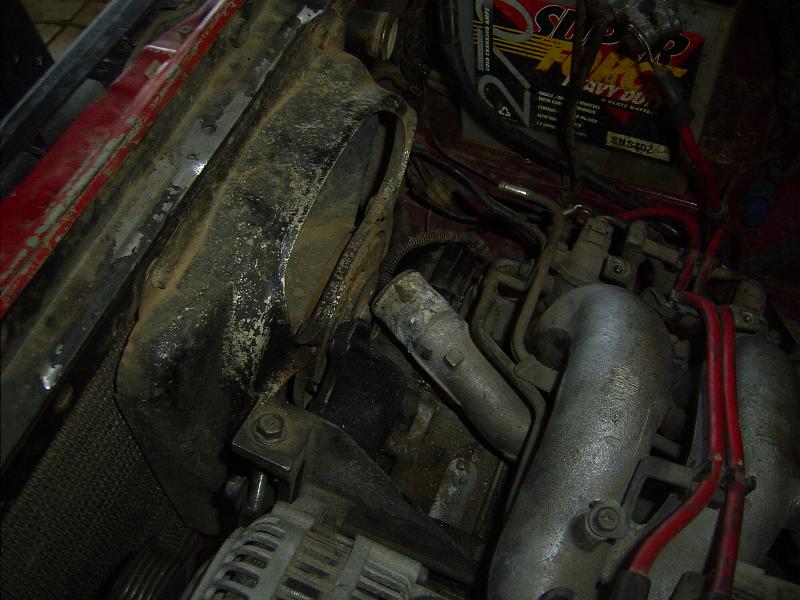
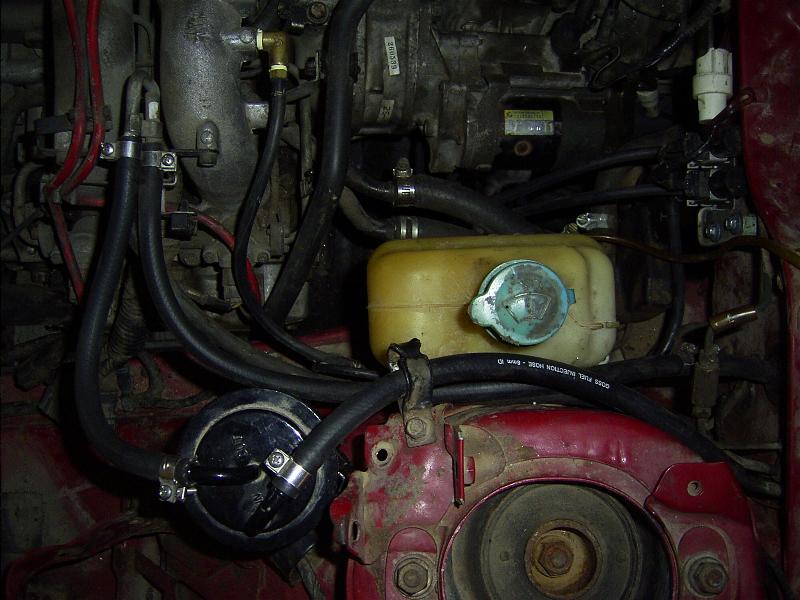
And some other pictures. First off my heater hose pipes. They were touching my vacuum solenoid and the starter motor. So I moved the whole heater valve backwards in the car and pulled the pipes a bit more into the car.
http://offroadingsub…eater_hoses.jpg
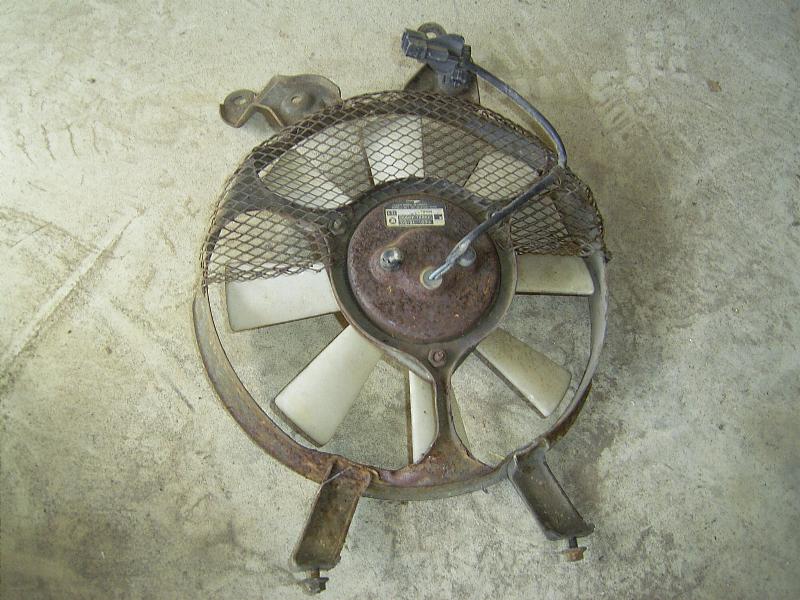
And heres an interesting one. No one has ever really shown me a picture of said how much room there is for stock cooling fans on the radiator. Heres why you can’t use the stock fans in my case.
http://offroadingsub…r_clearance.jpg
I plan to use 2 Air-con fans from Mazda 626’s on my EA81 radiator.
The EJ radiator looks like it would require cutting part of the chassis out, so I think I’ll stick with my EA81 version. And if it isn’t good enough in the future I’ll get a double core one. Although, mine has never had a problem with over heating my EA81dc exepct the few times the cap failed.
It’s almost time to get the wiring loom out of the box and place it in the engine bay to see if I can start this puppy.. Well I have some exhaust and cooling to deal with first. Also need to weld that center bearing in for the propshaft and deal with the shifter side of things. Oh and make that vacuum solenoid do it’s thing.. The list goes on, and on, and on….
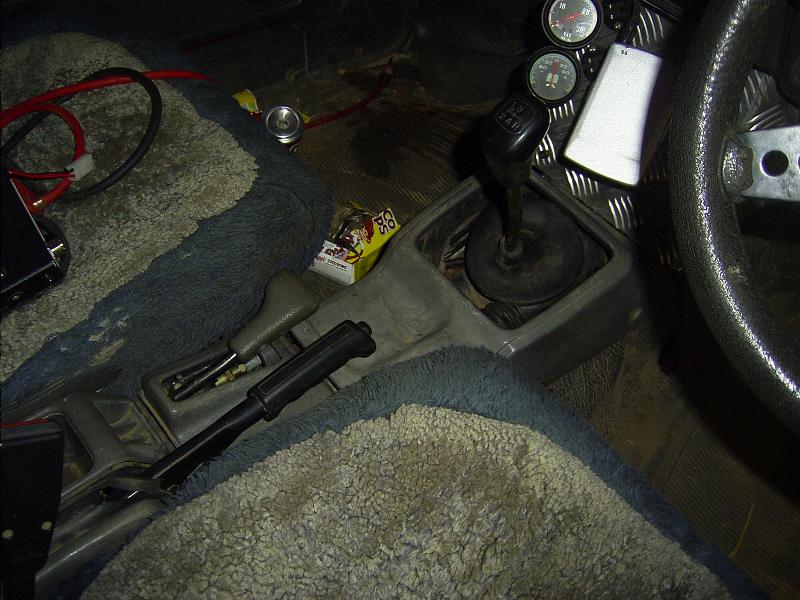
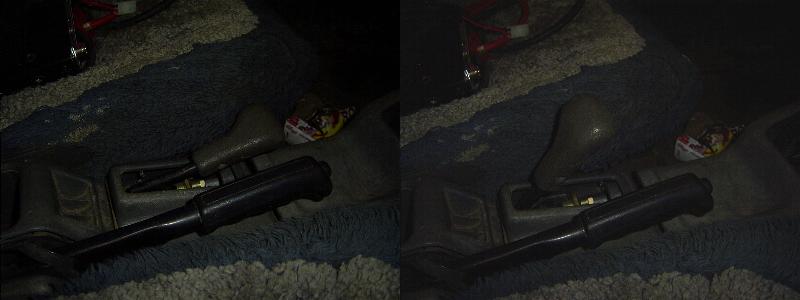
http://offroadingsub…sp_shifters.jpg
http://offroadingsub…e_positions.jpgI had to remove the boot for the low range lever too
 and I’ve long since had a boot for the shifter. Maybe I’ll get something for them. Might have to break out the lether, tools and sewing niddle…I’m going to work on the intake later today. It’s good not having a full time job ahaha.
The y-pipe exhaust looks like it needs some cutting and welding to get it to fit how I want so I’ll have to wait til my brothers got another day off, as his 100% better at welding them me. I better start looking for a muffler. I want 2 inch pipe cat back. I want a muffler thats the same as my old one, which looks something like this:
_____| |_
|……/ /..|
|…../ /…|
|…./ /….|
|…/ /…..|
|../ /……|
|./ /…….|
-| |——
lol.. I wonder if that makes any sence to you?
Basiclly it’s a straight through but it goes on an angle. It sounds 10x better then a “cannon” or “hot dog” muffler I reckon.
Alright, another update.
I’ve only been working on small things since last time. But heres the big things from everything I’ve done.
First the intake. I really don’t like the setup I have created, but I’ll live with it for now. I wanted a air box in the spare wheel well out of the way and out of the water.
http://offroadingsub…ntake_setup.jpg
I’ve also pulled out a lot of trim to install a new fuel return hose. Oh the joys of pulling the air box out and squeezing wires and pipes where they were never suppose to go.
http://offroadingsub…fuel_lines1.jpg
http://offroadingsub…fuel_lines2.jpg
http://offroadingsub…fuel_lines3.jpg
I’ve also put the diff locker solenoids in and piped them into the intake manifold via one of the plugs on the side of it. I pulled the plug out and used a brass gas fitting, and it worked great. Lets just hope it operates the diff locker now….
http://offroadingsub…_subarubrat.jpg
One question though. Do the solenoids stay “on” all the time while either in locked mode or unlocked mode. Or do they just push the diff locker into place then switch off? There is a detent on the diff locker that holds it in place.
Posted 22 February 2007 – 09:24 PM
Numbchux said
Phiz. looks like you’re making good progress there. to answer your question about the diff locker solenoids. They do stay engaged. I found at the ice races (I didn’t have a T yet, so it was either heat, or locker…) that under hard conditions, it would frequently unlock on me. the stock switch is just a DPST switch, power in the middle, and then out one side, and straight to one of the solenoids.
Cheers for that. I think I’ll mount the switch where my choke cable used to go, on RHD car that’s just down and to the left of the steering wheel.
I’ve also soldered up plugs to the difflocker and reverse light sensors. My diff locker should light up the 4WD light now It will be interesting to see if that light works as I’ve never seen it on in this car before.
I still have to put the temp sensor in and figure out a oil pressure sensor too.
Posted 01 March 2007 – 10:15 PM
Bit more progress…
But first, I’ve been looking at what I’ve done with the fuel lines.. And I think it ain’t gonna work. After more research I’ve seen most people use the standard tiny return hose? And just use new rubber on them. I thought I had to replace the whole line, and I have. But on the pump I’ve used a T piece, which just ain’t gonna work. As when air gets in the system, which it will some time for another, it will just pump air.. So I am thinking of just using the original return hose from the tank to the fuel pump area and adapting it to my new EFI hose coming back from the engine bay. I’ll get on the lathe and make something up for there..
But for the real progress..
I’ve mounted the center bearing for the propshaft. No welds, just bolts. The pictures say everything that is needed. Execpt that I only have a 2″ lift so this is how I got away with this.
http://offroadingsub…aring_mount.jpg
And my bro helped me out with his welding yet again. We are hoping it does not leak, but if it does he’ll weld it up again.
http://offroadingsub…pipe_welded.jpg
http://offroadingsub…ipe_mounted.jpg
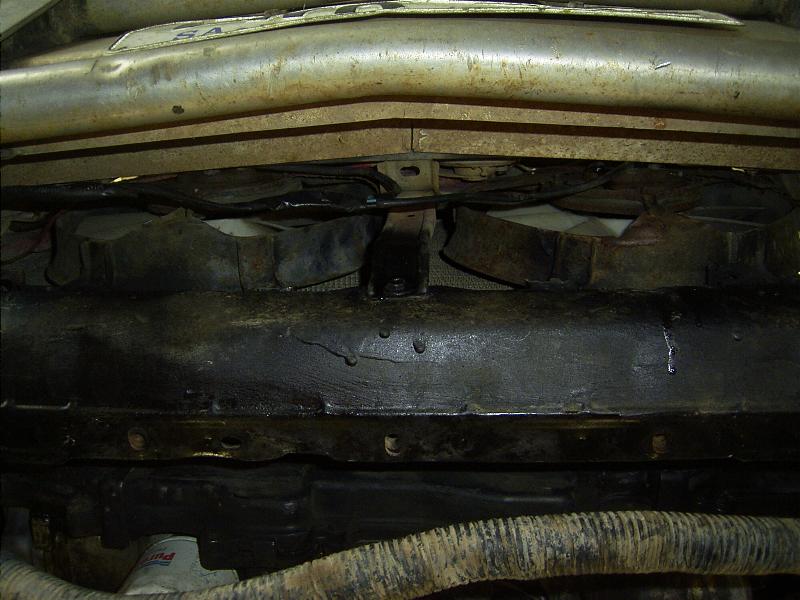
http://offroadingsub…crossmember.jpg
The marked part on the engine crossmember in the last picture is where I cut out for clearence for the o2 sensor.
On the right pipe I made a slit (not all the way thru) about 1mm thick. And on the left pipe I cut a wedge shape of about 12mm wide near the cat and then cut out 15mm of the pipe near the engine. It didn’t go all to plan and needed a patch to make up lost pipe. So I hope it works..
I plan to get an exhaust shop to setup something much better later on. But for now I’m just going to use my old 2″ pipe and muffler… At least that way there is some upgrading to be done So if “I get bored of the sound or there isn’t enough power I don’t have to do anything ridiculus.
I have made a list of other things to complete, and it is growing. I can’t nock enough off of it quick enough before I tihnk of new things.
The radiator I got from a 89 Nissan was looking like it was going to fit great until I relised the filler cap was going to be sticking out the hood… :-\ So I’m not working on mounting it lower which will help with mounting the lower rad hose anyhow..
The more I do, the more that things go wrong and the more work I create. I am almost at the point of testing the engine and loom, but I really don’t want to just incase it doesn’t work 
Posted 02 March 2007 – 04:11 AM
the_postie said: Not a 100% sure but i think the 89 rad is different to the 87.
Yeah, probably. I checked it out at u-pull it and it looked good. It would fit a stock EA81 great but for the fact the filler is so high… The pipes are slightly smaller then the Liberty ones, but I think the liberty pipes will go on ok
Posted 05 March 2007 – 05:33 PM
carfreak85 said
So was there any difficulty in installing the EA gear stuff in the EJ box? Any grinding or silly things like that? I don’t think I’m going to do anything like that, but I will be diving into a gearbox and swapping some gears around(3.9 gears into an RX box with 1.5 low range). I just need the voice of experience from someone whos been inside a gear box.
The problem that we’ve explained in other threads about changing the diff ratio with a RX (center diff lock) box is the pinion shaft is a 3.7. And the pinion gear is part of the shaft. You would have to be a BLOODY good welder to put a 3.9 or 4.11 pinion gear on the pinion shaft.. Swapping the low range in the EJ box required a detent to be welded up on the EA82 shift fork as you can see. This makes sure the gear stays in. This is because the EA82’s low range detent is in the back section with the 4WD selector. Which I think if you want 3.9 you are going to have to use the PT4WD rear end of the box. I don’t know what the RX gearbox has for a detent on the low range shift fork as I have not seen a RX casing, my diff locker box had already been merged with PT box. I have seen people with PT 5spds and dual lever (for lo hi) and they don’t have problems with it slipping out of Low range. So The detent may not be needed, who knows..
Posted 06 March 2007 – 12:54 AM
After 3 hours of trouble shooting the loom, she RUNS! WOOOOO HOO
 :banana:
 😀 * *
😀 * *  The problem was in the sheiding lines for the gray cables that go between the ECU and major engine componets..
When I done the loom ages ago, I must of taped the sheid GRD (ground) wire into the Ingition switch wire. Stupid me. But After 4 fuses and the 3 hours, it goes.. And runs sweet. I’ll post back in a bit with photos, and then VIDEO of the very first try and start of the BEAUTY!
Posted 06 March 2007 – 01:06 AM
86BRATMAN said
Hell Yeah man. Congrats.
Hell yeah indeed!!! I’m so relieved!
http://offroadingsub…iring_test1.jpg
http://offroadingsub…iring_test2.jpg
Heres the wiring. Next steps are:
weld EA82 throttle pedal to fit EA81 pedal box,
fit pedal box,
Clean up wiring loom and fit,
install original EA81 radiator, which requires some welding to the front chassis beem,
weld old exhaust pipe to new flange and bolt on,
fit pod filter,
fit all interior stuff, dash stuff, seats, etc,
new switch and wiring for diff locker,
… The list goes on! I’m hoping to get it all done before next weeked though.
Posted 06 March 2007 – 01:28 AM
Video is encoding…..
Heres what I have done for the rest of the fuel lines.
I used one of the vent hoses, the one that vents into the top of the vent box in the rear gaurd. And I used the original fuel return hose. So this gives me a 3mm tube and a 6mm tube to return from the engine. And as I said earlier I also ran a new return hose to where the pump is from under the hood. This is just a rubber EFI grade pipe which runs under the door trim.
http://offroadingsub…fuel_lines4.jpg
http://offroadingsub…fuel_lines5.jpg
http://offroadingsub…fuel_lines6.jpg
The vent hose I done, as you can see in pic fuel_lines4 I have a T piece and then it runs a rubber pipe into a hard line. This hard line is from the original EA81 carbon canister vent from the front of the car, just cut off the smaller pipes and zip-tied it in next to the tank.
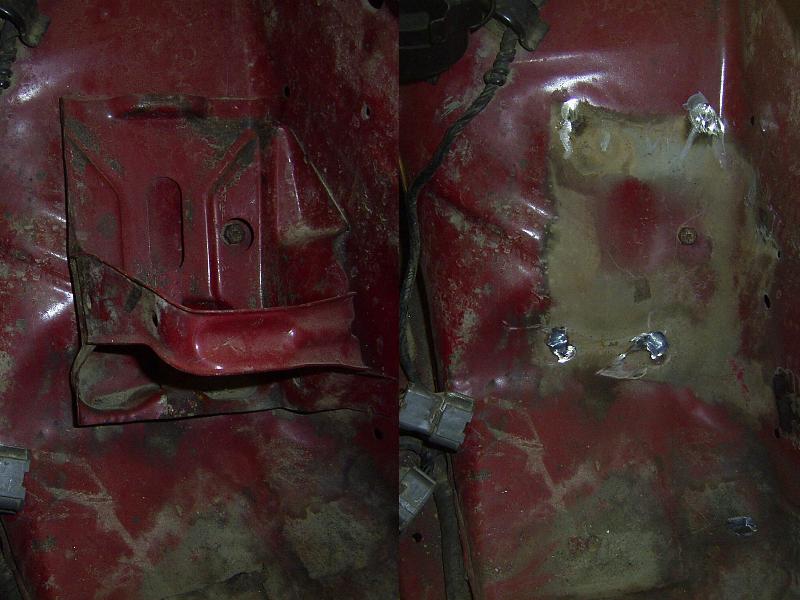
I have also fit the EA81 pedal box with the EA82 clutch cable so it reaches the 5sp’s clutch lever (I think this is only a problem for RHD cars.)
http://offroadingsub…bleandpedal.jpg
http://offroadingsub…ads/it_runs.wmv
VIDEO! 
Lovin it… Can’t wait to drive it..
I just happen to have my Brother and his mate working on a snorkle for a Subie and my dad as spectators!
Posted 08 March 2007 – 09:55 AM
I am having a little trouble understanding what you did. There might be something lost in the Australian English – American English reading.
From the pictures it you put the T near the gas tank.
What do you mean by the “rear guard”
From the pics it looks like the pump is in the stock location. is there also a pump near the engine?
Posted 08 March 2007 – 09:24 PM
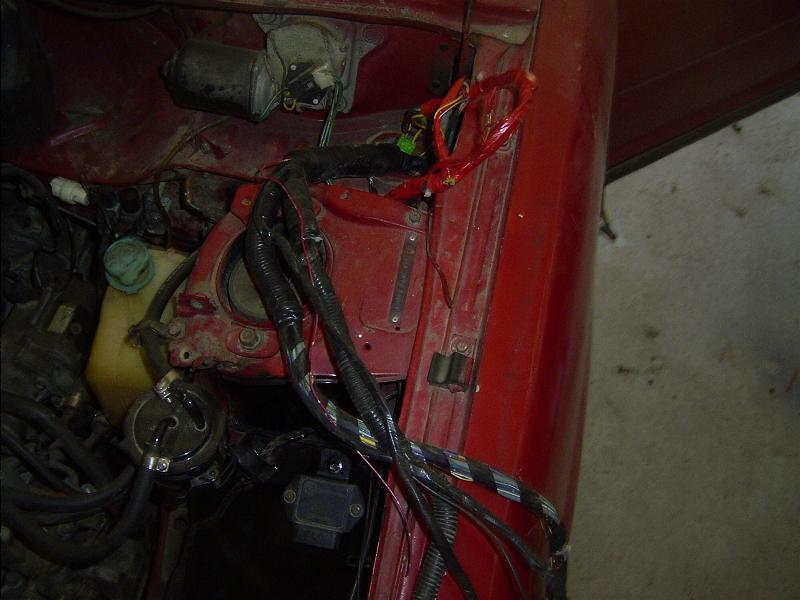
Alright.. So after all those questions about wiring and getting my loom ready to my installed into the car here is the first stage I done yesterday.
http://offroadingsub…om_install1.jpg
http://offroadingsub…om_install2.jpg
I pushed it through the left hand side rubber grommet which wasn’t in uses (keep in mind that this is a RHD car.. so passenger side for me.) I then mounted the ECU right where the air vent pipe goes  stupid me. But I could not find a better place so I made some slight adjustments to the fan air vent pipe.
http://offroadingsub…p_ecu_mount.jpg
http://offroadingsub…cu_airvent1.jpg
http://offroadingsub…cu_airvent2.jpg
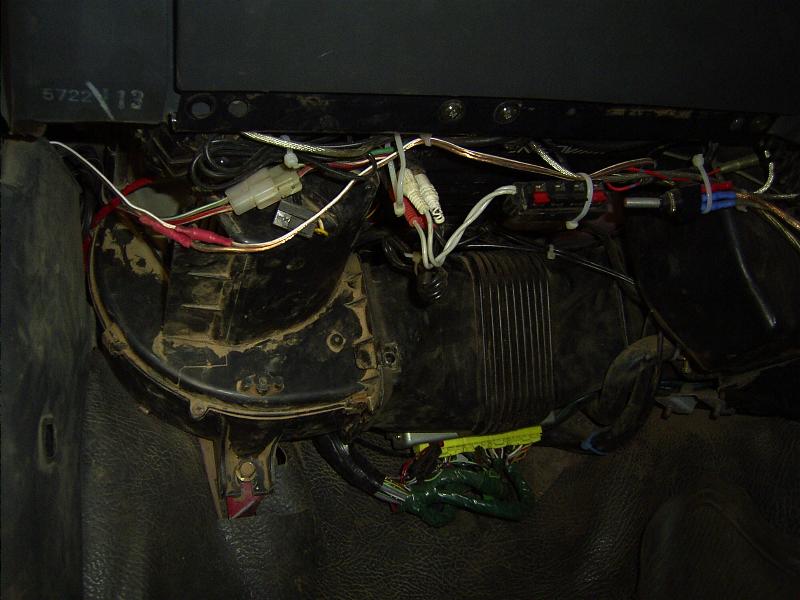
Then I installed the relays onto the side of the car.
http://offroadingsub…om_install4.jpg
And after all that I spent another hour trying to fit that bloody fan box back in!  That thing is a nightmare…
http://offroadingsub…om_install3.jpg
Also I found that my EA81dc’s oil pressure sender will bolt into the EJ’s block.. This means I new fitting on the wire and I’ll have my original gauge working!
http://offroadingsub…sure_sender.jpg
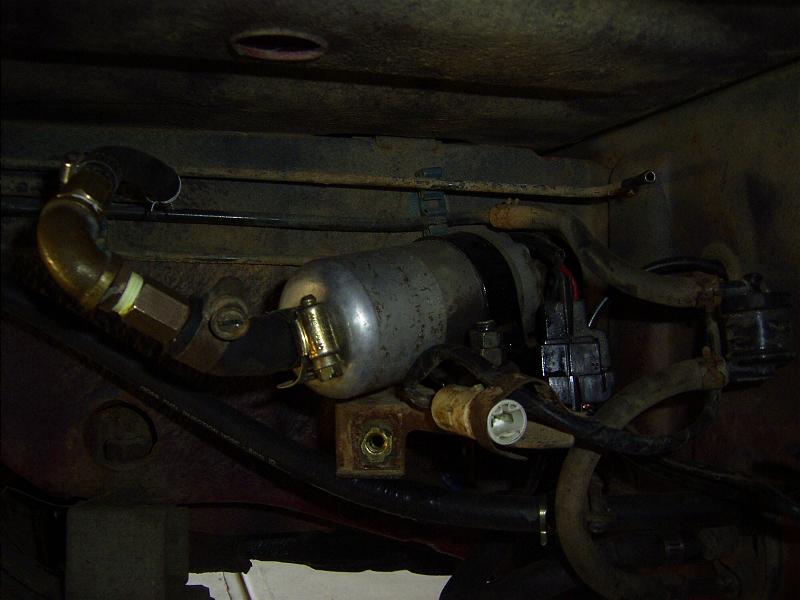
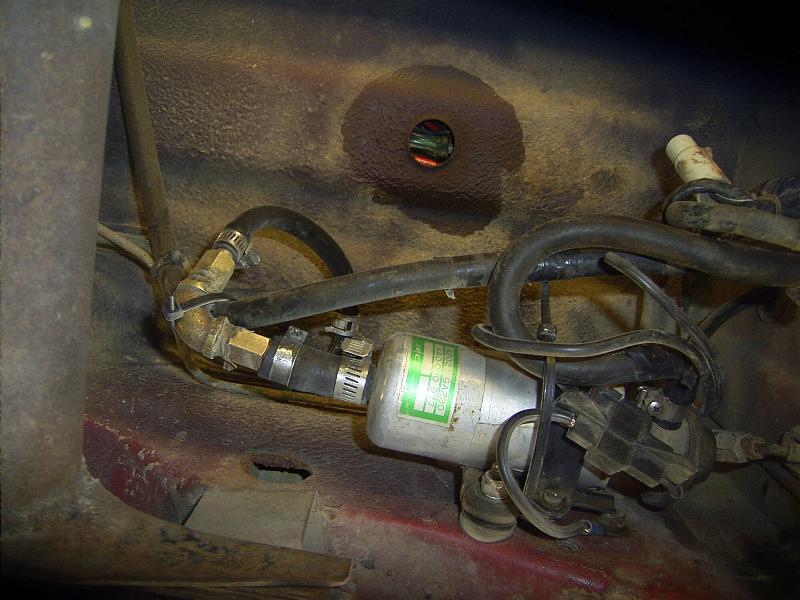
And of cause, I made way for some wires and maybe a overflow bottle by cutting out the jack bracket. I have also mounted my ignitor just above where the bracket once sat, right next to my Liberty/Legacy fuel filter. I’ll get a picture of that when I put the engine bay side of the loom in.
http://offroadingsub…ack_bracket.jpg
I also have painted where the jack bracket was black to prevent rust.
Still lots more to do. then 
Posted 08 March 2007 – 09:58 PM
86BRATMAN said
That box is held up by the 2 10mm bolts through the bedside isn’t it. I Remember seeing it now that I think back to undercoating the insides in my brat
It was two philps head screws on my Brat.
I pulled one out of my wrecked wagon and cut it open to make sure it wasn’t anything special. I’ll try my best at some text art to describe it.
………………………tank vent………….
…….._________||____…………
…….|…………………………..|…………
…….|……………|…………….|…………
…….|……………|…………….|…………
…….|……………|…………….|…………
…….|……………|…………….|…………
…….|……………|…………….|…………
…….|__|| ___|___||__|…………
…..canister vent – fuel drain back vent..
Mack sense? All the vapour goes into that box, then the liquid splits and goes back into the tank while the vapour goes inthe to canister under the hood, which *should* end up going into your intake via a vacuum hose while your car is running..
Ok.. Now I have an alternator question. In my car I have a plug with a large white wire and a small white/red wire. Along with the large white that bolts to the alt. On the new loom, the alt has two large white wires that bolt to it together. And the plug has three wires, 1 big white, 1 small black/red and 1 yellow. I’m guessing the black/red wire has to go to the dash for the alt light and the whites all just go to the battery. But… what’s this yellow? Where should it go? no where?
Also how did people splice the alts wiring to the chassis wiring? I can’t solder it as it seems to big and I don’t think crimps are going to be good enough. I’m thinking of a screw connector now, I’ll have to see what I have in the shed.
Posted 11 March 2007 – 12:30 AM
86BRATMAN said
I was looking at that the other day on mine. One of the big whites looks to go to the fuse box for chassis electrical and the other looked like it went to all the crap for the legacy a/c system. Not sure on the yellow’s function, but after I cut out the a/c relays and stuff it went nowhere
Posted 11 March 2007 – 11:50 PM
I got the alt wired up. My 40watt switching iron just couldn’t get hot enough, so I used a flame and that did the trick. I fixed up my lower radiator mounts (kinda screwed it all up when fitting the Nissan radiator to the point where the Brat one wouldn’t go back in. So I welded some plates to the bottom chassis rail with cut off bolts sticking up out of them for the radiator to slot onto. I tell ya, I’m not a great welder, I’m glad I got my brother around for welding the exhuast and crossmembers…
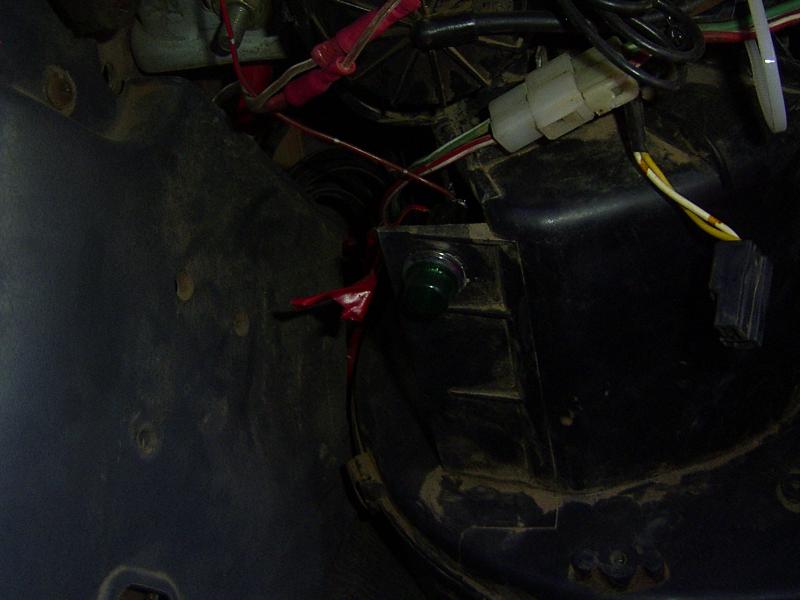
I’m working on the diff lock switch now. I’ll have pictures in a while I hope. You know where the standard “warning” sticker for the 4WD lever is? Well I got the switch and two LED’s in there. yellow for lock, green for open. I also have the diff lock sensor in the gearbox wired to the 4WD light on my dash, but I have no idea if that light even works. I’ve never seen it on.
Posted 14 March 2007 – 06:03 PM
http://offroadingsub…ker_switch1.jpg
http://offroadingsub…ker_switch2.jpg
It’s a DPDT, one poll runs the LEDs and the other the solenoids under the hood. Both the LEDs have 1800ohm resistors soldered to them too, btw.
I have also sorted out the rest of the wiring. I’ve got the gauges wired up (execpt the resistor for the temp gauge.)
http://offroadingsub…augecluster.jpg
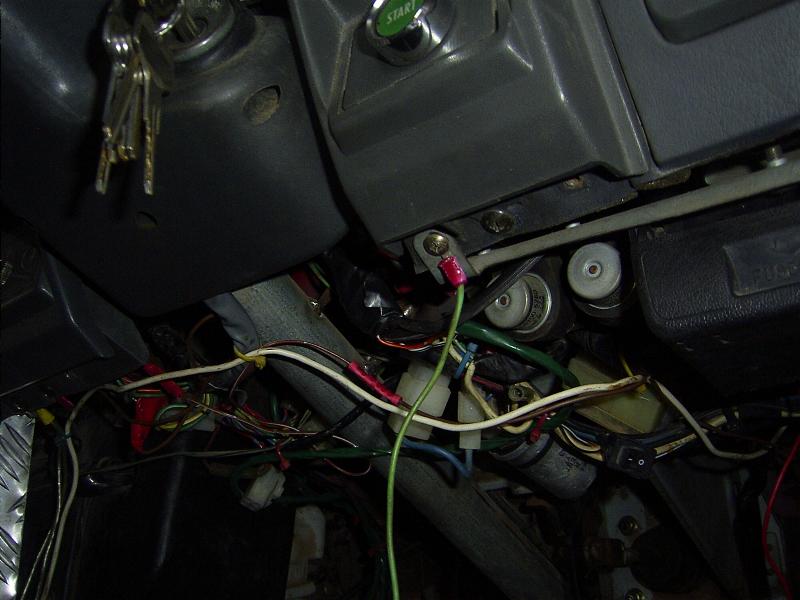
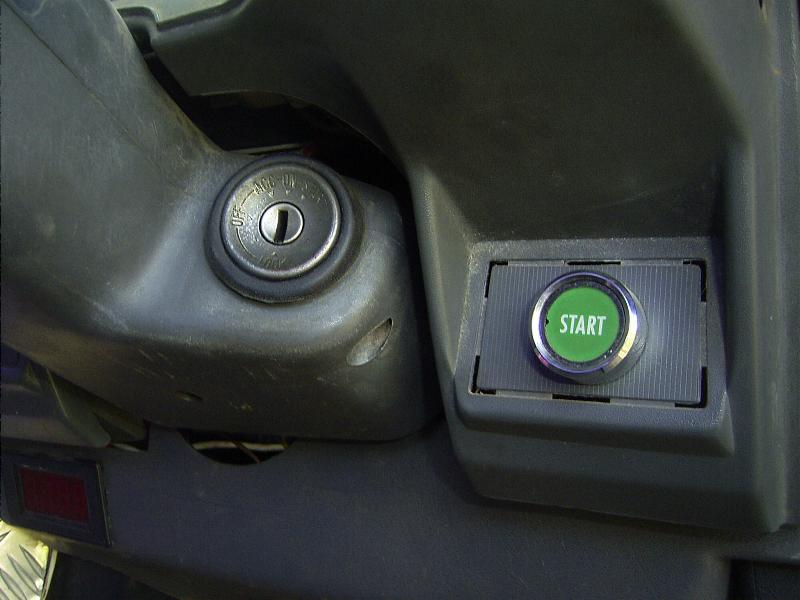
This is a picture of my fake kill switch. And also my new start button.
http://offroadingsub…kill_switch.jpg
The start switch in my ignition key is half screwed up and needs WD40 offen to work. So I wired in a extra start switch so all you have to do is put the key on ignition, and hit the start button til she run. I’ll have to find a better picture of the start button.
I also got the EJ looms power sorted into the ignition too. I wasn’t sure if the ECU needed the start wire from the loom wired in or not, so I ran it anyway. Then there was constant, ECU backup, and ignition. All seems to work good, and it does that little primer thing with the fuel pump.
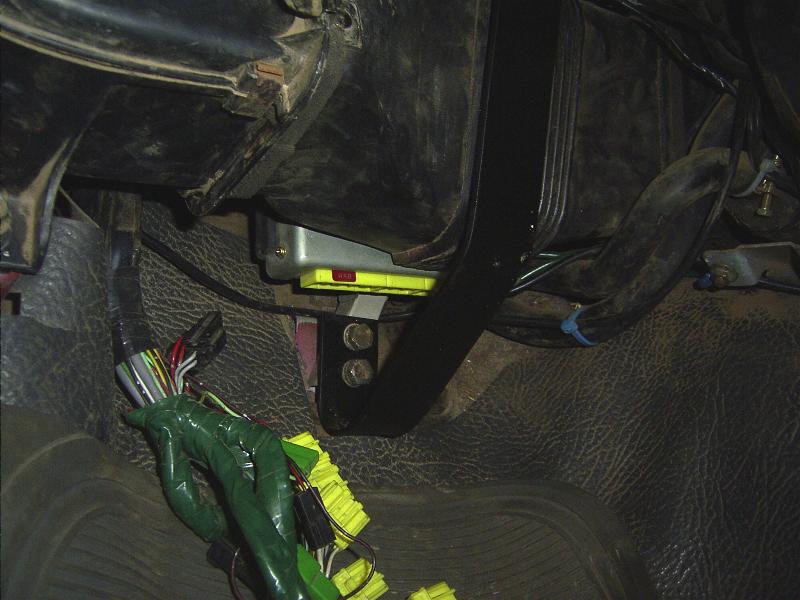
After putting the passenger seat back in I found that the ECU wires where a little vonrable. So heres a bracket that helps.
http://offroadingsub…rvent_guard.jpg
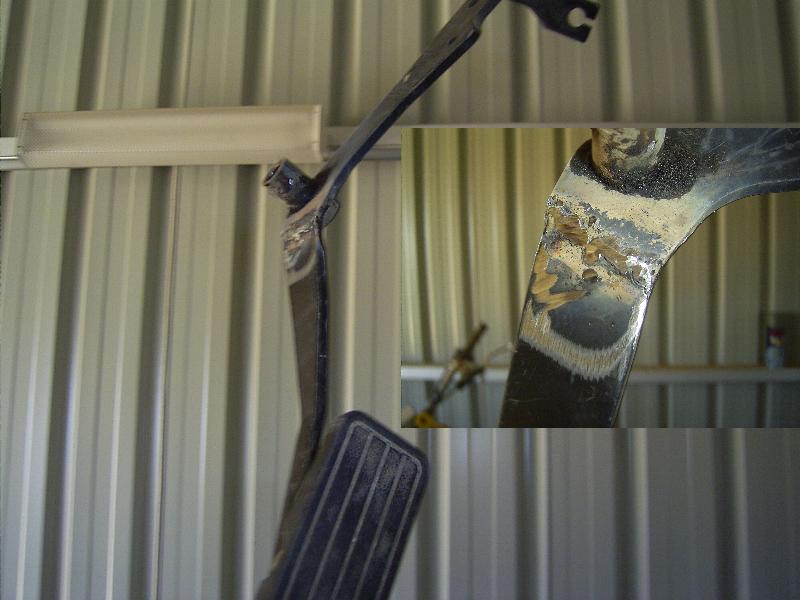
Throttle pedal has been welded up and the throttle box is back in. In this picture it doesn’t show the second cut and weld that my brother did to the top part where it connects to the cable. It needed to be about and inch further back and also more inline with the pedal. I might get a picture of it now that it’s in the car.
http://offroadingsub…ottle_pedal.jpg
Aren’t my welds just lovely. I also used a 86 Mazda 626 throttle cable. I’ll get a pic of that too.
My EA81dc oil pressure unit is in, I hope it works now, first time I put it in it was a little loose and leaked. But I reckon it’s good now. Time will only tell.
http://offroadingsub…nit_adapter.jpg
I could of just gone out and bought a elbow with the right threads, but I figure this will do and it saved my an hour and a half driving. Well, it took about half an hour to braze it up, and another to bolt it all togther and in.. It works… maybe.
And now to the radiator fans. I used two Air con fans (because they bolt to the front of a radiator and blow the right way) from two Mazda 626’s, yes, we do have a few wrecked cars here.
http://offroadingsub…onfan_stock.jpg
Each has the blowing power of maybe 2/3’s of the original electric EA81 fan.
Another note here is my EA81 only ever over heated when the cap died. And that includes driving in 35degree C heat.
A bit of cutting here, and bit of cutting there. Some bending and drilling here, some more cutting there. And….
http://offroadingsub…nfan_fitted.jpg
And of cause… The most important thing in this type of modification.
http://offroadingsub…xtinguisher.jpg
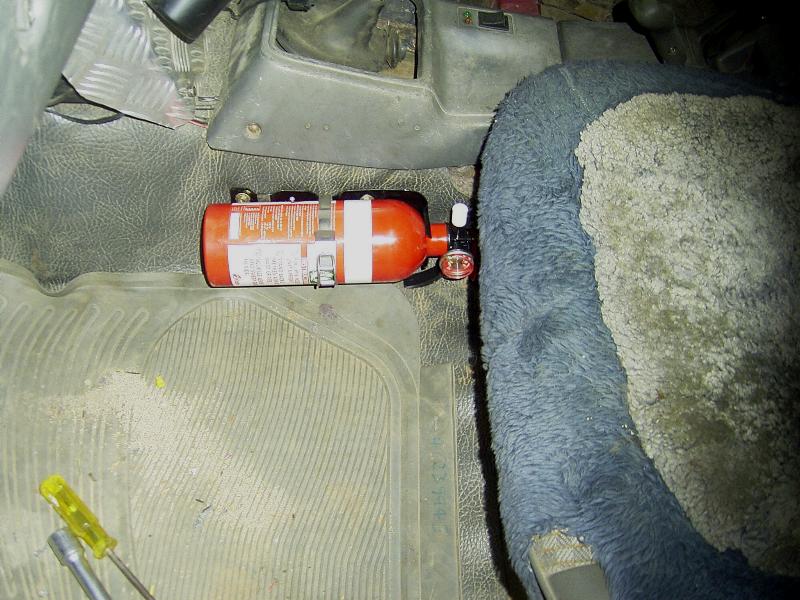
I’ll report back after the first test drive, I hope it will be today. Only a few things left to do.
Posted 15 March 2007 – 01:10 AM
It drives..
But..
I’m un happy with the power.
Just say if my brothers EA81 is 78hp, and my EA81dc would of been 90hp on that scale, then this EJ feels like 105 tops maybe.. :-\
Keep in mind I have never driven a EJ22 on the road execpt this one.
So I tried to read the ECU codes thru the CEL wire. But when I plug the CEL plugs in the light doesn’t come on, but the fuel pump comes on repetitively in intervals of say 1.5seconds. How weird? I’m going to look at the code reading info I have and see if I can figure this out. One thing I done with my loom when cutting it down was take out that SELECT MONITOR plug (I didn’t mean to, I SWEAR!) I was just cutting wires off the loom that go to it and then I found out what is was, by then I only had 3 wires from the ECU going to it.. So I cut those out too.
The gearbox has a little noise in it. Sounds like a bearing or something. I don’t think it’s major so I’ll leave it alone and keep my eyes on it.
Another thing, the temp gauge. When I started the car up the first time with water in it the gauge got to half way up before I realised my fans weren’t working. So I pluged the fans straight to the battery and the gauge stayed at half way. When I was driving it it was half way all the time. I kinda got worried that I was cooking it, but it didn’t boil or overflow, and it is only running rain water ATM. Then my brother brought up something when I took his car down the street. He said, are you sure the resistor/difference in temp sensor is for EA81s as well as EA82s. Cos he runs a EA82 sensor on his EA81 and the gauge reads 1/4, it used to be 1/2. And at 1/2 he says it boils. I’m going to see if I can get a thermometer in there somewhere to see how the temp is, or maybe borrow a mates laser one. But at the moment it looks like the EA81 gauge (in the tacho dash) works with the EJ sensor.. Hmm, weird. Any thoughts?
Diff lock works too, but I am already missing that locked rear
Posted 15 March 2007 – 06:24 PM
Last night I took it for a drive and let my brother have a go, because his driven a auto EJ22. He says it’s better then that one, but I thought it would be more then better being that autos suck power and I’ve got a coupld of hundred less KG’s. I have now noticed it pulls from 2K a fair bit better then my dc EA, and it’s power is a LOT smoother upto the rev limiter (just under 7K, is that right?) I’ve also noticed it’s getting fuel starvation when going up hills and around corners.. Yes, I only have a quarter tank of fuel. Looks like I’ll be in the market for a surge tank.
Yeah, I read the test code thing I saved ages ago and I figured out what I was doing wrong. But I have had no time to check it out since then.
Stock EA81 coupe dash gauge with stock EJ sender. And I’m running plain water, no over heat, over flow or boil with the gauge half way up, and it didn’t move above that. I’m going to plug the fans into the EA81s radiator thermo switch and see if it will turn the fans on, and where on the gauge it will do that.
But now I have to fix my muddy wheel bearings and my really heavy steering (look in old gen for my new thread.) I need this fixed within 24hrs :-\
Posted 15 March 2007 – 06:50 PM
And for those of you who are going “fake kill switch, how would that help?” It’s a discration away from my real one…  … And sorry, but I’m not saying where that is. What I can say however, It’s a SPDT swtich and when it’s in the “off” position if you turn the ignition on a piezo alarm. I am hoping if anyone looks under the dash to either pull the ignition plug out to hot wire it, or find out why it’s just screaming at them they will find the fake switch, switch it and nothing will change, so they will give up… I hope. Or by then maybe someone would of found them.
So, more on the temp gauge.. I tested it with the radiator fans plugged into the radiator thermo switch and they come on at the same place on the gauge as they used to. So the EJ temp sensor in my EJ22 (out of a 89 D/R Liberty) is the exact same as my EA81 coupe dash gauge.
And the fans seem a fair bit better at cooling then the original EA81 electric fan. I didn’t run the clutch fan, only 1 electric.
But theres another thing that is puzzling me now. When she was just ideling (warming up to test the radiator fans) her idel would sit constant for a good few minutes, then drop and raise, and just all over the place within 650RPM to 1250RPM. And then it would go back down to 900RPM and sit pretty good. Also she seem to have a stutter if you floor it from idel without load (just sitting there.) I think I noticed this taking effect when I tried a clutch drop start on a gravle road. Could this be caused by air in the fuel line? I’m not sure how much or when the fuel line is pumping air. I’ll fill her up with some premium 95oct fuel tomorrow.
Posted 16 March 2007 – 04:46 AM
I found some more ponys in the barn… Or is that horses under the hood? Anyway, when I was trying to find a rough idle problem I found that 1 out of the three plug leads didn’t change the engines idle. It did however effect reving. So, we swapped that lead with another plug and it was definitely a problem with the lead. But then I was looking at another one and it had dirty water all over it. So after using the air comp to blow it all clean and dry, we put it all back together, started it up and it was smooth. Took it for a test drive and theres at least 5 more horses, maybe even 10 in the “butt in the seat dyno.” But now theres a problem of any driving that isn’t straight and down hill it runs rough, I’m pretty sure I really need a surge tank now..
WARNING TO ALL BRAT CONVERTERS:
I’m very sure you will need a surge tank, I’m very sure you can’t do this mod and keep your 55litre tank without a surge tank. My brother alos warned me that if it’s getting that much air it might do damage so I have to go get fuel in the morning…
And of cause.. This wouldn’t be a conversion if I didn’t still have problems.
My idle is really weird. When I start the car, it runs at 1600RPM for about 4 seconds or so, then drops to 900RPM. Then, once it’s heated up and just before the fans kick in it goes upto 1200RPM and stays. After a 10min drive I pulled up and it was at 900RPM again. And the fans had stopped working properly so the heat was going up a little high.. I play around with the thermoswitch on the radiator and the fans start up. Then 3 seconds later, back up to 1200RPM or so.. What gives?? 
Oh, and I also got my 150mm x 92mm UniFilter foam filter.. I’ll show pics of it tomorrow maybe. Does the US get UniFilters? Good ol’ made in Australia
Posted 16 March 2007 – 08:30 AM
Posted 16 March 2007 – 05:40 PM
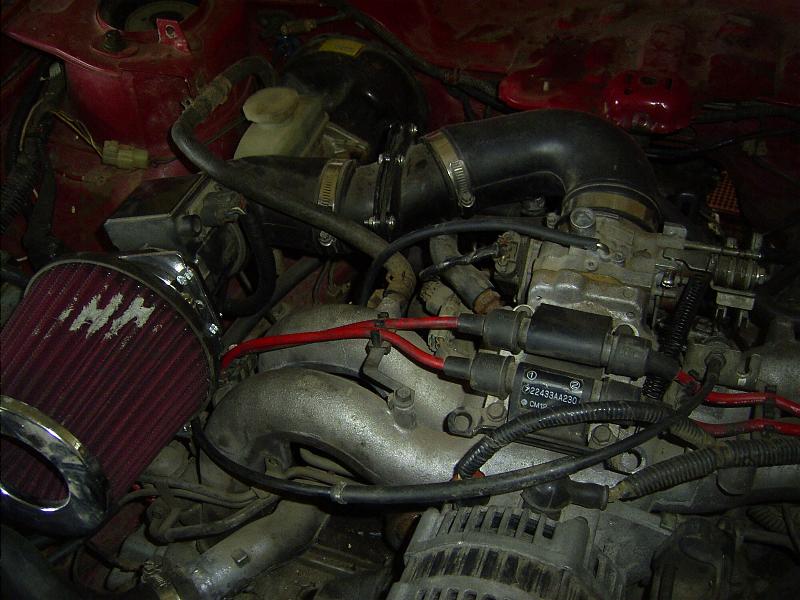
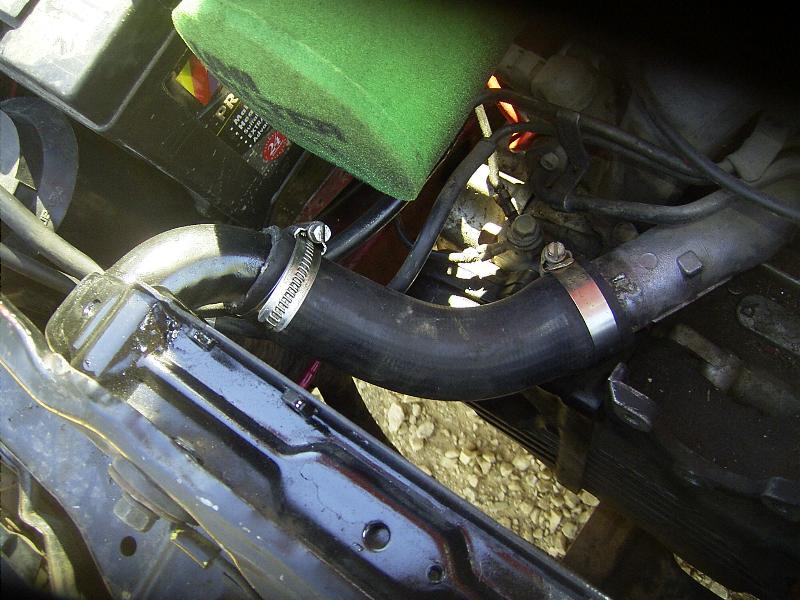
http://offroadingsub…e_underhood.jpg
That’s under the hood, showing the use of my mazda 626 throttle cable and another return spring.http://offroadingsub…e_footpedal.jpg
And another picture of the throttle pedal, sorta showing the extra cutting and welding we had to do.http://offroadingsub…exhaust_mod.jpg
This is the little bit my brother had to do to fit my old 2″ exhaust on. One day I’ll get a better exhaust setup from the heads to the back of the car. But for now I like the sound of this and it’s nice and quiet
http://offroadingsub…_test_drive.jpg
The beast out of the garage.. This is just after her first test drive 
http://offroadingsub…_conversion.jpg
The mess I left my brother garage in, I have to clean it up on Monday…
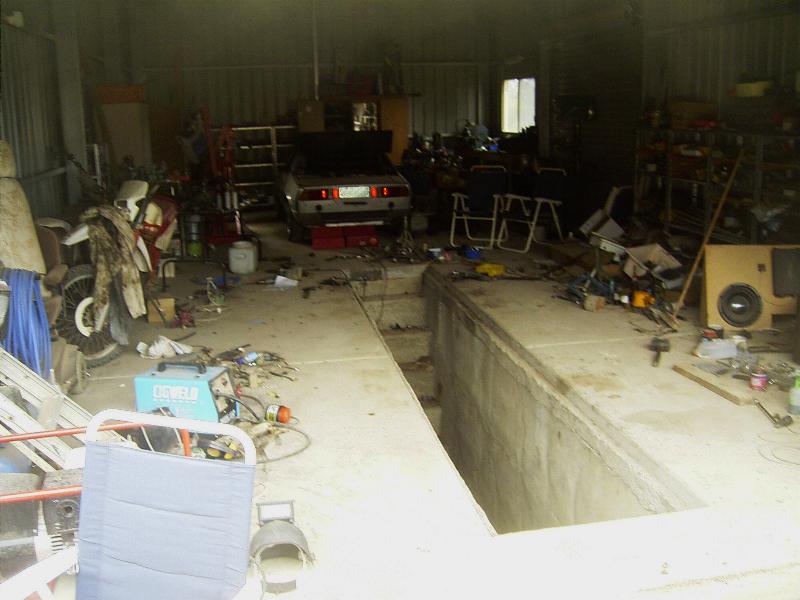
http://offroadingsub…r_placement.jpg
And my new pod filter. I plan on changing it’s position some day soon up into the spare wheel well. And I may add a snorkel.. But for now it will work. It sounds pretty awesome when it revs up with that on it
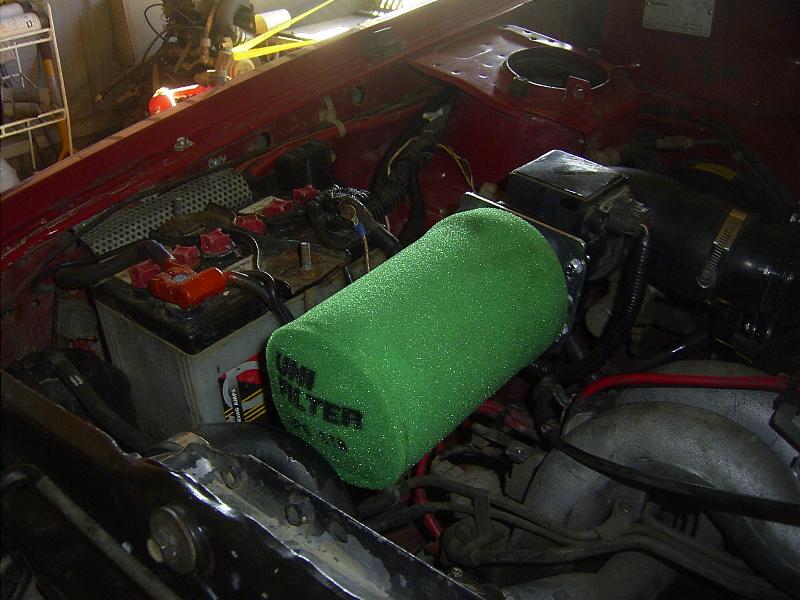
Numbchux said
other side of the CEL needs power. the ECU grounds it.
I had a feeling about that… I just assumed red was positive again.. That has got me in trouble 4 times now with the wiring.. haha.. I’ll go check that light out.
Posted 17 March 2007 – 02:45 AM
Ok, so I ran the codes off the ECU and came up with this…
22 Knock sensor craps out the fuel maps it says
24 Air Control Valve, that would explain the idle.
And 35, which is the purge solenoid, which I have unplugged as it doesn’t work. But the info I have says that won’t do anything to the running of the car.
So. Could I get some help fixing these? I have no idea where to start. I’m looking into it right now, but I’m at a friends house with limited tools. So we’ll see how it goes.
Posted 20 March 2007 – 06:58 PM
I have only been on a short test drive and I didn’t rev it up but the ECU does that constant flash thing at me (thats error free flashing right?) But without the black CEL connectors plugged in the CEL light is still on. This is confusing me now. I’m going to go back to my info I downloaded to learn what the green connectors do again… Isn’t it something like another set of codes?
Anyway, the idle is pretty steedy now and the low end power (800 to 1400rpm) is pretty good compared to my EA81.
Posted 27 March 2007 – 09:15 PM
Looked good for a while. Then on a long drive the car almost stooled when I came to a stop and then it started that fuel cut thing under lead foot driving. And now the light comes on and goes out randomly. Not for a second or two, but will come on, and then 5min later go out, then ages later come back on..What do you reckon I should check next? I’ll see if I can find another ECU cheap or borrow one to test if it’s that. It could be wiring I guess (crap, I would hate to pull the loom out
) seems it is a little intermittent.It’s getting on my nerves now. I don’t want to spend a thrid what the whole conversion has cost me on a new stupid IAC valve.
What about tricking the computer that it’s there and then plugging the hole up and using a good old fasion idle screw only?
Posted 30 March 2007 – 10:36 PM
Alright. Done some testing on the IAC…
First up, eliminate EJ loom main relay.
Instead of spending $40 on a second hand OEM Subaru relay, with running a risk of it not being wrong, I tested it with bypass wires.
http://offroadingsub…_testbypass.jpg
I took the car for a drive with the relay in and running it. Then when the CEL came on and the fuel cut at full throttle came in I turned the car off, took the relay out and put the wires in (just crimp connectors on large speaker wire.) I took off and soon after the CEL came back on and the fuel cut came in again.. Heres something I thought was interesting, the CEL goes out after a while (along with the fuel cut.) And then a while later of driving, it comes back on…
So, relay eliminated.
Next was to make sure the IAC always was getting 12V+.
So I hooked up a wire into stuffed the IAC’s plug. Then ran that with another wire to the inside of the car, along with a mulitmeter. Took the car for a drive, this time it took about 10mins before the CEL came on, but it still came on.. And when it was on, the IAC was getting a very constant 13.7X volts. So the IAC is getting good volts at all times.
http://offroadingsub…volttesting.jpg
Next I think I need to check the signal into the ECM when the light is out, and then when it comes back on see what it reads. My manual says the two wires for the IAC are in B44, number 1 and 2. I have no idea how I’m going to check these while I’m driving and while the CEL is on, maybe wait till tonight when my brother can help. It’s just annoying how it comes and goes randomly now..
I think the volts going from the IAC to the ECU should be between 6 and 10 volts depending on if it’s closed or open.
Another interesting fact is the car idles fine now, even though the CEL is coming on every so offen. And, yes, the ECU has code 24 still stored in it. I was trying to wipe the codes but I forgot I left the IAC unpluged so it kept coming up with code 24 right away. Silly me.
Posted 01 April 2007 – 07:04 PM
the_postie said
to test the connecter at the ecu use sewing pins pressed into the wires you want to test ,connect wire to these and alligater clips.
Didn’t think about that… Cheers,
Posted 12 April 2007 – 09:57 PM
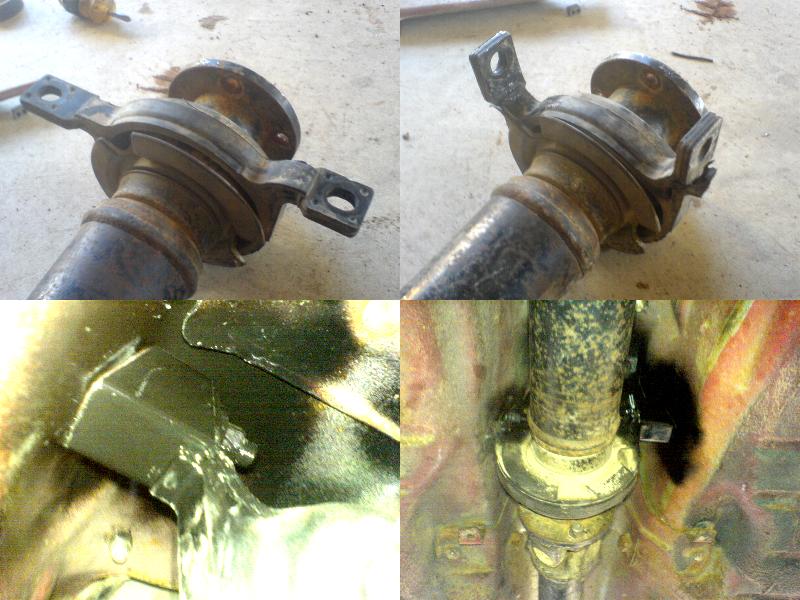
Some more updates:
My propshaft (tailshaft, some may know it as) was on it’s way out when I put it in the car (5sp conversion needed a 2 piece prop.) So it was squeeking away at me.. Then it stopped one day, and then started to vibrate. Then it shuddered mostly on deceleration. Then it was just shuddering everywhere.. So I thought I’d grab a ‘new’ one from the wreckers. When I took mine out, it looked like this.
http://offroadingsub…ft_grenade1.jpg
http://offroadingsub…ft_grenade2.jpg
It has about 5mm movment in that hole.. I’m amazed it was still working like that…
I had some fuel pump issues as well. The hose I used for the inlet side of the pump wasn’t fuel hose and it was leaking, along with the gas fittings (I used silicon instead of thread tape and that fix it.) And after I replaced the hose the pump was making an horrid sound. I thought it was the pipe being kinked and had killed the pump, but after my brother pulled it off for me (I couldn’t because I had a cyst removed from my ear so I couldn’t look around very well or get under the car) we found it was just a silicone ring that must of been inside the tank that got to the pump… This is after I bought two more pumps from the wreckers cos I thought I’d need to replace it.. So now I have 2 spare pumps and all up the three have only cost me $60, so thats pretty sweet, I should be set for a little while now, and I can keep a spare in the car all the time.
Oh, and heres the new pump mount setup…
http://offroadingsub…fuel_lines7.jpg
The radiator I finally got modded to fit better, no more rubbing hoses.
Not much to say, since I got it done at a shop.. But the pictures tell you everything you need to know.
http://offroadingsub…ied_tophose.jpg
http://offroadingsub…_bottomhose.jpg
http://offroadingsub…or_modified.jpg
Stupid me forgot to (after telling myself at least 6 times to) take photo’s of the original radiator and crazy thermostat housings that I bolted together to get the pipe to fit the EA81 radiator to EJ engine… It was a mess and it also rubbed the pod filter and the timing belt cover.. But this new setup worked good.. And the pipes are just cut from one pipe to fit a Bits-r-missin.
Thats about it.. Still having problems with the IAC, but I think another good clean might fix that up.. We’ll see..
I’m going offroadin with a bunch of friends next week so I’ll have plenty of photo’s for you forumers then. Till then, enjoy yourselves. I know I will
Posted 13 April 2007 – 10:55 PM
http://offroadingsub…bay_14-4-07.jpgCEL light wired in on the fan blower box. At night, when it comes on the foot well lights up green, but the light doesn’t bother me because it isn’t shinning in my eyes
http://offroadingsub…_wiring_cel.jpgGeneral picture of the interior on the beast as it is right now.
http://offroadingsub…ior_14-4-07.jpg
Subaru Liberty D/R cable lever, start button, diff lock switch, etc.
Close up of my start button.
http://offroadingsub…buttonstart.jpg
Posted 14 April 2007 – 07:26 AM
Numbchux said
cause I don’t think I’ll ever have a neutral start switch wired up to it. so it’ll always throw a code.
I didn’t wire mine up and it doesn’t give a code for it.. Maybe that’s something the auto ECU’s had? Is there even a difference aut ovs manual with the ECU?
I think I just have to clean my IAC again.. We’ll see. It’s not bothering me much anymore.
I figured out how to get it to throw the IAC code 24. This seems to work everytime. Head down a steep hill in 4th, put it into 3rd and the light comes on. Then to get rid of it, as I’m coming to a intersection and I put it in 2nd from 3rd and the light goes out.. Confusing the hell out of me.. I mean, what makes it do that?? Weird.
It still only shows code 24 when I read the ECU and the light goes on and off. I thought if it had a code in there the light would always be on, maybe I’m mistaken?
I reckon about 3 times that in research and part sourcing starting from May last year.Maybe I shouldn’t of logged it.. that is a lot of time.
Posted 21 April 2007 – 11:30 PM
Phizinza said
WARNING TO ALL BRAT CONVERTERS:
I’m very sure you will need a surge tank, I’m very sure you can’t do this mod and keep your 55litre tank without a surge tank. My brother alos warned me that if it’s getting that much air it might do damage so I have to go get fuel in the morning…
I’ve been driving a lot now and the surge tank doesn’t seem to be a need for my car. I ran it pretty low and have had no problems. My fuel starve problem was my IAC problem giving the ECU a safe mode setting where it cuts fuel at a particaular throttle position vs RPM.
Posted 27 April 2007 – 08:26 AM
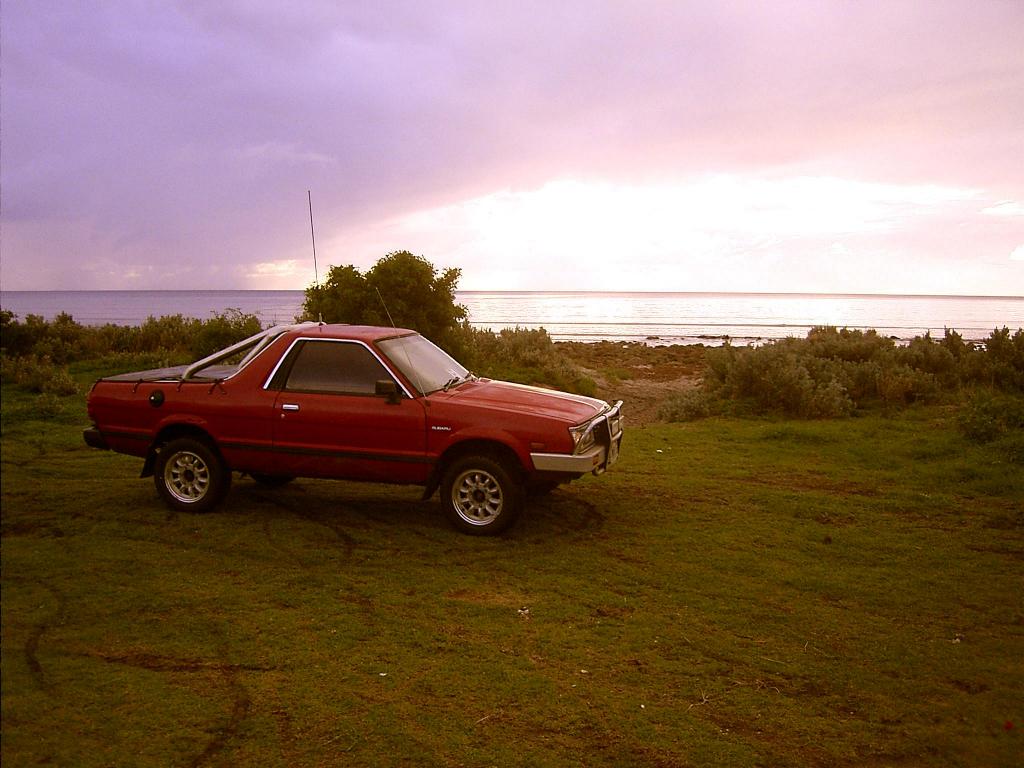
Just had to post these two pictures for no particular reason.
The first day I got her home. The first car I ever bought. The potential was high indeed.
And a little while back now, but the car looks basiclly the same.
Posted 05 May 2007 – 09:07 PM
Well…
I think I have the IAC figured now.
I replaced the ECU and it’s now only bringing up code 33. Which the other ECU didn’t have, which is weird. But hey, it drives better now. Still need to change the plugs and maybe wires.
And it still needs more power
![]()
I bought my first Subaru back in 2005, it was a 89 Brumby, flair red. I lifted it, fitted Kumho 27″ MT’s. After a while I swapped the dual carb EA81 it had with an EJ22 bolted on a custom gearbox which used EJ D/R casing, EA82 5sp low range and an RX centre locking diff. Once I sold the Brumby I got a 83 Leone. Converted it to 4WD, put the Kumho’s on it, added a 5sp and drove it like I stole it. I then upgraded to a 99 Outback. It was hail damaged so I repaired it myself. I fitted it out with some storage and a mattress. I now have a 87 Brumby that I’ve resprayed with two pack urethane in Waratah Red. I am planning to fit an EJ with PT gearbox and a little bit of lift. It’s another project in progress.
Phizinza – who has written 50 posts on Offroading Subarus.