
97 EJ25 DOHC Outback Head Gasket Repair
If you’re suffering from losing coolant or coolant mixed into the oil then most likely you have a leaking head gasket.
In this case the coolant loss was pretty minimal, about 5 litres over 800km. The car had been looked over by a mechanic and had all the hoses and clamps replaced. But it still was losing coolant. From what I could see it was losing a fair bit of coolant out of the overflow bottle. This indicated to me it was pushing it out of the radiator under pressure, a common symptom of a blown head gasket. Usually it can be easily diagnosed by taking the radiator cap off, starting the engine and watching for bubbles coming out the radiator. Those bubbles are the compression pushing out of the cylinder into the water jacket. In this case the leak was so small it would only show signs of bubbles once up to operating temperature.
It is possible to replace the head gaskets while the engine is in the car, but with the lack of room I find it easier to just pull the engine out and do the job.
Tools required:
- Engine crane
- 10, 12, 14, 17mm sockets and ratchet
- Philips and flat head screw drivers
- 6mm punch and hammer
- 10, 12, 14, 17mm spanners
- Adjustable spanner
- Torque wrench
- RTV silicone
- Box knife blade
- Solvent (metho or better yet acetone)
Parts required:
Full Head Gasket Set which must include
- Head gaskets
- Valve cover
- Inlet manifold
- Exhaust

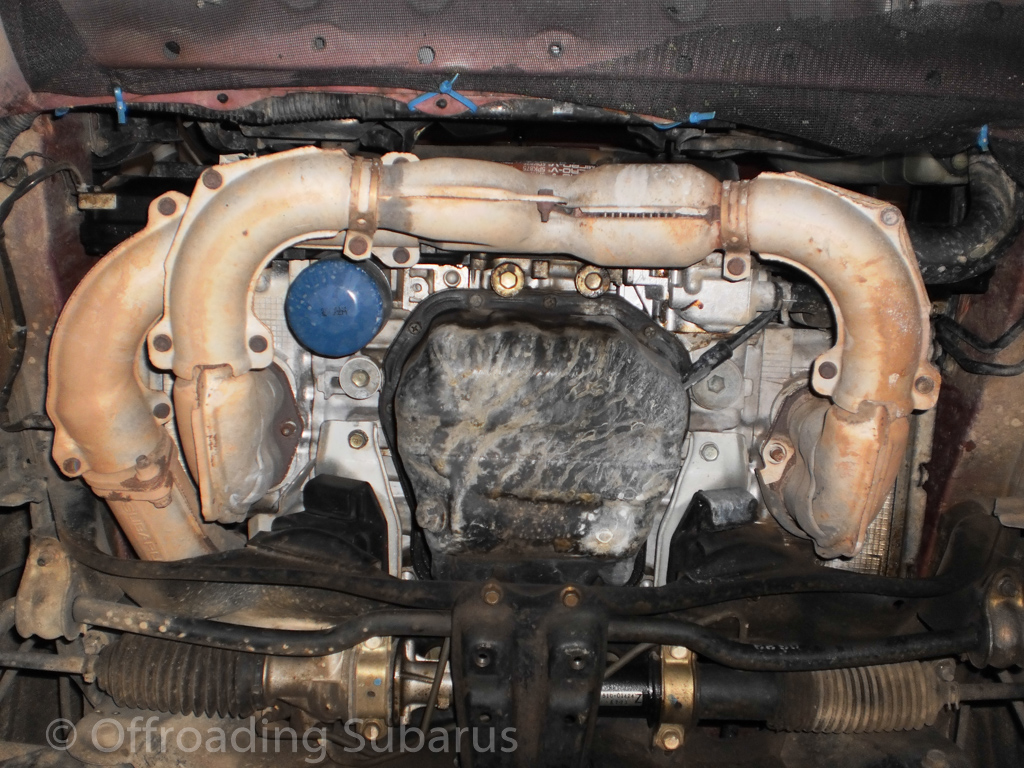
First up with removing the engine is the exhaust. All EJ’s have three exhaust studs on each head. This one has a turbo style equal length manifold so it had to be unbolted from the “up pipe” and removed from the car. The other type of manifold EJ’s have is the “y pipe” which goes under the engine crossmember on each side of the engine then joins below the diff. That type can just be unbolted from the head and hung down off the rest of the exhaust using the exhaust mount at the back of the gearbox to prevent bending anything.
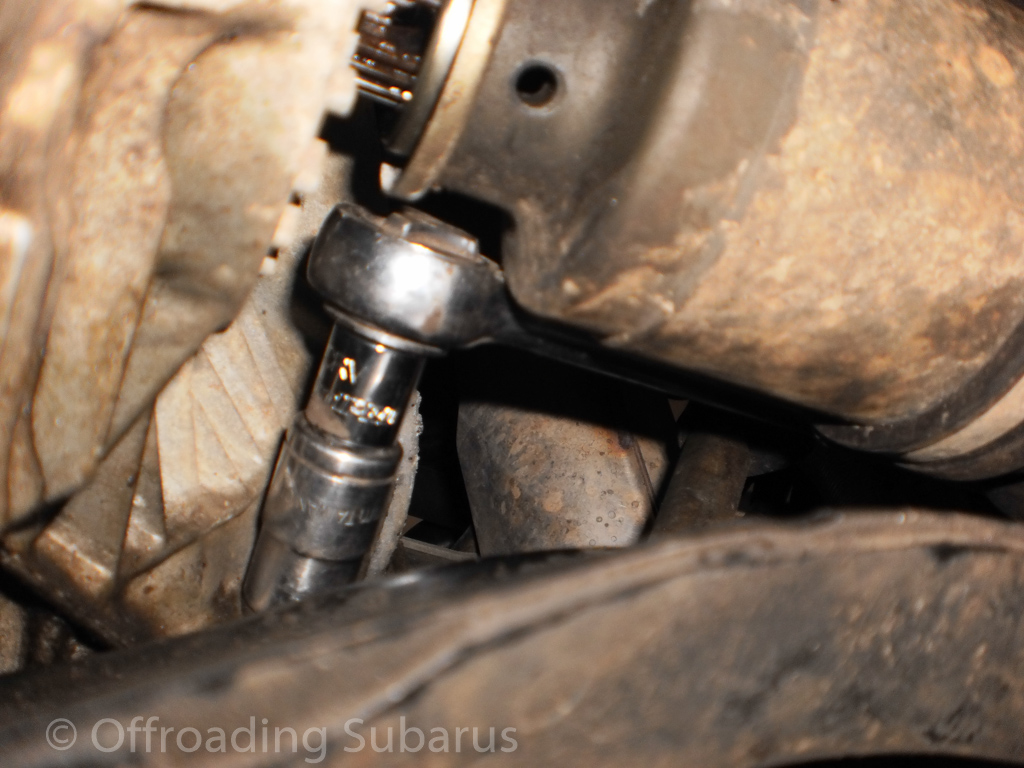
While under the car you’ll need to unbolt the bottom engine mounting nuts. Because of the exhausts “down pipe” you’ll need to punch out the right hand side CV shaft’s split pin and pull the shaft along the spline, it won’t come all the way off but just enough to get a socket on it. Also unbolt the engine mounts, there are two which bolt to the crossmember.
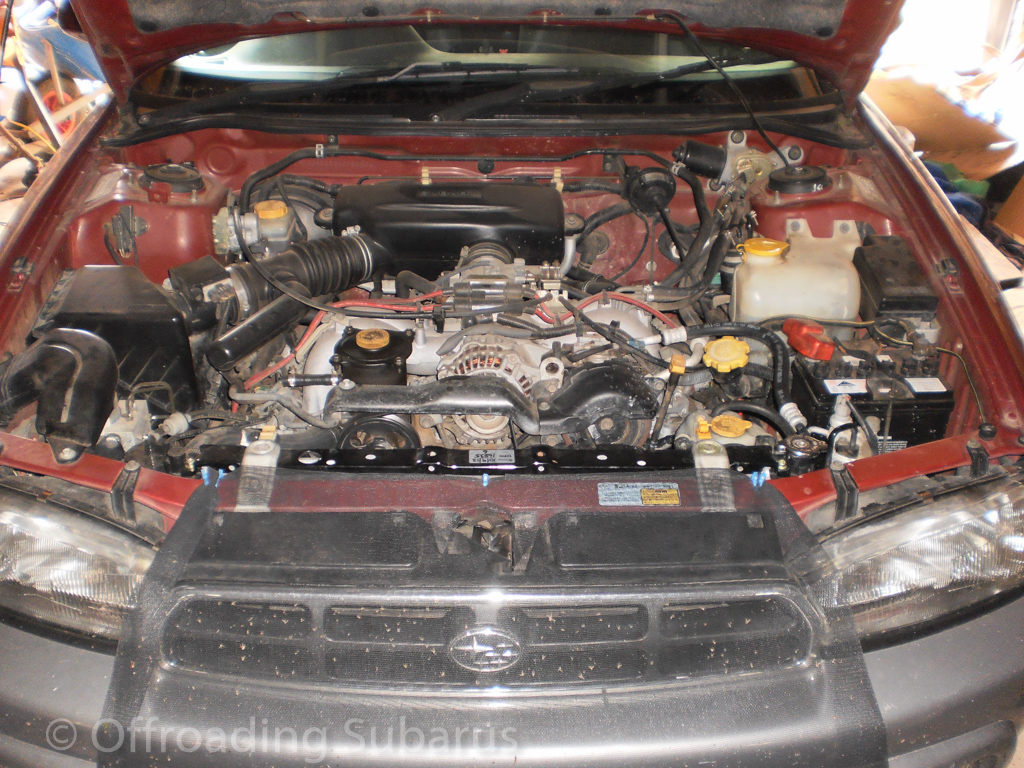
Up top the first thing to do is remove the airbox. There are two 10mm head bolts which hold the throttle body box down to the engine (gearbox in reality) and a hose clamp. The airbox is hold with two clips at the top and unhooks from the bottom. There should be two half inch crank case vent hoses plugged into the throttle body box as well as the PCV pipe which is around the 1 inch size, pull those off.

Pull the throttle and cruise control cables off. Loosen the nut on the throttle body side and unthread until it is loose on the cable, pull the plastic part of the cable until you can slip the cable out of the slot on the mount. Give yourself some slack and unthread the cable from the pulley and pull the knob out using the slot for the cable. Repeat for the other cable. Pull the fuel hoses off and take note as to which of the two larger ones go where. One is the fuel feed, the other is return. Getting these wrong will cause havoc to your engine.


Drain the radiator using the drain plug if you have one, otherwise use the bottom radiator hose disconnected at the thermostat hosing. Unplug the two fan connectors. Remove the overflow bottle, this is two 10mm head bolts at the top and slotted in at the bottom. If the car is an auto remove the trans cooler lines from behind the overflow bottle. Remove the radiator hoses. Now remove the top brackets holding the radiator in and pull the radiator out upwards. It is only held in the bottom via rubber pins.


Loosen the crank pulley bolt using a 22mm socket. With the engine out of the car loosening this can be difficult and require a special tool, I’ll touch on that later.
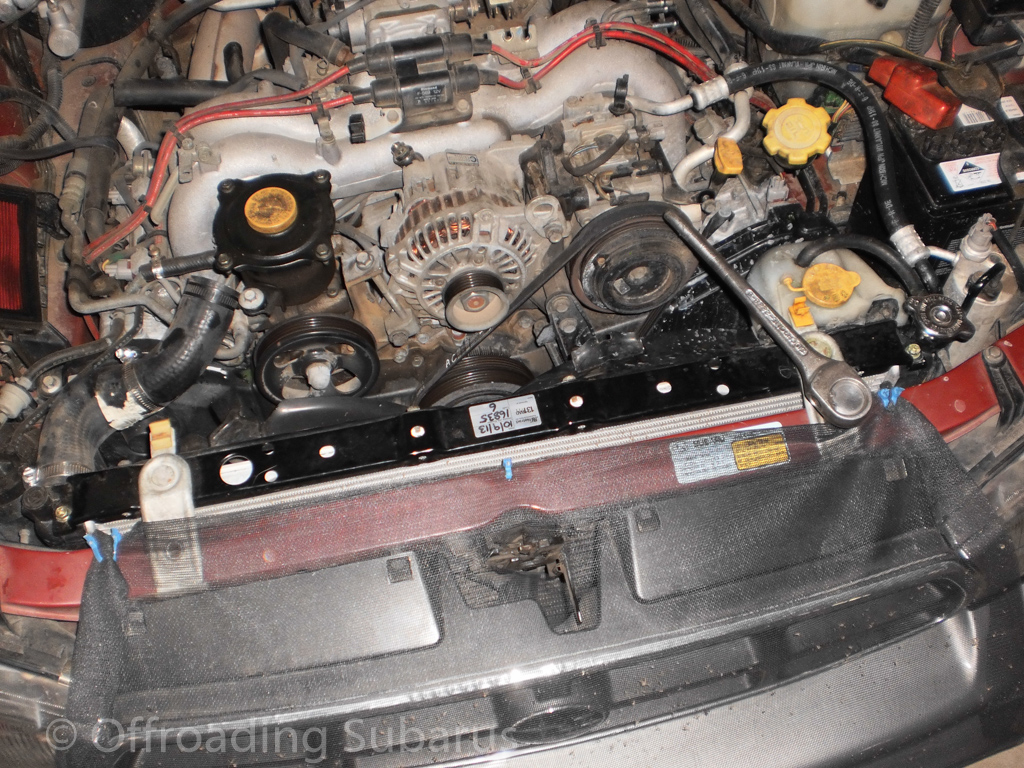
Unplug the alternator and AC wiring, unclip it and pull it back to the battery so it is clear of the engine for removal. The charge wire on the alternator is held on by a 10mm nut. Loosen the alternator mountings, the long bolt going through the AC mount and the short bolt through the tensioner. Loosen the belt using the long bolt going down in the power steering mount. Pull the belt off. Slide out the two bolts holding the alternator out and pull the alternator off the engine, this can take a bit of wriggling.


Unbolt the mounting bracket of the power steering, there is 4 bolts which hold it to the engine. Unbolt the power steering hose from the right hand side fuel rail and pull the pump up and out of the way (rest it on the top of the fender with a rag between).

Because the AC is held on with a bolt under the intake manifold you’ll be unable to remove the intake before the AC (this is not the case on all models, but for the EJ25d it is). The AC needs to come off the engine because we cannot remove the hoses as they are under pressure and you do not want to be letting R134a into the atmosphere then spend the $$$ for a re-gas. Unplug all of the sensors off the engine as the loom is connected to the intake manifold and will be removed with the manifold. Next to the battery is two large plugs that join the engine loom to the body loom. Instead of unclipping these from the metal mount it is easier to just unbolt the metal mount from the body, this is one 10mm bolt. On this model the other side of the engine has another plug for the loom, next to the airbox. Also disconnect the water hose below the throttle pulleys (note: you’ll see I’ve disconnected the other hose on the other side of the throttle body here, this is because on the later SOHC models this is the hose which joins to the water jacket manifold, how ever on this DOHC engine this hose simply goes to the IAC valve then there is another hose which goes to the water jacket manifold.) Unbolt the intake manifold, there are 4 bolts on each side holding it to the engine. Pull the manifold up to get access to the hose between the IAC valve and water jacket manifold.


Now we can unbolt the AC mount, this is again 4 bolts holding it ot the engine. Pull the AC up and out of the way just like the power steering. Attach the engine crane preferably using a balancer.


Hold the transmission up with a jack, this is so when you pull the engine off it doesn’t drop down. If your car is an auto you will need to unbolt the drive plate from the torque converter. Do this through the inspection hole (legacy hole for timing marks), there are 4 bolts with 12mm heads holding the two together. Remove the two top engine bolts holding it to the transmission. Take note here that newer EJ’s are 8 bolt not 4 bolt, this means they use two studs and 6 bolts to hold them to the transmission. The older EJ’s such as this one only use 2 studs and 2 bolts. One of these bolts is holding the starter motor in as well, but you do not need to remove the starter. Take EXTRA SPECIAL care when removing a the engine with an auto transmission. You want the torque converter to stay with the trans, if it pulls out even a little you will want to follow the steps at the bottom for reseating it VERY CAREFULLY! To pull the engine, lift it until its mounts are out of the crossmember, then slide it forward off the transmission. Before doing this I highly recommend you look around the entire engine to confirm everything is disconnected from between the engine and body.


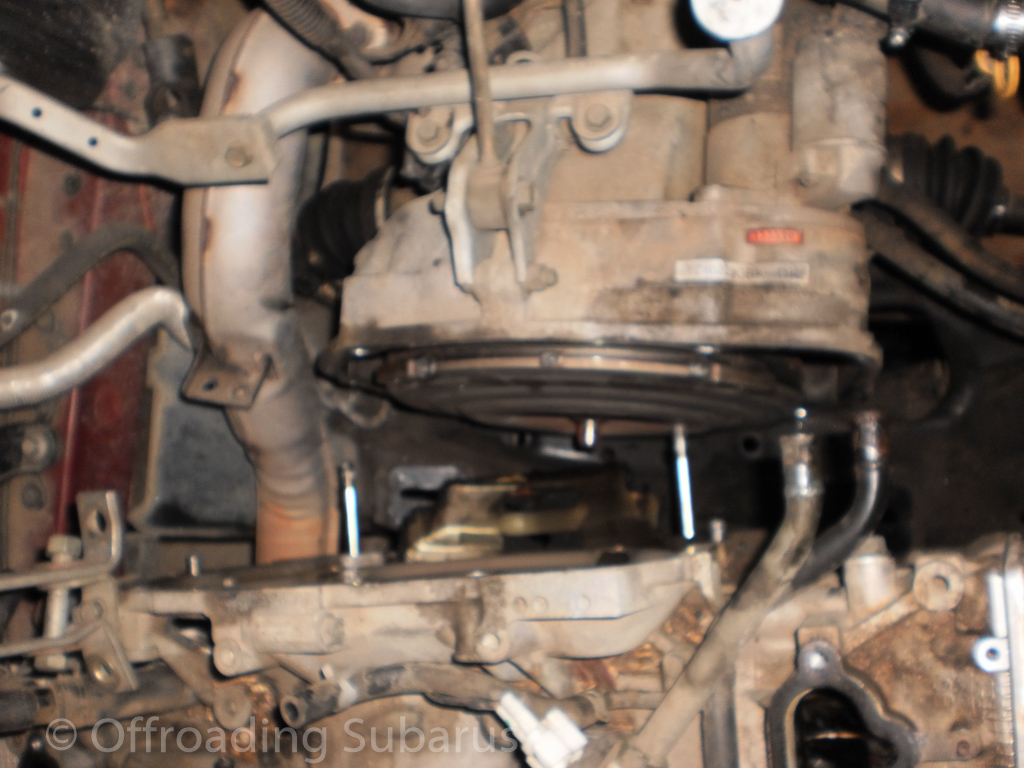
Pull the engine up and forward once it is off of the two bottom engine studs that goes into the transmission.
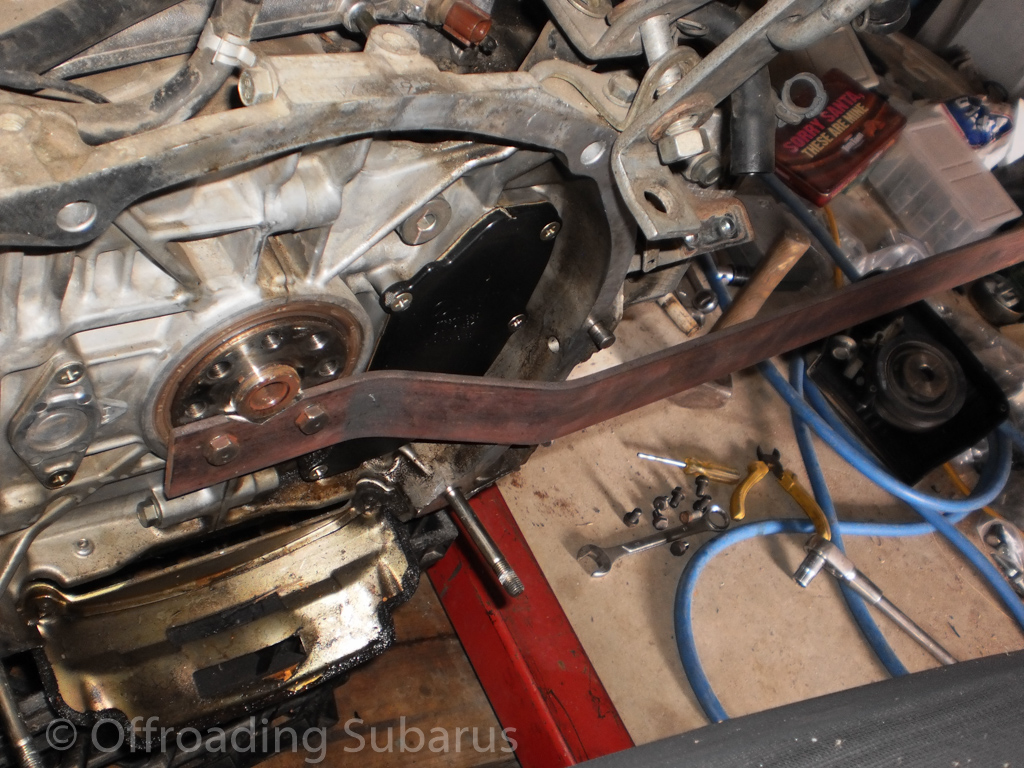
Remove the drive plate. Note, if you have a flywheel (manual transmission) you do not need to remove it. You only need to remove the drive plate because it is too easy to bend if using it as assistance in locking the engine up to remove crank and cam pulleys.
If you have forgotten to loosen the crank pully bolt you will need a special tool made up. It’s just a flat bar with two hole drilled to line up with the drive plate holes and a small cut taken out to clear the centre of the crank. Hold this lever while loosening the crank pulley.
Remove the timing covers by taking all the 10mm head bolts off. The front of the timing cover will come off in 3 or 2 parts depending on what model EJ you have.
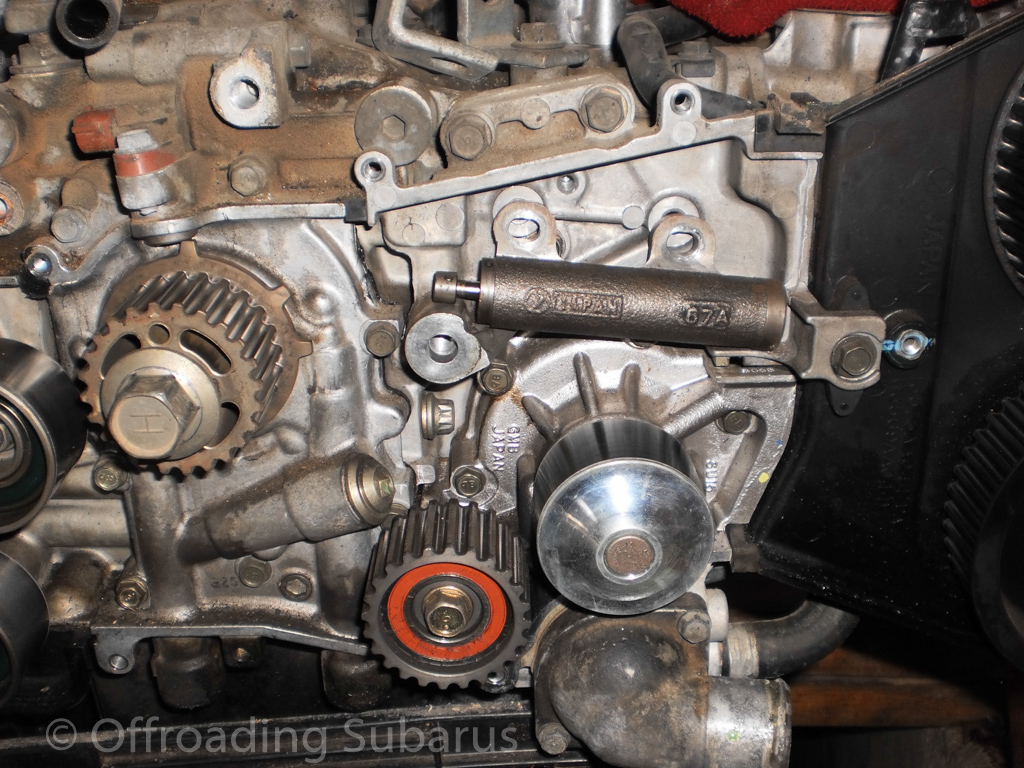
Once the front covers are off loosen the camshaft pulley bolts. Remove the tensioner plunger and tensioner pulley bearing. Remove the belt and camshaft pulleys. Now remove the rear timing covers with the remaining 10mm head bolts. Remove the dipstick at this stage.


Remove the valve cover using the 6 bolts shown in the first picture. Remove the cams by unbolting their bearing caps, two of these are internal, one is external to the valve cover. Remember to keep the cams and caps in order as you need to put these back in exactly the same way. On this model EJ the cams are directly over the valves meaning they use shims to adjust valve/cam clearance. These will fall out on their own so remove them all, including the valve top cups which secure the shims and keep them in exactly the right order for reinstall.
Under the cams you will find the 6 head bolts with 12 point heads. Use a 12 point 14mm socket and loosen these all, then remove. Some say you should keep these in order as they need to be placed in the same places they cam out. I don’t believe this so I just pull them out and clean them up. The head will now pull away from the block. You may need to pries it apart using a large flat head screw driver. Just don’t damage the mating surfaces.


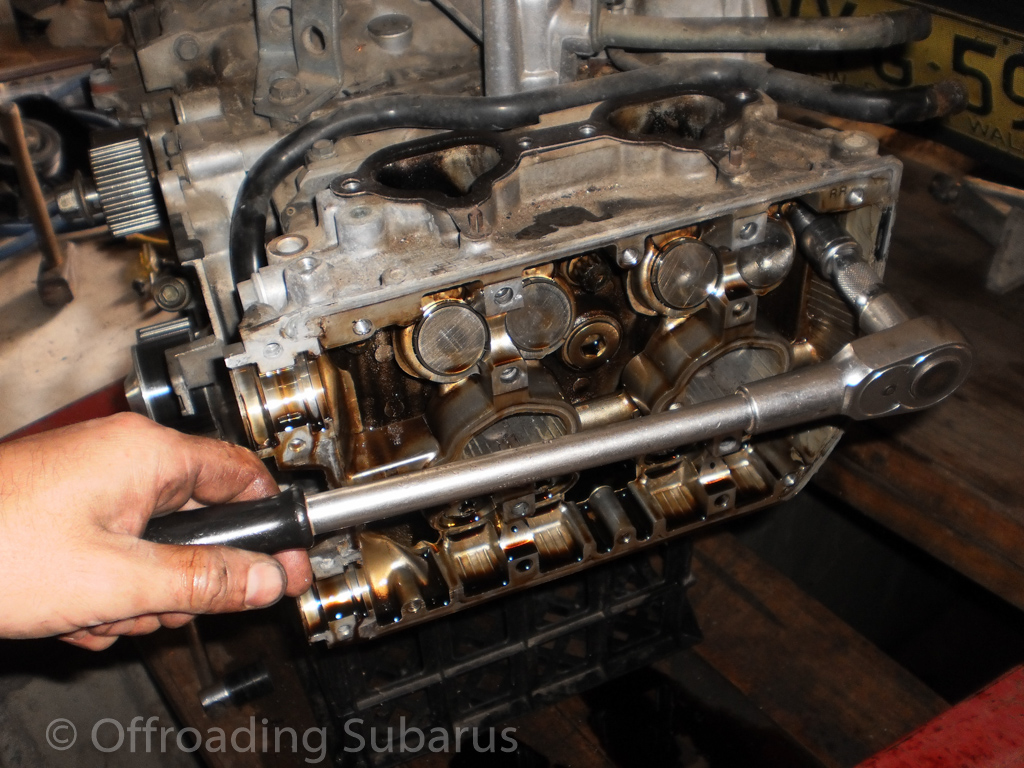

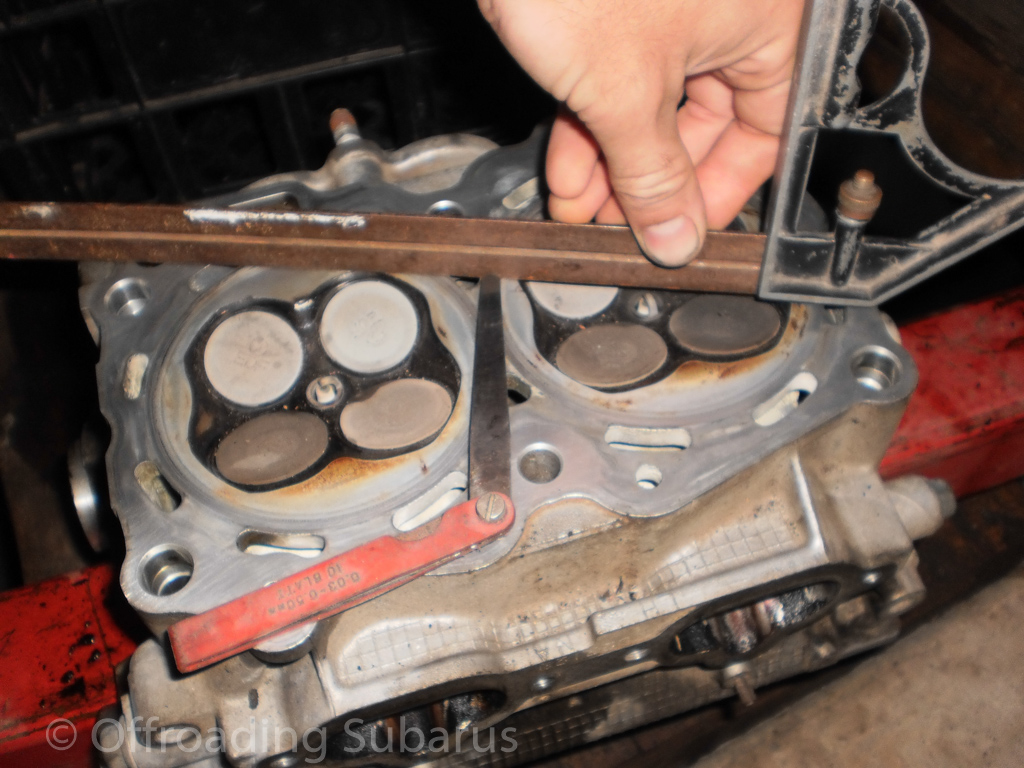
While you’re at the cylinders you may as well clean off the carbon build up, I use a box knife blade and scrap it clean. Clean the head and block mating surfaces using the same blade, careful not to scratch the surfaces, and wash with metho on a rag. Once clean check for and warping of the heads and block using feeler gauges and a straight edge. The heads have a warpage allowange of 0.05mm or less. If they are warped more than this you need to get them machined. The machining limit is 0.3mm over factory. Remember to check the warpage from all different positions on the head and block.
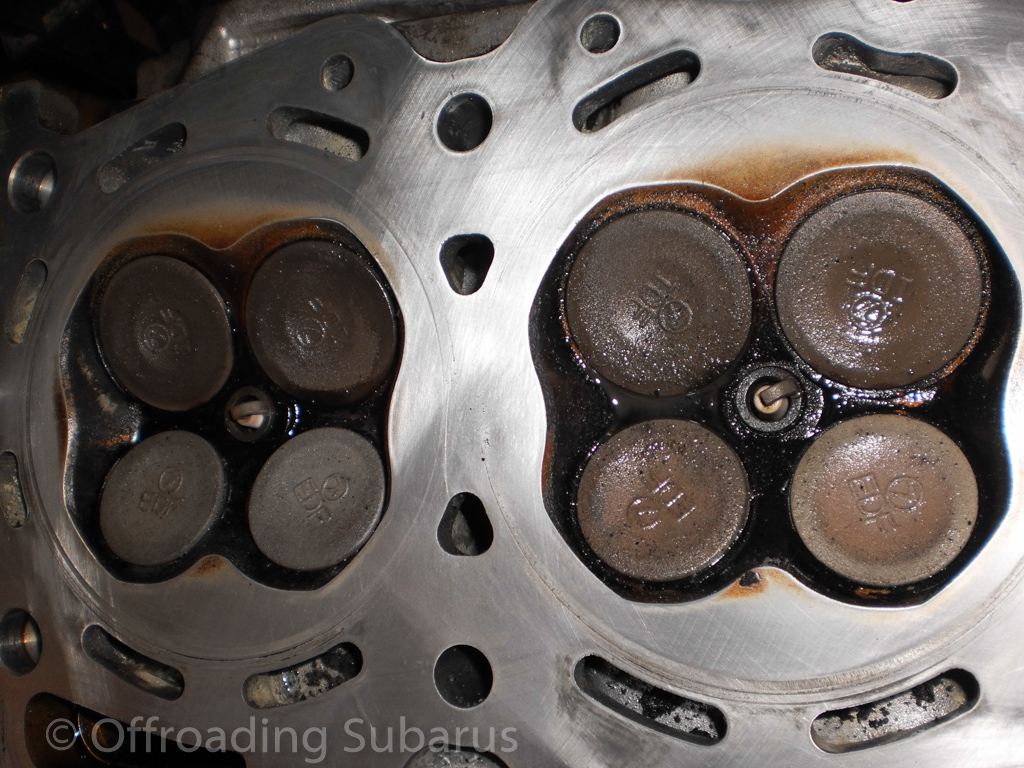
In the third picture you can see a mark which I believe was the tiny leak this car had. The final picture is of the area where the mark was cleaned up with some wet’n’dry 600 and 1000 grit. You may need to rub the marks out as they can actually be corrosion, but be careful not to exceed the 0.05mm limit.


Assembly of the head is very straight forward. Ensure head gasket surfaces are spotless and head bolts have been cleaned of corrosion. Place the new head gasket in place on the sleeves protruding from the block. Place the head onto these sleeves and stick all 6 head bolts in place. Tighten them to finger tight.
Using a torque wrench tighten the bolts to the following specifications and order (PLEASE NOTE: I take no responsibility for these specifications, if they cause damage. It is up to you to find the correct specifications for your model engine, this is just a guide to the specs I used)
While looking at the head the order is
3 1 6
5 2 4
First tighten in order all 6 bolts to 29nm,
Tighten in order all bolts to 69nm,
Back out all bolts 180 degrees in order,
Back out all bolts again by 180 degrees in order
Tighten all bolts to 45nm in order,
Tighten all bolts 90 degrees in order,
Tighten all bolts again by 90 degrees in order.
Reassemble the cams, ensuring not to forget the valve cups and shims.
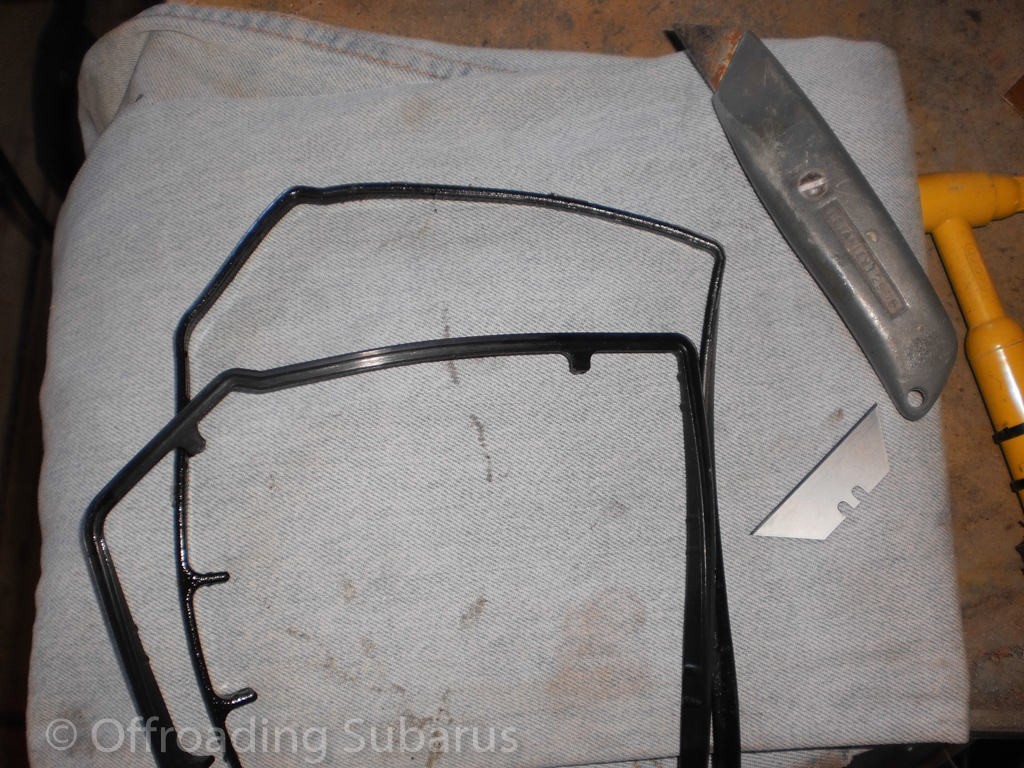
Clean valve covers of old sealant, oil and gaskets. Clean the heads surface for the valve cover gasket. Place RTV sealant on the 90 degree corners the rubber gasket takes. Place the rubber gasket in the valve cover groove along with any spark plug area gasket rings and assemble the cover to the head.


Once the heads are assembled on the block install the rear timing covers and cam pulleys. You can’t tighten these pulleys until the belt is assembled in place. Aligning the timing on this SOHC engine I found difficult and required several attempts.
Before proceeding use a press or vice to compress your tensioner plunger. Stick a small nail or similar through the hole to keep it captive. Bolt the tensioner in place but only to finger tight. Do the same with the tensioner pulley bearing. Temporarily tighten the crank pulley bolt into the crank and use it to turn the engine over.
Genitally turn the engine over (this may be easier with spark plugs removed) until the crank timing mark (not the small arrow but the small line on the back near the sensor) is pointing directly up. If during rotating the engine it stops solid do not force it, it may be valves colliding with the pistons.
Turn each cam so the lines point to the other cam on that head (or on SOHC engines point upwards to the mark on the aluminum). Again if they stop solid it is because the valves are colliding with the other cams valves. Just turn each cam until they both point to each other. They will be stiff as you’re compressing valve springs and in there timing area they will be in the mid point of compression and want to flick around to one way or the other. It can be tricking and patience is needed.
Note: Timing marks on the cams and crank are different to the top dead centre marks (arrows).
Once all the marks are aligned place the belt over the right head cams, around the crank, around the tensioner, around the left cams, around the idler and oil pump and finally around the last idler. It may be quiet tight and I found removing the last idler made it easier to put the belt in all the toothed pulleys, then install the last idler. Once the belt is on and all timing marks are still pointing at each other or the casing marks remove the nail on the tensioner and let it take up the tension. Now rotate the engine twice around making sure if doesn’t fowl on anything (valves, pistons). All the marks should line back up and also when turned to the arrows all the cams arrows should point up and the crank either directly up or down depending on which rotation you’re one (remember the cams turn half the speed of the crank). If all marks are still lining up tighten the tensioner and pulleys, tighten the cam bolts, install the timing covers and the crank pulley.


The installation of the engine is reverse of removal with exception to the following:
Ensure the hoses from block to manifold and manifold to manifold are all reinstalled and clamped.
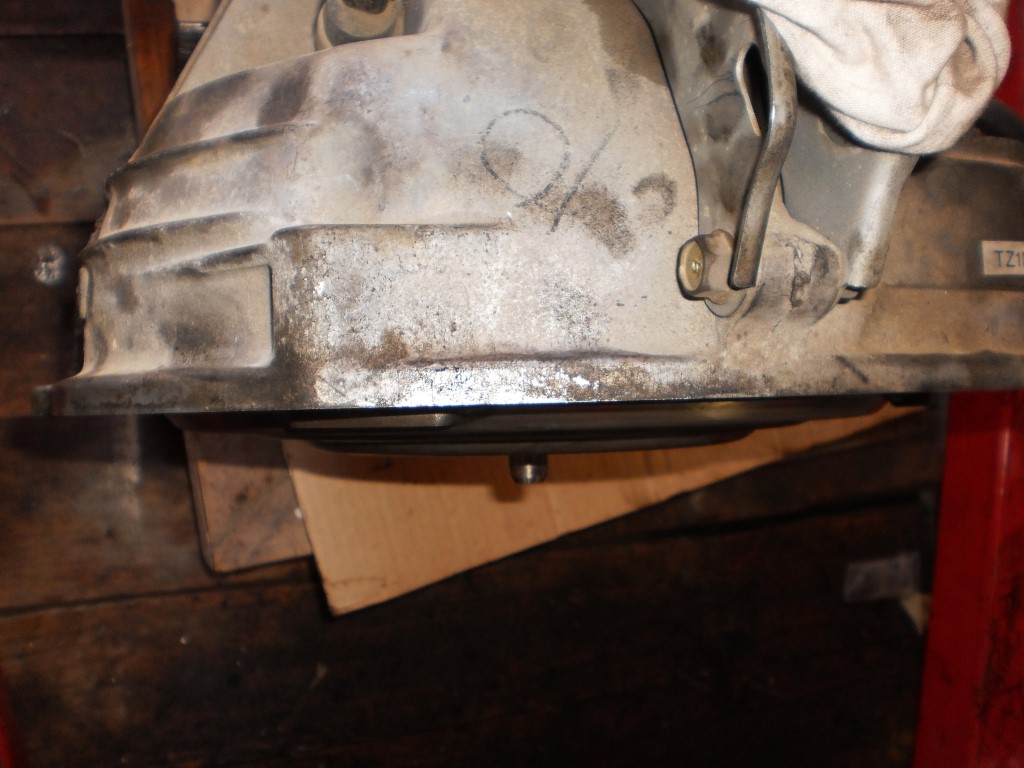
Before installing engine onto the auto transmission ensure it is seated in as shown here. If it is sticking out any more than this you will break the auto trans oil pump when installing the engine.
If the torque converter completely came out of the transmission then this is the process to install it. Slide it in, rotate while genitally pushing, you will feel it slide in a few millimetres. Continue to rotate and push until it slides in again. Once again rotate and push, it will then engage on the oil pump with another slide in by a couple of millimetres. If it isn’t going in at any stage of this try lifting it up and down genitally while pushing and rotating.
Don’t forget the CV shaft if you had to pull it off.
Always do a triple check on bolts, nuts, connections, clamps, oil, coolant, etc before starting the car.
Any questions, or if you feel I have missed anything, please leave a comment or contact me!
![]()
I bought my first Subaru back in 2005, it was a 89 Brumby, flair red. I lifted it, fitted Kumho 27″ MT’s. After a while I swapped the dual carb EA81 it had with an EJ22 bolted on a custom gearbox which used EJ D/R casing, EA82 5sp low range and an RX centre locking diff. Once I sold the Brumby I got a 83 Leone. Converted it to 4WD, put the Kumho’s on it, added a 5sp and drove it like I stole it. I then upgraded to a 99 Outback. It was hail damaged so I repaired it myself. I fitted it out with some storage and a mattress. I now have a 87 Brumby that I’ve resprayed with two pack urethane in Waratah Red. I am planning to fit an EJ with PT gearbox and a little bit of lift. It’s another project in progress.
Phizinza – who has written 50 posts on Offroading Subarus.